What is a Good 2GIG GC3 Compatible Deadbolt Lock?
There are several good Z-Wave deadbolt door locks that are compatible with the 2GIG GC3. After successfully programming a Z-Wave door lock, you will be able to unlock it using an valid user code for the panel. You will need to know the installer code for your GC3 panel to program the lock.

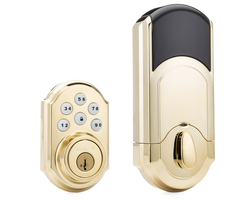
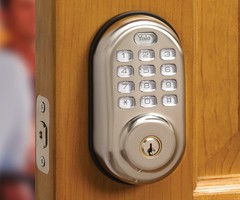
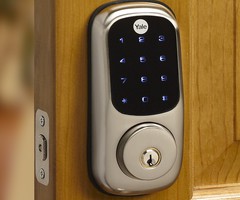
Some of the best Z-Wave deadbolt door locks for the 2GIG GC3 include:
You can program a Z-Wave door lock to your 2GIG GC3 by completing the following steps:
1. Bring the lock to the GC3. It is necessary to have the door lock in close proximity to the GC3 when it is being learned-in. Bring the door lock to the GC3 panel before attempting to enroll it.
2. Clear the lock. When programming a Z-Wave device, you should always clear it from the network before attempting to enroll it. Many Z-Wave devices are enrolled with another system before they even leave the factory as part of quality assurance, and a Z-Wave device must cleared from an existing network before it can be learned to a new one.
From the home screen of the GC3, go to System Settings > enter installer code (the default is 1561) > Smart Home Settings > Remove Devices. The GC3 will begin listening for Z-Wave devices to clear.
You should now initiate the inclusion function on the lock itself. Some locks have a special button for this purpose, while others will require you to enter in a specific code. Refer to the instruction manual for your lock for more information on how to activate its inclusion function. Once the inclusion button has been activated, the GC3 will indicate that a foreign node has been removed. Press the back arrow on the left side of the screen to continue.
3. Enroll the lock. Select "Add Devices". The GC3 will begin looking for Z-Wave devices to add to its network. Initiate the inclusion function on your Z-Wave lock, just like you did in the previous step. If successful, the door lock will be recognized by the GC3 panel. Click "OK", and you will be taken back to the Smart Home Settings screen. At this point, you can edit and save the name of the lock. Once finished, press the back arrow until you return to the home screen. In order for all user information to be shared between the panel and the lock, the two devices should remain in close proximity for several minutes.
4. Install the lock. At this point, you can install the lock into its permanent location. The exact process for installation varies between different locks. Consult the instruction manual for the correct installation instructions.
5. Run a network rediscovery. On the Smart Home Settings screen, select "Rediscover Network", and then click on "Start" in the bottom right corner of the screen. The process will be completed automatically. This will establish an effective mesh network for your Z-Wave devices. Once complete, press the back arrow on the left side of the panel until you return to the home screen.
6. Test the lock. From the home screen of the GC3, click on "Smart Home Controls" in the bottom left corner of the screen. Then choose "Locks". The newly-installed lock should be listed on the screen. If the lock was programmed and installed correctly, you should be able to lock and unlock the door from this screen.
Did you find this answer useful?
We offer alarm monitoring as low as $10 / month
Click Here to Learn MoreRelated Products

Related Categories
- Answered