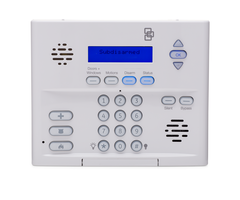
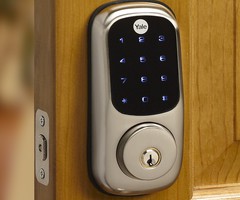
Which Locks Work w/ an Interlogix Simon XT?
Any Z-Wave lock will work with an Interlogix Simon XT. However, a Z-Wave controller must also be added to the system before this is possible. The Z-Wave controller comes integrated with a cellular module. This module will provide both cellular communication and access to Alarm.com services.
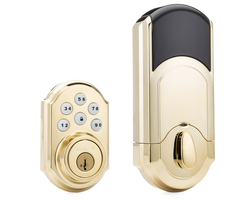
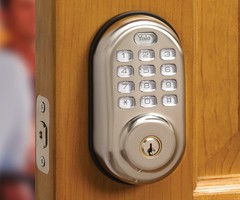
Once the Z-Wave lock has been installed and programmed with the system, it can be unlocked by entering any valid system code into its keypad. The lock can also be controlled from Alarm.com or using an Interlogix Two-Way Talking Touch Screen. By using the Alarm.com Mobile App, a user can operate their Z-Wave lock from virtually anywhere. This is great for situations where you need to let somebody inside while you are away.
Follow these steps to add a Z-Wave lock to an Interlogix Simon XT System:
1. Access programming. Starting from the main screen of the Simon XT, use the up and down arrows to locate the option called "System Programming". When you find this option, press the "OK" button. Then enter the system Installer Code. By default, this code is set to 4321. Once you have entered the valid Installer Code, press the "OK" button. You will then enter system programming.
2. Exclude the Device. Alarm Grid always recommends, prior to inclusion, that you exclude the Z-Wave device. Devices are often included as part of Quality Assurance, and may still contain old network information. This will prevent them from being successfully included into your network, and can be frustrating.
Once in "System Programming" press the up arrow once to reach "Interactive Services", and then press the "OK" button. Press the down arrow once to reach "Z-Wave Setup", and then press the "OK" button. Press the down arrow twice to reach "Remove Z-Wave Device" and then press the "OK" button. The screen will read "Press button on device to remove...". This indicates the system is in its exclusion mode. Follow the instructions on the Z-Wave Lock to exclude it from the network. The Simon XT should display "Device # Removed."
3. Activate inclusion mode. Press "Status" to return to "Z-Wave Setup", and then press the "OK" button. Press the down arrow once to reach "Add Z-Wave Device". Then press the "OK" button. The panel will enter its inclusion mode, and the screen will read "Press button on device to add...".
4. Add the device. With the panel in its inclusion mode, activate the inclusion function on the Z-Wave lock. Some locks have an inclusion button on the back, while other locks require that a specific inclusion code be entered into its keypad. Check the instruction manual for the lock to learn how to activate its inclusion function. After the Z-Wave lock has been added, the Simon XT System will provide a device number for the lock.
5. Test the lock. Keep pressing the "Status" button on the Simon XT until you are returned to the main screen. This will exit programming and ensure that any changes were saved. You can then test the lock using Alarm.com or an Interlogix Two-Way Talking Touch Screen Keypad. Make sure that you are able to lock and unlock the device as needed.
Did you find this answer useful?
We offer alarm monitoring as low as $10 / month
Click Here to Learn MoreRelated Products

Related Categories
- Answered