How Do I Create a Scene Locally Using the Honeywell Home Tuxedo?
You can create a scene locally using the Honeywell Home Tuxedo by choosing Devices > Scene > + Add (with Local highlighted blue), and then setting an optional Condition, a Trigger, and one or more Actions, and then pressing the Checkmark in the bottom-right corner to save the local scene.

A scene tells one or more Actions to occur automatically when a specific event, called a Trigger, occurs. You can also set the scene so it only occurs if a Condition is in effect. However, setting a Condition is optional. You can create up to ten (10) local scenes at the Honeywell Home Tuxedo. This is in addition to twenty (20) remote scenes that can be set up using Total Connect 2.0 as your remote interactive service platform.
There are three (3) parts to a scene. These are the Trigger, the Action(s), and the Condition. The Trigger is the event that causes the scene to occur. The Action is what happens automatically when the scene occurs, and you can have more than one in a single scene. The Condition is optional, and it restricts the scene to only occur if a certain specified situation is in effect (e.g. a certain day of the week, a certain time of day, the system being in a certain arming state, etc.)
- TRIGGER - What causes the scene to occur.
- ACTION - What happens automatically when the scene occurs.
- CONDITION - A restriction that tells the scene to only occur if this is in effect.
Another way to think about it is like this:
If [TRIGGER] occurs, then [ACTIONS] result, but only if [CONDITION] is met.
For this FAQ, we will assume that any automation devices being included in the scene are already enrolled with the Tuxedo. We will also assume that there is at least one (1) local scene slot available for creating the new scene. Complete the following steps to create a local scene for a Honeywell Home Tuxedo Keypad:
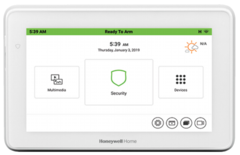
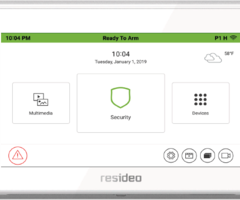
1. Add new local scene. Start from the main screen of the Honeywell Home Tuxedo. Click Devices. Then click the Scene button at the bottom of the screen. This is the button with the wrench and screwdriver near the center. On the left-hand side of the screen, check and make sure the option for Local is highlighted blue. Press the + Add button in the bottom-right corner. This will add a new local scene that you can begin editing.

2. Set an optional Condition. A Condition tells the scene to only occur if a certain situation is in effect. For example, if you only want the scene to occur on a certain day of the week (e.g. on Mondays & Wednesdays or only on Friday, etc.) or only if the system is in a certain arming state (e.g. Away, Stay, Disarmed, etc.), then you would set a Condition. Available Condition types include Time, Security, Thermostat, Door, Garage Door, and Water Valve. Setting a Condition is optional, and you can only set one (1) condition per scene.
To set a Condition, click the [+] icon in the Condition field on the left. Set the Condition type on the left-hand side. Then configure the Condition by highlighting the options you want to apply. The available options will depend upon the Condition type that you selected. For example, if you choose Time, then you will be able to set things like day of the week or time of the day to serve as the Condition. Once you have the Condition configured how you would like, press the Checkmark in the bottom-right corner. Remember, setting a Condition is optional, and not required in order to build a scene.
3. Set the Trigger. The Trigger is the event that causes the scene to occur. If the Trigger occurs, then the scene will run, and the Action will follow, provided that the Condition is in effect. Some examples of possible Triggers could be putting the system into a certain arming state (e.g. Away, Stay, Disarmed) or activating an automation device. Available Trigger types include Security, Thermostat, Door, Garage Door, and Water Valve. You can only have one Trigger per scene.
To set the Trigger, click the pencil icon in the Trigger field in the middle. Set the Trigger type on the left-hand side. Then configure the Trigger by highlighting the options that you want to apply. The available options will depend upon the Trigger type that you selected. For example, if you chose Security, then you will be able to set the activation of a certain system or partition arming state to serve as the Trigger for the scene. Once you have the Trigger configured how you would like, press the Checkmark in the bottom-right corner. Setting a Trigger is required for building a scene.
4. Set the Action(s). The Action is the resulting event that occurs when the scene takes place. It is the Action that you want to transpire automatically as a result of the Trigger occurring if the Condition is met. Some examples of possible Actions could be having the Z-Wave lock for your front door LOCK automatically, or having your hallway light turn ON automatically, or having your water valve SHUT OFF. Available Action types include Security, Light, Thermostat, Door, Garage Door, and Water Valve. Please note that it is possible to set multiple Actions in a single scene. You are required to have at least one (1) Action in every scene.
To set an Action, click the [+] icon in the Actions field on the right. Set the Action type on the left-hand side. Then configure the Action by highlighting the options that you want to apply. The available options will depend upon the Action type that you selected. For example, if you chose Door, then you will need to choose which smart lock you want to work with and which mode it should be set to (e.g. UNLOCKS, LOCKS). Once you have the Action configured to your liking, press the Checkmark in the bottom-right corner. You must set at least one (1) Action for each scene. If you would like to set additional actions, press the [+] icon in the Actions field on the right and repeat the above process. Continue until you set all the desired Actions for this scene.
5. Finish and save. After setting a Condition (optional), a Trigger (required), and at least one Action (required). You can now finish the process. Set the SCENE NAME to something that will help you remember the scene (e.g. Bedtime, Movie Night, Water Leak). Review the Condition, Trigger, and Action(s), and make sure they are all correct. Once everything is set properly, press the Checkmark in the bottom-right corner to save your scene. Then at the Z-Wave Device Management screen, make sure that your new scene is set to ENABLED, otherwise it will not run if the Trigger occurs and the Condition, if any, is met. You can also choose to manually run the scene if you want to see what happens when it occurs, without waiting for the Trigger. Press the picture of the house in the upper-right corner to return to the home screen.
Did you find this answer useful?
We offer alarm monitoring as low as $10 / month
Click Here to Learn MoreRelated Products


Related Categories
- Answered
