How Do I Get My ADC-V523 Added to a Network Using AP Mode?
You can get your ADC-V523 added to a network using AP Mode by powering on the camera, waiting for its LED to flash white, connecting to the camera's Access Point using a WIFI-connected device, scanning for networks, choosing one to connect with, and providing the network password to connect.

Access Point (AP) Mode pairing is a more secure method to get a WIFI camera online compared to using WPS pairing. Many users opt for WPS pairing, but WPS is no longer considered as secure as it once was. AP Mode pairing is the better alternative. Completing this process will get the camera online so that it can be paired with Alarm.com. Account pairing can be done using either the website or the mobile app.
If your WIFI router does not support WPS pairing, you have WPS disabled for security purposes, or if you simply prefer to pair through AP Mode, complete the following steps.
1. Power the camera. You can power on the ADC-V523 by connecting its plug-in transformer. You should connect the transformer to the camera using the barrel connector, and then plug-in the transformer to a working outlet. You will know that the camera has powered on because its LED will begin flashing.
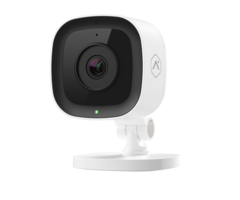
2. Activate camera AP Mode. AP Mode for the ADC-V523 is active when the camera's front LED begins flashing white. The camera may do this on its own shortly after powering on. If not, press and hold the camera's Reset Button until the LED begins flashing white, and then release the button. The diagram below shows the location of the Reset Button, circled in green. Note the Reset Button is located under the rubberized Micro SD card slot cover.

3. Connect to the AP. You must now connect to the Access Point. On a WIFI-connected device, such as a computer, tablet, or smartphone, go to settings and open up the list of available WIFI networks. You should see one named ADC-V523 (XX:XX:XX), where the X's represent the last six (6) characters of the camera's unique MAC Address. Connect to the network. A browser should automatically open upon doing this. If not, then open a web browser, and enter 192.168.1.1. You will have connected to the camera's Access Point (AP).

4. Connect camera to network. Press the black Scan button to begin searching for available networks. A list of WIFI networks should be displayed. Click the network that you want to use. The SSID for the network should automatically appear in the corresponding field on the left. Next, enter the Password for the network in the field indicated. Click submit once the information has been entered.

Now check the LED on the ADC-V523. The light should turn red, then begin blinking green, and lastly turn solid green. A solid green LED light means that the camera has been successfully connected. You can now proceed to pair the camera using the Alarm.com web site or mobile app.
Did you find this answer useful?
We offer alarm monitoring as low as $10 / month
Click Here to Learn MoreRelated Products
- Answered