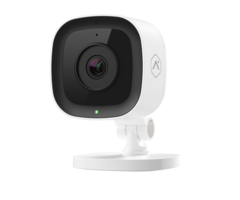
How Do I Get My ADC-V523 Added to My Alarm.com Account Via the Website?
You can get your ADC-V523 added to your Alarm.com account via the website by first getting your camera online and then logging into your Alarm.com account through a web browser and providing the MAC address for the camera. Once paired, you can view the security camera's live video feed.

For this FAQ, we are assuming that your Alarm.com account includes video services. If you do not have this feature added, or if you do not have an Alarm.com account, contact your monitoring provider, and ask them how you can gain access. If you need to perform this process via the mobile app instead of through the website, check out this FAQ instead. Complete the following steps to pair your ADC-V523 with your Alarm.com account via a browser:
1. Connect camera to network. You should start by getting the ADC-V523 online. This FAQ shows WPS pairing, while this FAQ shows AP Mode pairing. WPS is easier and more popular, but AP Mode is safer and more secure. Regardless of which method is used to connect, the LED light on the camera will be solid green once it has been connected to the network.
2. Access your ADC account. Open a web browser so that you can access the Alarm.com website. Then log in to your account. You will need your username and password to do this. If your account has two-factor authentication (2FA) enabled, then complete that additional process to verify your identity and gain access to your account. If you are having trouble, then contact your monitoring provider for further assistance.
3. Choose ADD Video Device. Upon logging into Alarm.com, you should select Video on the left-hand side. Select Settings on the top bar. Then choose Add Video Device. You will access a menu where you can pair the camera.


4. Complete the pairing process. Your ADC-V523 Camera should appear on the screen with both its MAC Address and local IP address displayed. You can give your camera a name by entering it into the corresponding field. We have named the camera "ALARM GRID" in our example. If you see the message "Needs Upgrade", then click the blue "Upgrade & Install" button to begin applying the upgrade and installing the camera. If no upgrade is needed, then just press the blue "Install" button instead. A firmware update may require upwards of thirty (30) minutes to complete in some cases. If you find that the camera is not automatically showing up, try pressing the grey "Refresh Devices" button.

Alternatively, if you are having trouble getting the camera to appear, then you can instead manually enter the camera's 12-character MAC Address into the corresponding field and then press the grey "Find" button.
 Upon adding the camera, you can then press the blue "Live View" button to view the camera's live video feed. This will help you to verify that the camera is connected and working.

Did you find this answer useful?
We offer alarm monitoring as low as $10 / month
Click Here to Learn MoreRelated Products
- Answered