How Do I Get My ADC-VDB770 Added to a Network Using AP Mode?
You can get your ADC-VDB770 added to a network using AP Mode by pressing and holding the device's doorbell button until its main LED begins flashing white, and then using a web browser to connect with the camera's Access Point (AP) so that you can connect it to a nearby wireless network.
In addition to AP Mode Pairing, the ADC-VDB770 Doorbell Camera also supports WPS Pairing. Although WPS Pairing is often seen as the easier of the two methods, AP Mode Pairing is much safer and more secure. That is why we recommend AP Mode Pairing whenever possible. But both methods accomplish the same end goal of getting the ADC-VDB770 online so that it can ultimately pair with your Alarm.com account. You can complete the pairing process through a compatible web browser, or by using the Alarm.com Mobile App.
Complete the following steps to get your ADC-VDB770 connected with a network using AP Mode Pairing:
1. Install the camera. You need to complete the camera's installation process, as doing so will get it powered on. Having it powered on is necessary for connecting it to a network. This FAQ covers the installation process in great detail, and we strongly recommend reading it if you have never installed an ADC-VDB770 Doorbell Camera before. Continue to the next step once the ADC-VDB770 is successfully installed and powered on.
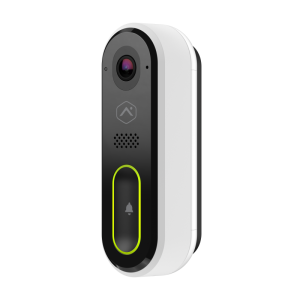
2. Activate device AP Mode. You will know that the ADC-VDB770 is in AP Mode because its LED light will be flashing white. AP Mode for the device can be accessed by pressing and holding the primary doorbell button until the LED light begins flashing white. This normally takes about 45 to 50 seconds. Just keep holding the doorbell button through all of the preceding LED cycles, and then release once the light is flashing white. Continue to the next step once the camera is in its AP Mode for network pairing.
3. Connect to the AP. Now turn your attention to a WIFI-compatible device, such as a desktop computer, laptop, tablet, or smartphone. Open the device's WIFI settings, display the list of available WIFI networks, and connect to the network named ADC-VDB770 (XX:XX:XX), where the X's represent the final six (6) characters of the camera's MAC Address. After connecting to that network, the default web browser should open and take you to a screen where you can connect the camera to a WIFI network. If no browser automatically opens, then just open up your favorite, and enter either http://vdb770install or 192.168.1.1 into the search bar. You will access the camera's Access Point (AP).

4. Connect camera to network. First, click the black Scan button on the right. After a few seconds, a list of available WIFI networks should generate. Click on the network that you want the ADC-VDB770 Doorbell Camera to connect with. The SSID for the network should auto-generate in the corresponding field. Then enter the network password into the corresponding entry field. Press the orange Submit button on the left-hand side once the information has been correctly entered. Then pay attention to the ADC-VDB770 itself. The camera LED light should go from solid red, to flashing green, to solid green. The solid green LED indicates that the camera is successfully connected to a WIFI network. You can then pair the camera to your Alarm.com account using the website or mobile app.

Did you find this answer useful?
We offer alarm monitoring as low as $10 / month
Click Here to Learn MoreRelated Products

Related Categories
- Answered