How Do I Get My ADC-VDB770 Added to a Network Using WPS?
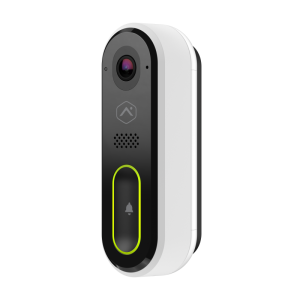
You can get your ADC-VDB770 added to a network using WPS by pressing and holding its doorbell button on the device for 30-35 seconds until its LED is blinking blue, and then activating the WPS function on your WIFI router. The LED should cycle to green to indicate a successful connection.
WPS refers to "WIFI Protected Setup". This is a very easy, but less-secure method for getting a compatible device paired to a WIFI network. For the ADC-VDB770 and most other WIFI-devices, WPS pairing is often discouraged, due to the vulnerabilities involved. A more secure method for getting the ADC-VDB770 Doorbell Camera online is AP Mode pairing. However, many users choose to pair using WPS anyway, as it is an easier and less-involved process. Whether you go with WPS pairing or AP Mode pairing is up to you, but Alarm Grid generally recommends AP Mode pairing whenever possible. That being said, we still have the WPS pairing process outlined below so that you can use it to get your camera online. Keep in mind though that not all WIFI routers support WPS pairing, and some routers that do technically support WPS have the feature disabled for security purposes. Before you attempt to pair using WPS, please make sure that it is supported by your router and that the feature is not disabled. Also, if you want more information on AP Mode Pairing for the ADC-VDB770, please review this FAQ.
Complete the following steps to add your ADC-VDB770 to the network through WPS pairing:
1. Install the doorbell camera. Installing the ADC-VDB770 will provide power to the device. This is necessary for connecting the device to a WIFI network, regardless of which pairing method you use. For more information on installing the ADC-VDB770, please refer to this in-depth FAQ.
2. Activate device WPS mode. With the ADC-VDB770 powered on, you can activate its WPS function. Press and hold the doorbell button on the ADC-VDB770 until the device's LED light is blinking blue. This will take roughly 30 to 35 seconds. Continue to the next step once the LED is flashing blue.
3. Activate router WPS mode. Now turn your attention to your WIFI router. Activate its WPS function so that the router is ready for pairing. Most WPS-compatible routers will have a button that you can press and hold for this purpose. Some routers will also allow you to log-in using a web browser on a connected device so that you can enable WPS without actually going to the router itself. Refer to the installation manual for your WIFI router for more information on activating its WPS feature. Remember, not every router supports WPS, and some routers have the feature disabled for security purposes.
4. Confirm network pairing. After you have activated the WPS feature on both the ADC-VDB770 Doorbell Camera and your WIFI router, the camera should successfully pair with the network. You can confirm this by observing the LED on the camera. The LED should first turn red, then start flashing green, and then turn solid green. The solid green LED indicates that the camera is now online. You can then pair the camera with an Alarm.com account either via the mobile app, or via the website.
Did you find this answer useful?
We offer alarm monitoring as low as $10 / month
Click Here to Learn MoreRelated Products

Related Categories
- Answered