How Do I Learn the Qolsys IQ Shock-S Into My Qolsys IQ Panel 2 Plus?
You can learn the Qolsys IQ Shock-S into your Qolsys IQ Panel 2 Plus by putting the system into its Auto Learn Sensor Mode and activating the cover tamper on the IQ Shock-S. The IQ2+ will acknowledge the sensor and allow you to pair it with the system. You must be using the 319.5 MHz IQ2+.

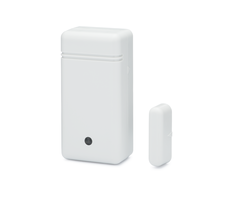
The Qolsys IQ Shock-S is a 319.5 MHz wireless sensor that uses Qolsys S-Line Rolling Code Encryption. The only version of the IQ Panel 2 Plus that will support this sensor is the 319.5 MHz model. That is the IQ Panel 2 Plus that comes in the gold and white packaging. You can also check the SKU, as the seventh (7th) digit will be 1 for the 319.5 MHz model. Specifically, the 319.5 MHz SKUs are QS9201-1208-840 and QS9202-1208-840.
Before you enroll the Qolsys IQ Shock-S, you will want to open up the sensor and adjust its Potentiometer and its DIP Switches. To open up the sensor, press a small flathead screwdriver into the tab so that you can easily pop the front cover off. You should be able to open up the sensor with very little effort when done properly.

The Potentiometer can be adjusted using a small flat head screwdriver. Turning the Potentiometer clockwise will make the shock detector more sensitive and require less powerful shockwaves to alert the system. Turning the Potentiometer counter-clockwise will make the shock detector less sensitive and require more powerful shockwaves to alert the system. There are also three (3) DIP switches you can set to ON or OFF.
- DIP Switch 1 - If ON, enables test mode. Sensor will not transmit signals to the panel when ON. Keep OFF for normal operation.
- DIP Switch 2 - If ON, sounder and LED light will be used with the sensor. Turn ON if you want the sounder and LED to function, or turn OFF for no sounder and no LED. Leaving this option set to ON will cause the battery to drain more quickly than if it is set to OFF.
- DIP Switch 3 - If ON, then the sensor's internal reed switch is enabled. This has the sensor ALSO function as a door/window contact sensor. You will need to keep a magnet (included) next to the sensor and properly aligned. Separating the magnet from the sensor (i.e. opening the door or window) will cause the sensor to transmit a fault signal to the panel, just as if it detected shockwaves. The sensor has two functions, but when the reed switch is enabled both functions will be signaled using a single zone. The system will trigger the SAME RESPONSE whether a shockwave was detected (i.e. door or window being struck) OR the reed switch was faulted (i.e. opening door or window). If you want the IQ Shock-S to function as BOTH a door/window contact AND as a shock sensor, then keep ON. If you want the IQ Shock-S to ONLY function as a shock sensor, then keep OFF.

For this FAQ, we will assume that you have already adjusted the Potentiometer and the DIP Switches, and we will focus strictly on getting the sensor into the IQ Panel 2 Plus and adjusting the zone settings. Complete the following steps to learn the Qolsys IQ Shock-S into your IQ Panel 2 Plus:
1. Enter Auto-Enrollment Mode. Start from the main screen of your IQ Panel 2. Click the small grey bar at the top of the screen. Choose Settings > Advanced Settings > enter Installer Code (default 1111) > Installation > Devices > Security Sensors > Auto-Learn Sensor. This will put the system into an auto-enrollment mode for learning-in the Qolsys IQ Shock-S Sensor.
2. Transmit enrollment signal. Open up the sensor by sticking a small flat head screwdriver into the tab, and popping off the front cover. If the sensor was powered on when you did this, it will send an enrollment signal to the panel. If it is your first time using the sensor, then you will likely need to remove the battery tab first. Or if the sensor has no CR123A battery inserted (or a dead battery is inserted), then the sensor is not powered on, and no enrollment signal will be sent. Insert a fresh battery if needed. This should be enough to cause the sensor to send an auto-enrollment signal to the panel. If not, then press and release the tamper button once a fresh battery has been installed. Once the 319.5 MHz IQ2+ receives the signal, an "Auto-Learn Sensor" message will appear on the screen, and the sensor's Serial Number will be displayed. Press the OK button to proceed. You can then close the IQ Shock-S Sensor.
3. Configure the zone settings. The Sensor DL ID can be left alone, since you auto-enrolled the sensor and had this information automatically generated. Sensor Type should be set to Shock Sensor. The dropdown below that should be IQ Shock.
For Sensor Group, set it to 13-Shock if you want the sensor to trigger an alarm upon activation when the system is Armed Away OR Armed Stay. Or, set Sensor Group to 17-Shock-Away Only if you don't want the sensor to be able to trigger an alarm when the system is Armed Stay, and only have it able to trigger an alarm when the system is Armed Away. Remember, if you have DIP Switch 3 set to ON, then faulting the reed switch (i.e. separating the magnet from the sensor by opening a door or window) will have the same effect as the sensor detecting a shockwave.
Set the Sensor Name to something that will help you identify the sensor (e.g. Bedroom Window). Set the Chime Type to a Chime sound that you like, or set it to None to disable the Chime. Set Voice Prompts to On if you want the system to speak the Sensor Name when the sensor is activated, or set Voice Prompts to Off if you do not want to use the voice feature. For Source, be sure that S-Line is selected so that the sensor uses the Rolling Code Encryption.
Did you find this answer useful?
We offer alarm monitoring as low as $10 / month
Click Here to Learn MoreRelated Products
Related Videos

Related Categories
- Answered