How Do I Program a SiXCOMBO to a Lyric Security System?
As of April 15, 2026, Lyric panels can no longer be activated or remotely programmed using AlarmNet360. For full details, please read this notice.
You can program a SiXCOMBO to a Lyric Security System by putting the Lyric into its SiX Programming Mode and then having the SiXCOMBO send out an enrollment signal by powering it on or activating its tamper switch. It may take up to thirty (30) seconds for the Lyric to receive the signal.

The Honeywell SiXCOMBO is a life-safety sensor that serves as a combination smoke, heat, and carbon monoxide (CO) detector. It has a wireless signal range of roughly 300 nominal feet, though thick walls and large metal objects can disrupt range. The sensor is highly praised for its One-Go-All-Go functionality, which means that when one SiXCOMBO or SiXSMOKE on the Lyric activates, all of the other SiX Series Smoke Detectors on the network will activate as well. The device has an 85dB sounder to alert building occupants to a fire or CO outbreak. It emits a Temporal 3 (T3) sound for fire, and a Temporal 4 (T4) sound for CO gas. The sensor uses 128-bit AES encryption, and it is designed exclusively for use with the Honeywell Lyric Alarm System.
Complete the following steps to program a SiXCOMBO to a Honeywell Lyric Security System.
1. Access SiX Programming Mode. Start by putting the Lyric System into its SiX Programming Mode. From the main screen of the Lyric, choose Security > Tools > enter Installer Code (default 4112) > down arrow on right-hand side of the screen > SiX Programming. You will enter SiX Programming Mode.
2. Send the enrollment signal. You must now have the SiXCOMBO send an enrollment signal to the Lyric. If this is the first time the SiXCOMBO is being used, then you can remove the battery tab to power on the sensor. If the sensor has been used before, then you can either activate the tamper cover or remove and insert a battery to power it on. The Lyric should recognize the enrollment signal from the SiXCOMBO and automatically enroll the device with the panel. You will know that this has happened because the SiXCOMBO device will appear on the SiX Programming screen. If you want, you can check that the displayed Serial Number matches the Serial Number on the SiXCOMBO.
For reference, the SiXCOMBO uses four (4) lithium CR123A batteries for power. These are also sometimes referred to as camera batteries. To open the sensor, press it against its back plate, and twist it counter-clockwise. The device has an green enrollment LED light that you can use to determine whether or not it is enrolled with a system. When the SiXCOMBO is not enrolled, the green LED light will blink rapidly. This same LED light will blink slowly when the SiXCOMBO is actively enrolled with a system. The SiXCOMBO can only be paired with one (1) Lyric System at any given time. For more information on defaulting SiX Series devices, please review this document. Once the sensor is paired, you can close the device by aligning it against its back plate and twisting it clockwise.
3. Configure zone settings. You will now configure the zone settings for the SiXCOMBO. The device can use three (3) zones, with each one serving a different function. There is a zone for smoke detection, a zone for heat detection, and a zone for CO detection. Make sure the circle next to any function you want to use (under Services) is green. If there is a feature you don't want to use, then click the green circle to toggle it grey, meaning that it is not in use.
For Alarm Report, you definitely want to have that feature enabled for any Service that is being used. The Alarm Report option tells the system whether or not it will send an alarm notification to AlarmNet when the zone causes an alarm on the system. AlarmNet then forwards the notification to Total Connect 2.0 and/or a central monitoring station, depending upon the user's monitoring plan. Alarm monitoring service is required if you want to have the Lyric send out signals during alarm events.
The Verify option for the smoke detection service determines whether or not the zone will use Fire With Verification. If enabled, the SiXCOMBO must detect smoke twice within a short period of time before a fire alarm will occur. This is a false alarm prevention tool that makes it so that a fire alarm won't occur due to a small amount of accidental smoke exposure, such as burning something in the kitchen. For smoke detection, the SiXCOMBO is considered to be a photoelectric smoke detector. This means that there is a small light inside the sensor, and smoke entering its detection chamber will cause the light to refract, which tells the sensor to report the fire to the alarm system. For more information on how the Fire With Verification setting works and whether or not you should use it, please review this helpful FAQ.
The two (2) Description fields near the bottom are used for naming the sensor. This is used for identifying the sensor, and it is also the name that the Lyric Panel will speak out when the sensor is faulted, assuming that Voice is enabled on the system. We recommend choosing a name that will help you easily recognize the sensor, such as "Master Bedroom" or "South Hallway". Keep in mind that the Lyric will also speak out the Device Type (e.g. Smoke, Heat, CO) when the sensor is faulted, so you don't need to put the enter in "Smoke", "Heat", or "CO", in the second Description field.
At the very bottom, make sure the One-Go-All-Go feature is enabled if you want to use it. Remember that a green circle means that it is enabled, and a grey circle means that it is disabled. After confirming that all the settings are correct, press Save in the bottom-right corner. Make sure to press Save, and do not use the return arrow in the upper-right. If you press the return arrow instead of Save, then all of your settings will be lost!

4. Return home and test. After clicking Save in the bottom-right, repeatedly press the return arrow in the upper-right corner until you are taken back to the main screen.
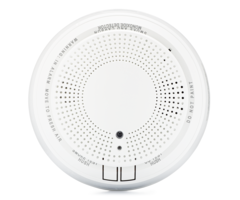
You must now test the SiXCOMBO to ensure that it works properly. Before doing this, make sure to put your system on test mode if the system is monitored. The SiXCOMBO has two (2) test buttons. The Smoke/Heat test button is on the left-hand side. The CO test button is on the right-hand side. You just need to press one of the buttons to initiate the test. The SiXCOMBO will then begin speaking to let you know that the test has been initiated. You have a chance to cancel the test by pressing the same button again before the alarm sounds. The SiXCOMBO will transmit an alarm signal five (5) seconds after it finishes speaking. Once the panel receives the signal, the alarm will occur. Again, always make sure your system is on test mode before doing this.
Once the Lyric System is in alarm mode, its siren will begin sounding. To stop the siren, press the green home button on the front on the panel, and enter in the system's Master Code (default 1234, but usually changed for security purposes). However, this will only stop the sound, and it will not clear the alarm from the system. To fully clear the alarm, you must press the home button and enter your Master Code again. The second disarm (aka, the double disarm) is what clears the alarm.
Did you find this answer useful?
We offer alarm monitoring as low as $10 / month
Click Here to Learn MoreRelated Products
Related Categories
- Combination Smoke/Heat Detectors
- Wireless Combination CO/Smoke Detectors
- Combination CO/Smoke Detectors
- Wireless Combination CO/Smoke Detectors
- Combination CO/Smoke Detectors
- Answered