How Do I Program an Image Sensor to a 2GIG Edge?
You program an image sensor to a 2GIG Edge by putting the system into its image sensor learn mode and then inserting batteries into the image sensor to power it on while it is within wireless range of the panel. From there, you must configure the settings for the image sensor zone.
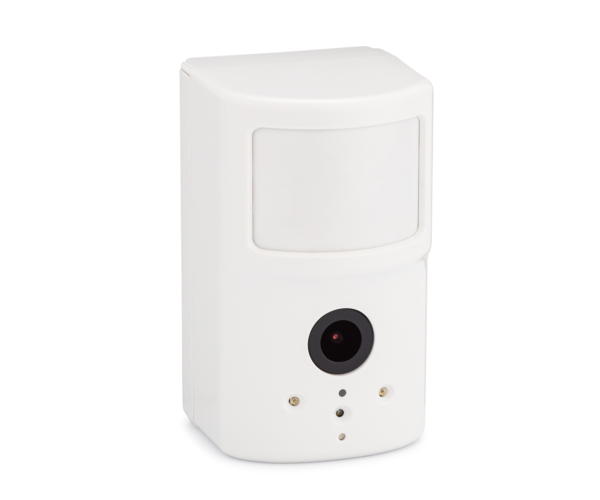
The only compatible image sensor for the 2GIG Edge is the 2GIG IMAGE3. In order to use the 2GIG IMAGE3 Image Sensor with the 2GIG Edge, you must have a 2GIG XCVR3-GC3 Module installed inside the panel. One important thing to note though is that as of June 2021, the 2GIG Edge will only treat the 2GIG IMAGE3 as a regular motion sensor. As a result, the IMAGE3 cannot send captured photos to the 2GIG Edge Panel, and ultimately, no images can be sent to Alarm.com. This is not intended behavior, and 2GIG says that they are working on a fix for this issue. No ETA is currently available for when a fix will be implemented. More information can be found in this blog post.
Please note that up to ten (10) image sensor modules can be enrolled with the 2GIG Edge Security System. Complete the following steps to enroll a 2GIG IMAGE3 with a 2GIG Edge:
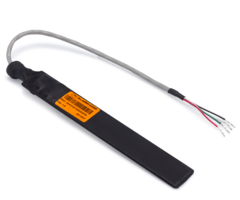
1. Install the 2GIG XCVR3-GC3. You must first install the 2GIG XCVR3-GC3 Module before an IMAGE3 Image Sensor can be enrolled with the 2GIG Edge. Please see this FAQ for information on how to install the XCVR3-GC3.
2. Access Image Sensor Enrollment. Next, you will put the 2GIG Edge System into its Image Sensor Enrollment Mode for auto-enrolling image sensors. To do this, start from the main screen of the 2GIG Edge, and choose the settings icon (the gear) in the bottom-right corner > enter the Installer Code for the system (default 1561) > Installer Toolbox > Panel Programming > Image Sensors > the green Add Image Sensor button. The panel will begin listening for an image sensor.
3. Power on Image Sensor. To have the 2GIG IMAGE3 Image Sensor send an enrollment signal to the panel, all you have to do is power on the image sensor. Have the image sensor within wireless range of the panel. Slide off its back cover, and insert fresh lithium batteries into the sensor. The 2GIG Edge should display the Serial Number for the Image Sensor on the screen. Click accept to begin configuring the image sensor zone settings.
4. Configure Image Sensor Settings. Go through and configure the settings for the image sensor device. The following settings are available:
- Image Sensor: This refers to the "number" that the image sensor is assigned. The image sensor will be assigned a number, 1 thru 10, depending on the lowest available image sensor slot. This option will be selected automatically by the 2GIG Edge.
- Sensor Type: This is essentially the "Response Type" for the image sensor. This setting determines how the system responds when the image sensor detects movement when the system is either armed or disarmed. Popular options for an image sensor include 03-Perimeter (causes a fault when disarmed, causes an immediate alarm if triggered when armed stay or armed away) and 04-Interior Follower (causes a fault when disarmed, is bypassed in armed stay; immediate alarm if triggered when armed away, unless an Entry/Exit Zone is triggered first).
- Sensor Chime: Determines the sound emitted by the panel when the image sensor detects movement while the system is disarmed. Can set to Disabled if no chime sound is desired.
- Sensitivity: Higher sensitivity will make it easier to fault or activate the image sensor. Lower sensitivity makes it more difficult to fault or activate the image sensor. Walk Testing is advised to determine ideal sensitivity.
- Smart Areas Assignment: This is the Smart Area Partition that the image sensor is assigned to. If you are not using partitions on your 2GIG Edge, then just leave the sensor set to S1. Otherwise, set accordingly.
- Transmission Delay: If Enabled, the 2GIG Edge System will wait a set duration of time after the image sensor has caused an alarm before sending the alarm signal to Alarm.com, assuming the system is monitored. This amount of time is set based on the Q205 setting in the Timers, Delays, and Counts Menu of Advanced Programming. The default Q205 setting is 30 seconds. Alarm Grid recommends Disabling this setting for each zone.
- Sensor Reports: If Enabled, then the system will report to Alarm.com whenever the image sensor zone causes an alarm on the system, assuming that the system is monitored. If Disabled, no alarm reports will be sent to Alarm.com for this zone. In most cases, this should be Enabled. Only Disable if you want local, on-site alarms for this image sensor, with no alarm reports being sent to the central station and/or the end-user.
- Sensor Supervised: If Enabled, the system will listen for periodic check-in signals from the sensor, and a trouble condition will occur if a check-in signal is not received within a predetermined amount of time. Some common reasons for Supervision trouble include a dead sensor battery, the sensor being moved away from the panel, and new obstacles preventing the sensor's signals from reaching the panel. In most cases, this field should be Enabled.
5. Return home. You do not need to click any sort of "save" button to apply the changes. All programming field settings are saved and applied upon entry. Instead, you can just return to the home screen by repeatedly pressing the return arrow in the upper-right corner.
Did you find this answer useful?
We offer alarm monitoring as low as $10 / month
Click Here to Learn MoreRelated Products


Related Categories
- Answered