How Do I Set Up a Cellular Communicator in a 2GIG GC3?
You can set up a cellular communicator in a 2GIG GC3 by powering down the panel and inserting the cell module into the panel side slot. Then power up the panel once it is installed. You can then have your alarm monitoring provider activate the communicator for alarm monitoring service.
 The GC3 requires an added cellular communicator for monitoring service. The system uses this module to communicate with Alarm.com. Once a signal is received by Alarm.com, it can then be forwarded to a central monitoring station and/or the end user via text and or email, depending on the user's monitoring plan. And if the plan includes remote access to Alarm.com, then the user can control their system remotely using a web browser or a mobile app on their phone.
The GC3 communicators include the 2GIG LTEA-A-GC3 AT&T LTE Communicator and the 2GIG LTEV1-A-GC3 Verizon LTE Communicator. The LTEA-A-GC3 requires Firmware Version 3.2.3 or higher, while the LTEV1-A-GC3 requires Firmware Version 3.1.3 or higher. Check our 2GIG GC3 Firmware Page for more information. Remember that since the 2GIG GC3 already has built-in WIFI, adding a cellular communicator will allow the system to use two pathways to communicate with Alarm.com. This is commonly referred to as dual-path communication. Alarm.com does not allow a panel to register on IP only, so that is why a cellular communicator is required for monitoring.
It's also important to note that there is an alternative to powering the system down before installing the cellular communicator. You can also use the Cell Radio Swap option. This option is accessed by choosing System Settings in the lower-right corner of the main screen, entering the system's Installer Code (default 1561), and scrolling down to Cell Radio Swap. The on-screen instructions will assist you with installing the communicator. This option is only available when a cellular module is already installed in the 2GIG GC3. Always use this option or power down the system before installing or removing a cellular communicator. Failure to do so may damage the panel and/or the communicator.
For this FAQ, we will use the traditional method of powering down the panel. Complete the following steps to set up a 2GIG GC3 cellular communicator:
1. Open the panel. Opening the panel is done to remove the backup battery and AC power. Start by loosening the set screw at the bottom of the panel. You do not need to remove it entirely. Just loosen it until it becomes difficult to turn. You can then open up the panel. If the panel is wall-mounted, simply press it against the wall, and then lift upward. If the panel is lying flat or desk-mounted, then pop off the back cover using your finger or a screwdriver.
2. Power down the system. To safely install the communicator, you must first power down the panel. Start by disconnecting the backup battery from its port. Next, remove AC power. This can be done by simply unplugging the transformer from the wall. If you are using a Honeywell LT-Cable, then you can alternatively disconnect the barrel plug-in from the back of the panel, rather than unplugging the transformer.
3. Remove cell slot cover. Before you attempt to open the cell slot, make sure the slot screw is removed or placed in the unlock position. To access the slot screw, first remove the front plate from the panel. You can do this by sticking your fingernail in the crevice where the silver border around the front plate and the white plastic of the main panel meet. Pry the front and the back apart. The cover screw can been seen in the lower-left corner. It will be in one of two (2) slots. The left one is for locking and the right one is for unlocking. Moving the screw from the locked to the unlocked slot will prevent it from being lost while you perform the cell communicator installation or swap. In the picture below, the screw has been removed entirely. But you can still see both of the slots.

You can then remove the cell slot cover. When facing the panel, the cell cover in on the left-hand side. Stick your fingernail or a flat tool into the crevice, and pry the cover off. The picture below shows the cellular cover removed.

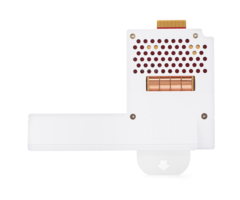
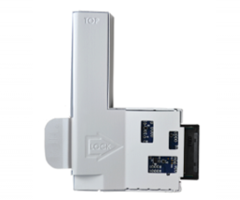
4. Insert the communicator. Start by lying the panel face down. Have the open cellular slot facing you. Position the communicator with its arrow pointed upward, and insert it into the panel. It should click nicely into place.
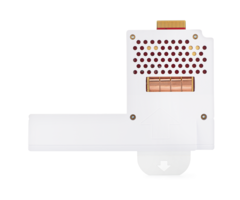
5. Record the IMEI number. Before you close the cell cover, write down the IMEI number on the white sticker on the communicator. You can also use your phone to take a picture of the sticker. You will need this information when activating the communicator. Keep it stored somewhere safe.
6. Reapply the cell cover. Put the cell cover back over the open slot. The cover should click into place. You can also move the cover screw from the unlocked position to the locked position if you want. Also put the front cover plate back on the panel.
7. Power on the panel. It is now time to power the panel back on. Connect the backup battery first. Then reapply AC power by either plugging the transformer back into the outlet or reconnecting the Honeywell LT-Cable's barrel connector.
8. Close the panel. If the panel is wall-mounted, then simply position the panel over the back plate, and then click it securely into place. If you have the back plate loose and not wall-mounted, then position it over the back of the panel and press it securely into place. The proper way to close the panel is to position the top portion first, and then lock the bottom portion of the back plate into place.
9. Activate the communicator. Contact your monitoring provider to have them activate the communicator with Alarm.com. If you are setting up service with Alarm Grid, then we will contact you at the scheduled time you selected. The IMEI number for the communicator must be provided during the activation. We recommend following these tips to ensure that the activation goes smoothly.
10. Perform a cell test. You must perform a cell test to finish activating the communicator. Your monitoring company can push it down to the panel, or you can perform it manually. The manual process is performed by clicking the 2GIG logo in the upper-right corner of the main screen, entering the system's Installer Code (default 1561), and then selecting the Radio Status option. There will be a button you can press to initiate the test. You can then follow the on-screen prompts to complete the process.
Did you find this answer useful?
We offer alarm monitoring as low as $10 / month
Click Here to Learn MoreRelated Products

Related Categories
- LTE Cellular Communicators
- Verizon LTE Cellular Communicators
- LTE Cellular Communicators
- AT&T LTE Cellular Communicators
- Answered