Adding a DSC HS2TCHP Touchscreen Keypad to a DSC PowerSeries NEO
Related Products


Related Categories
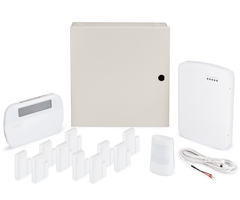
Description
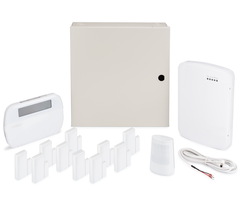
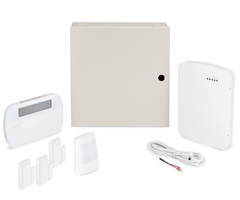
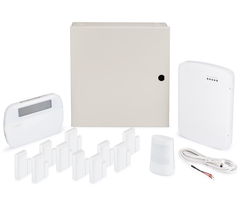
In this video, Michael from Alarm Grid shows you how to add a DSC HS2TCHP Touchscreen Keypad to a DSC PowerSeries NEO Security System. The DSC PowerSeries NEO is a hardwired security system, and it usually has at least one touchpad alphanumeric keypad enrolled for programming purposes. Adding a touchscreen keypad can be a nice option to make the system more inviting and approachable for users who may feel uncomfortable or intimidated in trying to operate an alarm system.
When adding the DSC HS2TCHP Keypad, you want to first make sure that you power down the system. Making hardware changes while the system is powered on could result in damage to the panel or the keypad. The DSC HS2TCHP will use the same 4-wire connection as a standard alphanumeric keypad on the DSC PowerSeries NEO. You can connect the wires at the panel to the same four (4) terminals. The keypad terminals are also appropriately labeled. Make sure all the wires go the proper location. We advise using 18 AWG, 4-Conductor cabling for this job, but you really shouldn't have any problem using a different gauge of wire if that's what you have around. Just make sure to observe any wiring limits based on the wire size you use.
When you power the NEO System back on, the DSC HS2TCHP Keypad will start up as well. It will likely take a minute or two for the touchscreen keypad to fully boot up, so be patient. Upon first startup, you will need to enroll the keypad with the system. This will be done using the system's main alphanumeric keypad. You can have the DSC HS2TCHP Keypad auto-enrolled so that it is assigned to the next available keypad slot on the system. Try and remember which keypad slot is used, because it can be useful if you ever need to change the keypad settings later.
https://www.alarmgrid.com/faq/how-do-i-add-a-dsc-hs2tchp-touchscreen-keypad-to-a-dsc-powerseri
http://alrm.gd/get-monitored
Transcript
Hi, DIYers. This is Michael from Alarm Grid. And today, I'm going to be showing you how to add a DSC HS2TCHP touch screen keypad to a DSC PowerSeries Neo security system. Now, the HS2TCHP, like I said, it's a touch screen keypad, so it adds full color menus as opposed to a touchpad keypad where you have a numeric keypad. A touch screen keypad can be more inviting for users who aren't necessarily familiar with security systems. The full color display can be more inviting. So a lot of people prefer to add these to their systems if they don't have a wireless all-in-one panel. So for a wired panel like the Neo, a touchscreen keypad can be a great way to make your system a bit more user friendly. The one thing you do want to keep in mind with this keypad, though, it shouldn't be used as an initial keypad for programming your system. You are going to want to have at least one wired alphanumeric keypad, which we already have set up on our Neo. We're just simply adding a new keypad today. So let's get right into it. I have the keypad here. And we've already done the wiring, but I do want to show you just quickly how to open up the keypad because you will have to do the wiring both at the keypad and at the panel. So the keypad has these two little notches here for getting into it. But what I like to do, I just get in the middle and just get it out on both sides right there. Well, that didn't go too well, but won't get that in there. Just pry it out like that and then it opens pretty easily. And we have these color coded connections here-- green, yellow, black, and red. Our wire has white instead of yellow so we're using white in place of yellow, but otherwise, just match the letters. So red, black, yellow or white, and green. And remember to run your wire through the backplate because otherwise you won't be able to close the keypads. So we did that on ours. Our connection is already complete at the keypad, so we're just going to be wiring at the panel. And remember to always have your Neo system powered down before you're doing any hardware changes. So disconnect the backup battery and unplug the transformer. We already did that. So we have our wires here. And we have an existing keypad already in the terminals, but we have our terminals loosened so we can just go and add this in. So now we're going to begin adding the wires to the Neo panel. All right, so we have our four wires that were ready to go in here. And we're just matching the colors here, so we got red in the red terminal. So we did our four wire connection, same location as our previous keypad. Just a reminder-- we used a 22 gauge for conductor wire, 22 AG. If you have 18 AG wire, 18 gauge wire, that should work fine as well. Really, whatever you have lying around should work fine, just remember to get the colors matching at the keypad and the panel. The colors aren't necessarily important themselves just as long as everything's matching, but it is a good idea to just stay organized red, black, yellow, or white, and green. That's how we have our setup. So now we're going to go and power on our Neo system. We're going to connect to the transformer. And we're just going to plug in the backup battery. OK, so we have our Neo system powered back on. You can see our keypads lit up. Move our hardwired motion sensor out of the way so hopefully it's not giving us trouble conditions. But we'll take a brief moment for this hardwired keypad to-- the touchscreen keypad to boot up. So we're just going to wait for it to load its screen. OK, so our keypad has booted up. You see that it's currently not enrolled with our system. We're going to be doing our work on the numeric keypad, the alphanumeric keypad for setting up the new keypad. You will get some trouble conditions when you first power on the Neo. We can take care of those later and we'll show them in a different video. But for now we're just going to show you how to get the keypad enrolled with the system. OK, so the first thing you want to do, you want to get into programming. So that's star 8 and then you enter the installer code. And ours is at the default of 5 5 5 5. And then we're going to go to programming field 9 0 2 for auto enrollment of new devices. And you can confirm 0 0 0, that is the one that is automatically displayed or you could press star. In our case, we entered 0 0 0. But you see that if you look at our touch screen keypad now, it is successfully enrolled with the Neo system. And we can use it however we want if we wanted to arm or disarm from there. I'll just show you a quick example. If I want to do a stay arm then we would just do our-- and then, I suppose, it's 1 2 3 4 actually. Get these mixed up, lots of different systems here. So the master code is 1 2 3 4. Failed to arm because our zone is still faulted, but that's how you would arm. But our keypad is enrolled with the system. We can do other options here. If I wanted to show the keypad mode, we can actually use this as a console mode for controlling the system. I'll just show you getting into programming real quick. Star 8, I guess the function is not available. Oh, it's because I'm still in programming on this keypad, that's why. We have the exit out on the original keypad. We have to repeatedly press the pound key to get out of programming. Now it's ready to arm. Sorry about that. So if you wanted to do a stay arm for your system arm stay, then you can click this button. And you can enter in your master code and ours is at the default, 1 2 3 4. And then disarm, 1 2 3 4 You can click up here to arm away. Same thing, 2 3 4. And remember, we have our master code at the default. If you change your master code, which it's recommended that you do, then you'll enter in whatever your master code is or a valid user code. We can also show you some options here. There is a keypad mode, which is kind of like a console mode where you can do various settings. So that's how you can have it act as an alphanumeric keypad if you did want to do some programming. Remember, for our initial setup, you do want to have an actual alphanumeric keypad so keep that in mind. And that's how you add a hardwired touchscreen keypad to your DSC PowerSeries Neo security system. If you have any questions about the DSC PowerSeries Neo or the HS2TCHP HP touch screen keypad, send an email to support@alarmgrid.com. You can also ask us about alarm monitoring. And if you found this video helpful, make sure to give it a thumbs up below to like the video. And remember to subscribe to our channel for updates on future videos. We hope you enjoyed the video. Thank you.
- Uploaded