Program a Wireless Zone to a DSC PowerSeries NEO
Related Products


Related Categories
Description
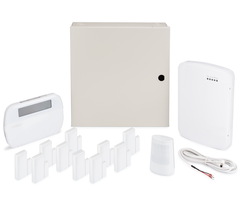
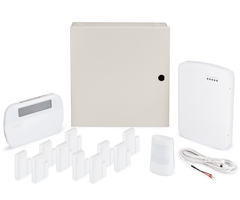
In this video, Michael from Alarm Grid programs a wireless zone to a DSC PowerSeries NEO Security System. The DSC PowerSeries NEO can use PowerG Wireless Sensors once a PowerG Transceiver Module has been added. The main options for adding a PowerG Transceiver include the DSC HS2LCDRF9 N Keypad and the DSC HSMHOST9 Standalone PowerG Transceiver. Either one will allow you to begin using these sensors. Without a PowerG Transceiver, you will be strictly limited to using hardwired sensors with the panel.
Wireless sensors are typically easier to install than hardwired sensors, as you do not need to run any wires between the panel and the sensors. Running wires is often the most difficult part of installing a security system, so being able to avoid that step is a nice luxury. Of course, you will still be able to use hardwired sensors with the NEO System after adding a PowerG Transceiver and some PowerG Wireless Sensors. The important thing to remember is that you cannot exceed the total number of zones for the panel. But with a PowerG Transceiver, your NEO System will become somewhat of a hybrid security system with the ability to support both wired and wireless sensors.
PowerG Sensors offer some great benefits, and they are often seen as some of the best wireless sensors on the market. They have an outstanding wireless range, as they can be used from up to 2km away from the PowerG Transceiver in an open air environment. These sensors also offer great security and wireless protection with their military-grade 128-bit AES encryption communication. There are all sorts of PowerG Wireless Sensors available, and you can almost certainly find some options that meet your needs. Using wireless sensors in combination with hardwired sensors can really help you set up the ideal alarm system for your home or business.
https://www.alarmgrid.com/faq/how-do-i-program-a-wireless-zone-to-a-dsc-powerseries-neo
http://alrm.gd/get-monitored
Transcript
Hi, DI wires. This is Michael from Alarm Grid. And today, I'm going to be showing you how to add a wireless zone to a DSC PowerSeries Neo security system. And when I say wireless zone, I basically mean a PowerG sensor. A wireless PowerG sensor. Because those are the only wireless sensors that the DSC PowerSeries Neo is capable of supporting. But in order to use wireless PowerG sensors with your DSC PowerSeries Neo security system, you will need to add a PowerG transceiver. Now you have a couple of options available. In our case, we have a DSC HS2LCDRF9 N keypad, which is a great initial alphanumeric keypad for the system. It includes a built-in PowerG transceiver. Since it's an alphanumeric keypad, you'll be able to use it for programming your system. And the fact that it has that PowerG transceiver, it will open up a bunch of possibilities for you to add wireless sensors instead of just restricting you to hardwired sensors that you would wire in with the system or an expansion module. The other option is to use a DSC HSM2HOST9 standalone transceiver module, which can be a good option if you already have an alphanumeric keypad setup with the system. And I also just want to briefly mentioned on PowerG sensors in general. They have a fantastic range. With the Neo, it's actually two kilometers away from the PowerG transceiver in an open air environment. Now keep in mind that thick walls or large metal objects can reduce range. So if you're having range issues there is a DSC PG9920 PowerG repeater, which can effectively double the range. So that's pretty useful. But when you're adding a wireless zone to your Neo system, you'll be using PowerG sensors. So I'm going to go on to our keypad here and show you the process for enrolling a new wireless zone with your system. We're going to start by entering star eight to get into programming. And then we need to provide our installer code to gain access, which ours is at the default-- 5555. And now we're asked to choose a programming field. We're going to choose programming field 804. And it gives us the option for auto-enrollment. We can confirm that by pressing the star key. And now we need to auto-enroll our sensor. So we have our PG9914 motion detector here. And just as a reminder, different PowerG sensors use different methods for auto-enrollment. So be sure to look up the installation manual for your PowerG sensor to see how it auto-enrolls. A lot of them just require you to insert a battery. In this case, we actually have to do an enrollment button, which is there. I'm going to turn it over here so you might be able to see it a bit easier. And so we're going to insert our battery to power on the sensor. And then we're going to press and hold the enrollment button until we get an orange LED light. And I inserted the battery backwards. Yeah, this was the proper way it goes. Because I turned it around. I wasn't paying attention there. So we're going to press and hold the enrollment button now and get the orange LED light. And there. It did recognize the serial number on the screen. And so we're good to go. We're going to confirm it by pressing the star key. And now we're going to choose a zone number for the system. It's going to automatically give you the first wireless zone available on the system. In our case, that's zone 009. We're fine with that. But if you wanted to enter in a different three-digit zone number, you could certainly do that. But we're just going to confirm by pressing the star key. And now we're choosing our zone definition. Since this is-- we'll call it an interior motion sensor. We're fine with interior. If we wanted to scroll between different options, you can see them here. If you aren't sure about zone definitions, then refer to the DSC PowerSeries Neo Security System manual, which will have a complete list of zone definitions. Remember, this is how the system will respond when the sensor is faulted. So it's very important that you get the proper zone definition. And we're fine with 004 for an interior sensor, so we'll press star to continue. And now we're choosing partitions. The Neo is a multi-partition system. You can scroll between different partitions using the arrow keys, and you can toggle Y for yes and N for no. We want ours to be on yes for partition one, and we want the others to be all no. So we'll go with that. And then in this case, we press pound to continue, not star, because star is to toggle. So we'll press pound to go to the next one. And now we're programming our zone label, which is the name for the sensor that you're enrolling. In our case, we have it set to better in motion. You can use the arrow keys to move the cursor at the bottom to different options. We're going to go and clear these out. I want to briefly show you how to do that. So you get it under the letter that you want to clear, and you press zero to delete it. And see, we're deleting the letters one by one. We're getting rid of motion. And we're going to go back to bedroom here. We're just going to wipe it out completely so we can start with a fresh zone label. And so, to get started out with a fresh zone label once you have it completely cleared, you can press the star key, and then it will give you the option for word entry. And you press star again. Now options one through 193 are actual words. And options 194 through 238 are letters and symbols. So I just recommend finding the actual words that are close enough to what you are looking for that meet your definition. And then just setting it the way you want. So how about we aim for kitchen motion? Let's go with that. So I'm going to just ballpark it here. And these are expressed in three digits, so let's try 090 and see where that gets us. That got us to heat. Not quite kitchen. So let's try 110. Lights. So that's a little bit further than we want. So let's backtrack a little bit. And there, I saw kitchen right there. 104. So we have kitchen displayed. It's option 104. We'll press star to confirm that. And then we have kitchen here, and we want to make it known that it's a motion sensor. So we'll do another one. And luckily, I happen to remember the one for motion. It's 125. And there. So we have motion displayed there. We press the star key to confirm. And now we have kitchen motion. It's exactly the way that we want it. So once you have the zone label perfectly configured, you can press the pound key to finish. And then it will have you enroll the next zone, which we don't need to do that. We're just going to press pound repeatedly to get back to the main screen. And now our PG9914 is enrolled with our DSC PowerSeries Neo security system. So that's how you add a wireless zone to a DSC PowerSeries Neo. If you have any questions about the Neo system or about PowerG sensors or about alarm monitoring in general, please send an email to support@alarmgrid.com. If you found this video helpful, make sure to give it a thumbs up below to like the video. And remember to subscribe to our channel for updates on future videos. We hope you enjoyed the video. Thank you.
- Uploaded