How do I add a Wireless zone to my L5100?
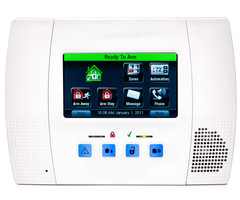
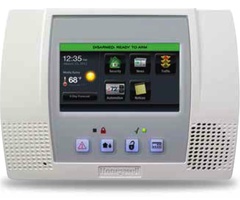
The L5100 is a Honeyewell control panel that supports 1 hardwired zone, zones 2 - 48 as supervised or unsupervised wireless zones (with zones 46, 47, and 48 as dedicated garage door zones) zones 49 - 64 as dedicated keyfob zones (any device that uses input type 5 or BR) zones 80 - 85 as hi/lo temperature threshold zones for use with Total Connect 2.0, and logical zones 95, 96, and 99 as programmable keypad panics, and finally, zone 97 as the panel's cover tamper response zone, which can not be disabled.
1. Go to Security -> More -> Tools -> Enter the Installer Code -> Program -> Zones -> Add New. This will take you to the next available wireless zone.
2. Select the "Serial Number" segment. You can either manually type in the Serial Number, or Fault and Restore the wireless device you're programming 3 times, until you hear the panel give 3 beeps, confirming that it has received the same serial number at least twice. The serial number will also be displayed on the screen along with the loop number received. Press "Done" in the bottom right.
3. If you learn the Serial Number in step 2, the loop number should be filled in automatically. If you typed it in, however, or if you used the tamper to learn it in, then you may need to change the loop number. Most wireless devices use loop number 1, but a few, most notably the 5816, often use loop 2. The 5816, using the magnet and reed switch is loop 2, wiring a separate magnetic contact to the two terminals on the board is loop 1. Both loops can be used, but each will take up a separate zone. To change the loop number, press the Loop Number segment to toggle through the available options until the correct one is shown.
3. Next, choose your Device Type. There are 14 different options here, and the Device Type you select here, will determine which options you have for a Response Type. Common Device Types are Door, Window, Motion Sensor, Glass Break. For a list of all Device Types refer to the Installation Instructions page 30.
4. Once the Device type is selected, you'll need to select the Response Type. In our example, we're programming a back door, so we selected Device type Door, and will select a Response Type of Perimeter. For a list of all Response Types and a description of how each is treated by the system, refer to the Installation Instructions, page 20.
5. The Alarm Report option toggles between "Yes" and "No". If you want alarms on this zone to report to a monitoring station choose "Yes" and if not, choose "No".
6. By default, all entry/exit and perimeter zones are enabled for chime, so in our example, this option is selected as "Yes" by default, but if we do not want this zone to chime, we can change this to "No". The chime feature provides 3 beeps and annunciation of "Fault + Zone Description" when the system is disarmed and the Chime Mode is enabled. In our example, the system would sound like this: "Beep, Beep, Beep, Fault Back Door".
7. Supervision will automatically be set to "Supervised" for zones 2 - 48, but you can change them to "Unsupervised" simply by toggling this selection on the screen. "Supervised" zones are expected to check in about once every 90 minutes by the panel, if they fail to do so for 12 hours straight, the system will generate a trouble condition on this zone. "Unsupervised" tells the panel if it fails to hear from an RF zone, we don't care, so don't tell us about it. This option is used on some portable wireless panic buttons that are expected to be carried off-site for extended periods of time.
8. Finally, the Zone Description 1 and Zone Description 2 options need to be programmed. When selecting descriptors, bear in mind the system will automatically speak the Device Type so you don't want to include this in your descriptor. If we want to say "Back Door" we'd select Zone Description 1 from the programming page, then begin typing B, A, C. As you type, the system will announce available words that match what you've typed so far. When you type B, it will say Baby, when you add A it will speak Baby again, and when you type the C, you will arrive at the word Back. Since this is the word we want, simply press "Done" at the bottom right and you'll be returned to the zone screen. Since the system will automatically say the word Door as the final word in our descriptor, we can leave Zone Description 2 blank.
9. Once all programming is done, press Save at the bottom right, then hit the back button to continue programming other zones. Or keep pressing the back button until you've backed all the way out of programming.
Did you find this answer useful?
We offer alarm monitoring as low as $10 / month
Click Here to Learn MoreRelated Products
Related Videos

Related Categories
- Home Security Systems
- Security Systems
- Wireless Alarm Systems
- Business Security Systems
- Apartment Security Systems
- Alarm Control Panels
- Honeywell LYNX Touch
- Answered
- Answered By
- Julia Ross