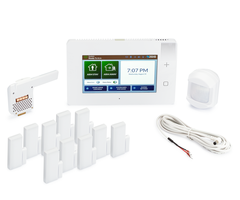
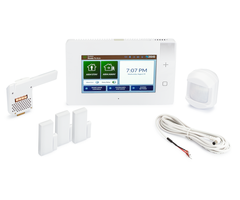
How Do I Program a Zone to a 2GIG GC3e?
You can program a zone to a 2GIG GC3e by putting the panel into programming mode and then configuring the zone settings. You will need to enroll the sensor's Serial Number with the zone. We recommend auto-enrolling sensors. A maximum of 100 zones can be set up with the 2GIG GC3e System.

The 2GIG GC3e supports 345 MHz sensors, such as one-way Honeywell 5800 Sensors and 2GIG 345 MHz Sensors. It also supports encrypted sensors from the 2GIG eSeries Lineup. Each sensor will take up at least one zone on the system. Some sensors will require multiple zones for full functionality. If a sensor uses multiple zones, then each of its zones will use a different Loop Number.
Complete the following steps to program a zone to a 2GIG GC3e:
1. Enter Wireless Zones Menu. Start from the main screen of the 2GIG GC3e. Click the 2GIG logo in the upper-right corner. Enter the system's Installer Code, which is 1561 by default. Choose System Configuration, followed by Wireless Zones. You will enter the Wireless Zones Menu.

2. Select a wireless zone. On the left-hand side of the screen, scroll to select the wireless zone you want to program. Wireless zones range from 001 to 100.
3. Configure the zone. Go through and configure the zone by adjusting each setting on the right-hand side of the screen. The options you will configure are listed below.
- Sensor Type: This is also commonly referred to as the Response Type. See this FAQ for more information GC3e Sensor Types.
- Equipment Code: This is the Equipment Code associated with the sensor you are programming. Scroll through the list, and find the sensor you are programming. If you cannot find the exact sensor, just choose an equivalent e.g. "Existing Door/Window Contact" for a door/window sensor. The exception to this rule is when you are using the new eSeries encrypted sensors by 2GIG. You must choose the exact Equipment Code specified for each of these sensors, or errant supervision trouble conditions will occur. Refer to the Installation Instructions for the eSeries sensor, or to page 46 in the Field Training Guide.
- Serial Number: This is the sensor's unique Serial Number. When you get to this option, choose the Learn button in the bottom-right corner. Then fault and restore the sensor. Its Serial Number should appear on the screen. Click Accept to continue.
- Smart Areas Assignment: This refers to the partitioning feature for the system. If you are not using partitions, just choose S1. Otherwise, choose the Smart Area where the sensor should be assigned.
- Equipment Age: Choose New or Existing. This has no effect on the zone.
- Sensor Loop: This ranges from 1 to 4 depending on the sensor. This setting determines which function of the sensor that the zone is monitoring. Some sensors can be programmed to multiple zones using different Loop Numbers for different functions. Refer to the sensor's instruction manual for more information regarding which Sensor Loop should be used.
- Transmission Delay: Set this to Disabled, unless you want the GC3e System to delay sending out an alarm signal when this zone triggers a system alarm.
- Voice Descriptor: This is what the panel will speak out when the sensor is faulted. It also serves as a name for the zone. If you want to change the Voice Descriptor, choose "Edit Voice Descriptor". You can only enter words based on what the panel is capable for speaking out. Once you have finished, choose "Done" in the bottom-right. Please note that you can still configure the Voice Descriptor without having the panel speak out the Voice Descriptor. Whether or not the panel will speak the Voice Descriptor is determined based on your selection for Sensor Chime.
- Sensor Reports: Choose Enabled, unless you don't want the system to send out an alarm signal when this zone triggers a system alarm.
- Sensor Supervised: Choose Enabled, unless you don't want the GC3e System to monitor for RF supervision. Disabling supervision is common for sensors that may be taken far away from the panel, such as key fobs and medical alert buttons.
- Sensor Chime: This determines what sound the GC3e will emit when the sensor is faulted. You can have the panel speak the Voice Descriptor and/or emit an audible chime tone when the sensor is faulted. If you do not want the system to produce any sound, choose Disabled.
4. Save the changes. Once you have finished configuring the settings, choose Return to System Configuration in the upper-right corner. Then press the return arrow on the left side of the screen. Choose Save. The zone will be configured based on the settings you provided.
Did you find this answer useful?
We offer alarm monitoring as low as $10 / month
Click Here to Learn MoreRelated Products


Related Videos

Related Categories
- Wireless Alarm Control Panels
- Wireless Alarm Control Panels
- Alarm Control Panels
- Alarm Control Panels
- Answered