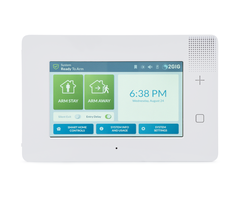
How Do I Properly Open the 2GIG GC3 or GC3e?
You can properly open the 2GIG GC3 or GC3e by loosening the set screw and then prying off the back plate. You don't need to fully remove the set screw. You can just loosen it enough to allow the front and back of the unit to be separated. Make sure to close the panel once you are finished.
.
The 2GIG GC3 and GC3e both have a back plate that must be removed to access the inside of the panel. This is done when providing power to the panel, changing the backup battery, and accessing the on-board terminals. You do not necessarily need to power down the system if you are replacing a cellular communicator, because the GC3e has a feature called Cell Radio Swap that you can use to safely swap communicators.
To access the Cell Radio Swap feature, click the System Settings button in the bottom-right corner of the main screen, enter the Installer Code (default 1561), and choose Cell Radio Swap. Then follow the on-screen instructions to replace the existing cellular module. When installing a new cellular communicator into a new 2GIG GC3 or GC3e, the panel should be completely powered down before installation.
Before you can open the GC3 or GC3e, you must loosen the panel's set screw. This screw is found at the bottom of the system. You should not remove the set screw entirely. Just loosen it enough to where you can open the GC3 or GC3e. This can be seen in the picture below. Note how the set screw is loose, but it has not been removed entirely.

If you need to open the 2GIG GC3 or GC3e, complete the following steps:
1. Put in test mode. If the GC3 or GC3e is monitored, then put your system on test mode first. This will prevent the central station from contacting you regarding the loose tamper cover. You can take the system off test mode once you have finished re-securing the system.
2. Loosen the set screw. Use a screwdriver to loosen the set screw for the GC3 or GC3e. Do not completely remove the screw. Simply loosen it so that it is no longer securing the panel to the back plate. You will tighten the screw later.
3. Separate from back plate. If the 2GIG GC3 or GC3e is wall-mounted, press the panel against the wall, and lift upward to remove it from the back plate. If the system is not wall-mounted, then lay it face-down on a desk or table, and pry off the back plate using your finger or a screwdriver. Please note that the tamper sound will occur once you remove the back plate. Do not be surprised or alarmed by this sudden sound. Press the Home button, or anywhere on the touchscreen to silence the system.
4. Make system changes. With the panel open, you can now perform any necessary hardware changes. Remember to power down the system first if you are working with the terminal block. Powering down the system requires unplugging the backup battery from its port and cutting AC power by either disconnecting the Honeywell LT-Cable or unplugging the transformer from the wall. When powering the system back on, connect the backup battery first, and then the transformer second.
5. Reapply the back plate. Once you have completed your work, you will reapply the back plate to the system. Remember to run any wires through the back plate first. If the system is wall-mounted then press the panel up against the wall so that the back plate locks into place. If the system is not wall-mounted then bring the back plate to the panel. Apply the back plate by latching the the upper tabs first, and then click the bottom into place.
6. Secure the set screw. Tighten down the set screw that you loosened earlier. This will ensure that the back plate remains secure at all times.
Did you find this answer useful?
We offer alarm monitoring as low as $10 / month
Click Here to Learn MoreRelated Products
Related Videos
Related Categories
- Answered


