How Do I Properly Test My SiXCOMBO?
You can properly test your SiXCOMBO by putting your system on test mode and then activating the sensor. The sensor can be activated by pressing one of its test buttons or by using canned smoke, canned CO gas, or a hair dryer. Smoke/Heat testing and CO testing are considered separate.

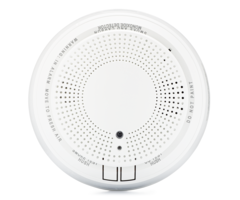
The Honeywell SiXCOMBO is a wireless combination smoke/heat and CO detector that is used with the Honeywell Lyric Alarm System. The sensor takes up three (3) zones on the system when every function is used. Testing the SiXCOMBO is very important after programming it to the Lyric. You should then test the sensor regularly to ensure that it is working properly. You will need to test the sensor at least once per year and have central station monitoring service to receive an updated smoke and CO certificate of alarm (CoA).
There are two (2) test buttons on the SiXCOMBO. The left button tells the sensor to transmit a Smoke/Heat signal to the panel. The right button tells the sensor to transmit a CO signal to the panel. All you need to do is press the button and wait for the signal to be sent. Do not press any other button on the sensor, unless you want to cancel the test. Upon receiving the signal, the system will go into an alarm, just like it would during an actual emergency. These buttons only test the signal transmissions from the sensor. If you want to test for actual functionality, then you will need canned smoke. a hair dryer, and canned CO gas. Put your system on test mode before testing the SiXCOMBO.

Once the system is in alarm, you can clear the alarm by performing a double disarm. This is done by entering the system's Master Code (default 1234, but usually changed), pressing the green home button on the front of the panel, and entering the Master Code again. When in doubt with the SiXCOMBO, just keep pressing the home button and entering your Master Code. As long as there are no other trouble conditions on your panel, the system should return to its Ready to Arm state. Keep in mind that while the first disarm silences the alarm, it does not clear the alarm. Only the second disarm (aka the double disarm) will clear the alarm and make the system ready for regular operation.
Complete the following steps to properly test your SiXCOMBO:
1. Put system on test mode. If you have central station monitoring service, then you must absolutely put your system on test mode before testing the SiXCOMBO in any manner. Failure to do so could result in a false alarm. You can put your system on test mode by contacting the central station company associated with your monitoring service. If you are monitored by Alarm Grid, then you can contact us at (888) 818-7728 and choose option (9) to be re-routed to the central station to put your system on test mode. We also allow end users to set up service with MyAlarms.com to put their own systems on test mode. Make completely sure your system is on test mode before continuing.
2. Test for Smoke/Heat. To test that the SiXCOMBO can successfully send Smoke/Heat signal to the panel, press the left button on the SiXCOMBO. You don't need to hold the button down. Just give it a press. The SiXCOMBO will begin speaking to provide current information about the sensor. At the end of the statement, the voice will announce that a test signal will be sent to the panel in five (5) seconds. Don't press any button on the sensor, unless you want the test to be cancelled.
The Lyric should then go into a fire alarm. To silence the alarm, enter the system's Master Code (default 1234, but usually changed). To fully clear the alarm, you must press the picture of the house on the front of the panel and enter the Master Code again. The act of entering the Master Code a second time is known as double disarm. You must perform this double disarm process to clear an alarm on the Lyric System so that it can be returned to a Ready to Arm state.
The button process only tests the ability of the SiXCOMBO to transmit a Smoke/Heat signal to the panel. If you want to test the sensor's ability to detect smoke and/or high temperatures, then you will need to perform additional testing. To test for smoke detection, direct canned smoke into the vents as shown in the picture below. Remember that if the Verify option is enabled in zone programming for the smoke zone, then you must activate the sensor twice (2) within a short period of time before the alarm will occur. Please read this FAQ on Fire With Verification for more information. To test for heat detection, use a hair dryer on its maximum setting, as seen in the picture below.
 3. Test for CO detection. The same general principles for testing for Smoke/Heat also apply to testing for CO gas detection. The right button on the device is for CO testing. Press this button to begin the testing process. You only need to press the button. You don't need to hold it down or repeatedly press. The SiXCOMBO will then begin speaking. At the end, it will say that a CO alarm signal will be sent to the panel in five (5) seconds. As long as you don't cancel the alarm by pressing a button, the CO alarm should occur on your system. Clear the alarm using the double disarm process that was covered earlier in this FAQ.
Just like with the Smoke/Heat test button, the CO test button does not test the ability for the SiXCOMBO to actually detect and respond to real CO gas. You are only testing the ability for the sensor to transmit alarm signals to the panel. If you want to test the sensor's ability to respond to CO gas and alert the system, then it is necessary to use canned CO gas. Be very careful when using this gas, as it is harmful to humans and pets. You should direct the CO gas into the CO Gas Port as shown in the picture below. Remember to clear the alarm with a double disarm after you perform the test.

Did you find this answer useful?
We offer alarm monitoring as low as $10 / month
Click Here to Learn MoreRelated Products
Related Categories
- Combination Smoke/Heat Detectors
- Combination CO/Smoke Detectors
- Wireless Combination CO/Smoke Detectors
- Combination CO/Smoke Detectors
- Answered