Honeywell SiXSeries Programming and Best Practices
Related Products


Related Categories
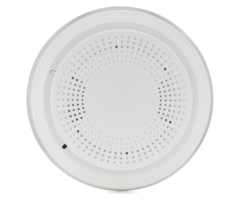
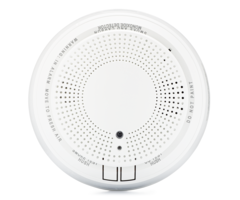
- Honeywell SiX Smoke Detectors
- Honeywell SiX Sensors
- Honeywell Six Motion Detectors
- Honeywell SiX Key Fobs
- Honeywell SiX Heat Detectors
- Honeywell SiX Glass Break Detectors
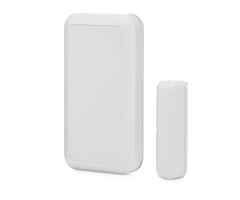
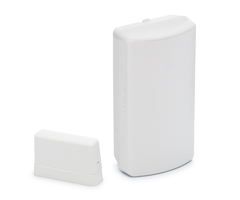
- Honeywell SiX Door Sensors and Window Sensors
Document Transcript
Technical Support Help Doc
Security.
Honeywell
.com 1/25/2018
Page |
1 of
9
Company Internal
SiX™
Transmitter Programming and Best Practices
Overview
SiX™
series wireless
is a
2-way wireless
technology that operates on 2.4GHz
frequency
. SiX™
series
transmitters use a 16 digit MAC address that must be learned and
paired with a
compatible system.
Once paired with the system, they cannot be used with a different system until they are unpaired from the
current system. They can be unpaired by either deleting the transmitters from zone programming
or by
defaulting
the panel while the transmitter
is within range.
When a SiX™
device is deleted from a panel,
the panel sends a signal to the transmitter to tell it that it has been deleted and unpaired*
. Each
transmitter can also be defaulted within 24 hours from being paired. Each time a SiX™
transmitter is
learned and paired with a panel, the 24hr default window restarts.
*SiXFOB
’s require a keypress to init
iate the unpairing.
This document explains the best practices for
programming
SiX™
series
transmitters
into the Lyric
Controller and Lyric
Gateway
systems
.
Table of Contents
Overview
.......................................................................................................................................................
1
Table of Contents
..........................................................................................................................................
1
Local Programming on the Lyric Controller
...................................................................................................
2
Programming SiX™ Devices via AlarmNet 360 App or AlarmNet 360 Website
...........................................
3
SiX™ Series Signal Level Chart
...................................................................................................................
8
Defaulting SiX™ Series Devices
...................................................................
Error! Bookmark not defined.
Technical Support Help Doc
Security.
Honeywell
.com 1/25/2018
Page |
2 of
9
Company Internal
Local Programming on the Lyric Controller
Learning
and pairing
SiX™
series
transmitters into the Lyric Controller can be done 2 different ways; The
easiest and most efficient method is using SiX Programming mode
or SiX Batch mode,
which learns,
pair
s, and programs
all your
SiX™
transmitters, one after another
, as you walk around and trip them
. The
alternate method, individual zone programming, allows you to learn, pair, and program one transmitter at
a time.
Method 1
– SiX
Programmin
Mode
(Preferred
Method
)
- SiX Programming Mode
learns, pairs, and
sets
basic programming just by tripping the dev
ice.
This mode
can be used to quickly enroll single or
multiple
SiX
-series sensors (
except SiXFOB
S*). To
enter
SiX Programming
mode, enter I
nstaller Program
mode, Page down and select
‘SiX
Programming’
. The panel is now ready to learn
devices
. Simply power
up or fault each transmitter, watch the green LED flash on the transmitter, then turn solid indicating it is
learned and paired and you’re ready to activate the next one, and so on. As each transmitter is learned
and paired, they are placed into the next consecutive available zone in the panel, starting with zone 3.
After
a device is learned and paired
it is assigned
a zone type based on the type of SiX™
series
transmitter it is
and
the zone will display the battery and signal levels o
f the transmitter. Once all of the
transmitters have been tripped,
select
each
transmitter in the list
‘, then press
‘Edit
’ to
program
all the zone
details for that transmitter
such as Response Type, R
eport code, chime option, and z
one descriptors
,
then press
SAVE
to
add the zone to the p
anel. Press the ‘
Back
’ arrow to leave the SiX Programming
screen. Any transmitter that was on the list that w
as not ‘
Edited and Save
’ prior to leaving this M
ode
wil
l
be deleted and unpaired immediately.
After all zones are programmed
and you exit programming mode
they
will
be
synced
with Alarm
Net 360.
*SiXFOB
’s must be programmed separately in
‘Keys
’ programming
Batch Enroll Mode
(Alternative
Method
)
– Batch Enroll Mode
also
learns, pairs, and sets
basic
programming just by tripping a
ny SiX
dev
ice
except SiXFOB
’s and SiX Keypads
*. To
enter Batch
Enroll
mode, enter Z
one
Programming and select “
SiX Batch
Start”. The panel is now ready to learn
device
s.
Simply power up or fault each transmitter, watch the green LED flash on the transmitter, then turn solid
indicating it is learned and paired and you’re ready to activate the next one, and so on. As each
transmitter is learned and paired, they are placed into the next consecutive available zone in the panel,
starting with zone 3. After
a device is learned and paired
it is assigned
a zone type based on the type of
SiX™
series transmitter, and the zone will display the battery and signal levels of the transmitter. Once
all of your transmitters have enrolled press “
SiX Batch Stop
”. Now you can go into each
zone
and select
specific
attributes such as Response Type, R
eport code, chime option, and z
one descriptors
. To do this,
select a zone, then “EDIT”, make necessary changes and “SAVE”.
After all zones are programmed, they
will
be
synced
with Alarm
Net 360.
*SiXFOB
’s must be programmed
manually
in ‘Keys
’ programming, SiX Keypads must be programmed in
‘RF Keypad’
programming.
Method 2
- Individual Zo
ne Programming
– Learn, Pair, and Program each transmitter individually. To
program them individually, enter zone programming, select “ADD NEW” or select a specific zone then
“EDIT”. Touch the “Serial Number” box. At this point you can power up or fault t
he transmitter
and watch
the green LED flash rapidly then go solid as it l
earns
and pair
s with the panel
. The MAC number and
transmitter type will show on the display.
Select “Done”, then
finish programming the zone attributes and
touch “S
AVE”. Once compl
ete, the panel will sync with Alarmnet 360.
Technical Support Help Doc
Security.
Honeywell
.com 1/25/2018
Page |
3 of
9
Company Internal
Webpage View
App View
Programming
SiX™
Devices
via AlarmN
et 360
App
or
AlarmNet
360
Website
The Lyric Gateway requires programming be done via AlarmNet 360, and this method can also be used
for the Lyric Controller. T
here are two ways to program SiX™
transmitters into the Lyric using AlarmN
et
360 app or
the
AlarmNet
360 web site. The recommended method, which is especially efficient with the
Mobile App, is to use the “LEARN”
button to l
earn and p
air the transmitter at
the same time, then select
the zone details and move to learning the next zone. The alternate method is to manually
program
each
SiX™
transmitter
’s MAC address and zone details
into AlarmNet 360,
sync
the into
to the panel
, then Pair
the transmitters later
. Either way will
require the transmitters to be paired to the panel via RF
transmission.
Method 1 -
Learn, Pair, Program all at once (Preferred
Method
)
- To learn and pair
SiX™
transmitters
via the AlarmN
et 360
Mobile App (
or the
AlarmNet
360 website)
, open the Account and navigate to the
“SENSORS” page and select “
+ SENSOR”. Choose your
SiX™
sensor
type
from the
list
and s
elect
“Learn Sensor
”. The examples on the left are screen shots from the AlarmNet 360 web site and the
screen shots on the right are from the AlarmNet 360 Mobile app.
Technical Support Help Doc
Security.
Honeywell
.com 1/25/2018
Page |
4 of
9
Company Internal
App View
App View
Webpage View
Webpage View
AlarmN
et is initiating connection to the Lyric system
to put it in learn mode.
The Lyric system is now in learn mode and ready to
learn and pair a
SiX™
transmitter. Activate
the sensor by either powering it up or by faulting it. Watch the Green LED on the transmitter flash
rapidly, then go solid.
Technical Support Help Doc
Security.
Honeywell
.com 1/25/2018
Page |
5 of
9
Company Internal
App View
App View
Webpage View
Webpage View
After the
SiX™
sensor is learned and paired,
you will receive a
green check mark indicating
such
. Now
you can program the rest of the zone options such as Zone Response and Device Type, Zone
Descriptors, Chime, etc. After
completion, you can “SAVE” or if you need to learn and pair additional
SiX™
devices,
choose “SAVE AND ADD ANOTHER”
at the bottom
.
Method 2
– Using AlarmNet 360 to
Program the MAC and Zone Attributes and Pair Later
– Although
not optimum, y
ou
do have the option to
manually program the SiX™
transmitter
s MAC addresses
into the
Lyric
Controller or Gateway
panel, but you will then have to Pair them in later
. To do this, select Add
Sensor and
select the type of SiX™
sensor
, type in the MAC address
along with all other zone options
,
then
press
either “SAVE AND ADD ANOTHER” or “SAVE” when finished.
Technical Support Help Doc
Security.
Honeywell
.com 1/25/2018
Page |
6 of
9
Company Internal
App View
App View
Webpage View
Webpage View
Notice the SiX™
sensor’s zone status shows
“Not Paired”
. This is because the panel has not received
any wireless transmissions from the transmitters
to pair them together
.
When you are ready to pair the
SiX™
sensors to the
Panel
, use
AlarmNet 360 to put the panel in a
pairing mode (on the Controller this can also
be done from the panel, shown on the next page) open the
Account and n
avigate to the “SENSORS” page, select
“ADD SENSOR”, select a
SiX™
device, then,
“LEARN”. This will put the Lyric panel into learn mode and will
be able to
pair each SiX™
transmitter.
Wait for the screen to display that the panel is ready to learn, then s
imply pow
er up or fault each
transmitter and watch the green LED flash, then turn solid indicating it is learned and paired and you’re
ready to activate the next one, and so on.
Technical Support Help Doc
Security.
Honeywell
.com 1/25/2018
Page |
7 of
9
Company Internal
On
the Lyric Controller Pairing can be done without using AlarmNet 360 by entering program mode. T
he
“Not Paired” status will be reflected
locally
in the zone programming as “Enter Serial No. or Activate
Sensor”.
When this is displayed you can
“Pair” all you
r transmitters by
select
ing
“SiX Batch Start”
or by
entering
‘SiX Programming’
. Power up or fault each transmitter one at a time and watch the green LED
flash, then turn solid indicating it is learned and paired
with the Controller.
Once complete, each zone will show battery and sig
nal levels of each of the SiX™
transmitters indicating
they are learned and paired with the system.
Press “
SiX Batch Stop” to exit the learn mode
Technical Support Help Doc
Security.
Honeywell
.com 1/25/2018
Page |
8 of
9
Company Internal
App View
Webpage View
After learni
ng and pairing all programmed SiX™
sensors,
they
will show as “Paired” in AlarmN
et.
SiX™
Series Signal Level Chart
Signal Level chart for SiX™
series transmitters.
STEPS TO DEFAULT SiX SERIES DEVICES
Defaulting a device may be necessary
if the device is
enroll
ed in a panel
(paired
with a panel)
in a
location that is different than the
intended
panel
, and the installer does not have access to the
unintended
panel to delete the sensor.
Each device
provides
visual indicat
ion
showing whether
or not
it is paired with a controller.
This is
described
in the table below
for each device
.
The procedure to default each device is primarily the same
(except
for
the keypad and key fob): Open
the device cover, remove the battery, activate the tamper switch, and then reinstall the battery while
the tamper switch is still held down.
For devices ot
her than the SiXFOB, t
his process is available for
24 hours after enrollment with the panel
and while the
device
remains powered
(battery
installed
in sensors; AC
power
applied at keypad)
. For
the SixFOB, this process expires after the first 100
transmissions.
PROCEDURES
MODEL
DEFAULT P
ROCEDURE
PAIRED
/NOT PAIRED
INDICATION
SiXCT
1.
Open the cover.
2.
Remove the battery.
3.
Hold the tamper switch down.
4.
Reinstall the battery while still holding
the tamper switch down.
Indicator
Paired
Not P
aired
Green LED
slow blink
when tamper
faulted
fast
blinking
SiX
SIREN
1.
Open the cover.
2.
Remove the batteries
.
3.
Hold the tamper switch down.
4.
Reinsta
ll the batter
ies while still holding
the tamper switch down.
Indicator
Paired
Not P
aired
Green LED
slow blink
when tamper
faulted
fast
blinking
SiX
SMOKE
1.
Open the cover.
2.
Remove the batteries.
3.
Activate the tamper with a magnet.
4.
Reinstall the batteries while still
activating the tamper switch.
Indicator
Paired
Not P
aired
Green LED
slow blink
when tamper
faulted
fast
blinking
SiX
GB
1.
Open the cover.
2.
Remov
e the battery.
3.
Hold the tamper switch down.
4.
Reinstall the battery while still holding
the tamper switch down.
Indicator
Paired
Not P
aired
Green LED
slow blink
when tamper
faulted
fast
blinking
SiX
PIR
1.
Open the cover.
2.
Remove the battery.
3.
Hold the tamper switch down.
4.
Reinstall the battery while still holding
the tamper sw
itch down.
Indicator
Paired
Not P
aired
Green LED
slow blink
when tamper
faulted
fast
blinking
LKP500
-
EN
(SiX KEYPAD
)
1.
Press the 3 key until the advanced menu
is displayed
2.
Scroll until
“Default
” is displayed.
3.
Press select.
Indicator
Paired
Not P
aired
Status icon
slow blink
fast
blinking
SiX
FOB
1.
Press and hold the
three white
buttons
simultaneously for
six
seconds.
Th
is process is available
for the first 100
transmissions from the key
fob.
Indicator
Paired
Not P
aired
both
LED
s
LEDs
no t
blinking
alternating
,
fast
blinking
- Uploaded