How Do I Add a VERSA-DSC Contact to a DSC Impassa?
You can add a VERSA-DSC Door and Window Contact to a DSC Impassa by accessing the wireless enrollment mode on the system and then activating the sensor's tamper switch. The system will automatically recognize the sensor, and it will be learned in. Its settings can then be configured.
To enroll a VERSA-DSC Contact to a DSC Impassa, complete the following steps:
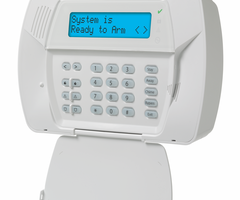
1. Enter enrollment mode. Start from the main screen of the DSC Impassa. With the system disarmed, enter in the command [*] [8] [Installer Code] [898]. The default Installer Code for a DSC Impassa System is 5555. If the screen displays "wireless enrollment mode", it means that the menu was accessed successfully. A new sensor can then be learned-in with the system.
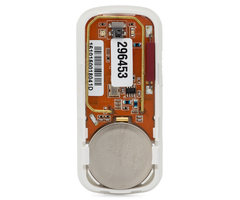
2. Enroll the sensor. The sensor can be automatically learned-in by having the system recognize the sensor. To do this, simply open up the back of the VERSA-DSC Contact. A battery will need to be inserted into the device when doing this. The DSC Impassa should recognize and enroll the sensor. After doing this, the sensor's serial number should be displayed on the screen. Verify that the serial number is correct, and then press the [*] key. Next, the system will display the next open zone number on the system. You can select this zone by pressing [*], or you can use the keypad to enter in a different 2-digit zone number (01-64), followed by the [*] key to select the zone. Make sure that the zone you choose is available.
3. Configure the settings. The next step is to choose the Zone Type that will be associated with the zone. This tells the system how to respond when the sensor is activated. For a contact sensor, we often recommend using a Zone Type of 01 for Delay. You can also enter in a different 2-digit Zone Type using the keypad. Once the appropriate Zone Type is displayed, press the [*] key to continue. A complete list of all Zone Types is available on pages 44 thru 46 of the DSC Impassa Manual.
4. Test the device. The system will then ask you to test the sensor. The message "Activate Device for Test, Exit #". will be displayed to indicate this. To test the sensor, first mount it in the desired location. Open the door or window to separate the magnet from the sensor and release the sensor's internal reed switch. The system will confirm that the sensor is working properly. Once you have finished, press the [#] key to exit and return to the home screen.
Did you find this answer useful?
We offer alarm monitoring as low as $10 / month
Click Here to Learn MoreRelated Products


Related Categories
- Home Security Systems
- Business Security Systems
- Apartment Security Systems
- Small Business Security Systems
- Monitored Home Security Systems
- DIY Wireless Security Systems
- Answered