How Do I Reset a Honeywell Camera to its Default Settings?
To reset a Honeywell camera to its default settings, simply press and hold the camera's reset button for 12 seconds. The power light will begin blinking, indicating a successful reset. On certain models, other lights, such as the network light and the active light, may also begin blinking.
A user may need to reset their Honeywell camera in the event that they made unwanted changes to the camera's settings, and they want to revert these changes to how they were set when the device was first activated. A reset can also be used to remove the IP address associated with the device so that it can be used with another system for the same user.
Please note that resetting the camera will not "release" the device from the Total Connect 2.0 account to which it is assigned. You must contact the alarm dealer that handles the account to have it deleted from its original account and allow it to be used with a new account.
To reset a Honeywell camera to its factory default settings, complete the following steps:
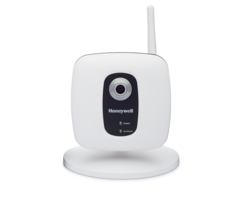
1. Locate the reset button. The camera's reset button can usually be found on the back of the device, but it may vary between different models. Below is a picture of the reset button on a Honeywell IPCAM-WL:

2. Press the reset button. Press and hold the reset button for 12 seconds to initiate a factory reset. On some devices, it may be necessary to use a paperclip or a similar thin object to properly access the button. The camera must be powered on at this time in order for the factory reset to be successful.
3. Confirm the reset. A successful factory reset is indicated by a blinking power light. On certain devices, the network light and the active light may begin blinking as well. Once the camera has been reset, any changes made to its settings will be returned to default. This will allow the user to set the camera up as though it is fresh from the factory
After the device completes its initialization process, the blinking lights will return to solid. This should take about 20 seconds on most devices.
All IPCAM Install Guides contain the following NOTE: If the camera is being used in a wireless mode and the Reset button on the back of the camera is used to restore factory defaults, you must delete that camera from the AlarmNet Direct account, enroll it back into the account, then reconfigure wireless security for that camera.
Did you find this answer useful?
We offer alarm monitoring as low as $10 / month
Click Here to Learn MoreRelated Products
Related Categories
- Answered