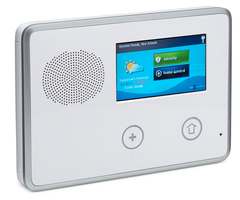
How Do I Use the 2GIG Easy Updater Tool to Update a GC2 Panel?
In order to use the Updater Tool, the GC2 must be Firmware version 1.5 or higher. Remove AC and battery power from the GC2. Once the panel is powered down, plug the connector from the Updater Tool into the port on the panel. Plug in battery then AC. Press the "Start" button on the tool.
These instructions assume that the Updater Tool is on the most recent version of Firmware for the 2GIG GC2. If it is not, see how to update it here. The updater tool may be required for older GC2 panels that do not currently have a cellular communicator installed. These panels may require an update to support a newer communicator, such as the 2GIG-LTEV-A-GC2 communicator. This communicator requires Firmware version 1.17 or higher. If you have an older version of the GC2 with no communicator, or possibly with a communicator that is no longer working, the only way to upgrade the panel is by using the Updater Tool or with the 2GIG UPCBL2 updater cable and a computer.

1. Verify the version. From the Home screen on the 2GIG GC2, press Security > Menu > Toolbox > Enter Master Code (default is 1111) > right arrow once > Version. The current firmware version will be displayed in about the middle of the screen. Make sure it is version 1.5 or later.
2. Power down. Unscrew the set screw from the top of the 2GIG GC2, and put it in a safe place. Pull the front of the panel forward until it separates from the back mounting plate. A flat head screwdriver may be required to pry the front and the back apart. Use the third hand strap to suspend the front of the panel from the back. Unplug the battery. Finally, unplug the panel's AC Transformer from the outlet. The panel should now be dark.

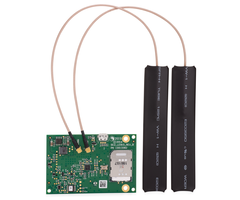
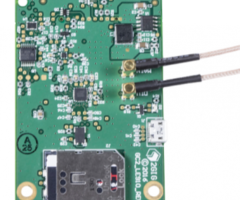
3. Connect the Updater Tool. Using the pigtail, connect the Updater Tool to the 2GIG GC2. You will not use the 4-pin cable adapter when updating the panel. When making the connection, make sure the 2GIG logo on the pigtail is pointed towards the cellular radio or towards the spot where the radio will be installed.


4. Power the system. Plug in the battery connector. Next, plug the transformer back into the outlet. Once the panel is powered and booted completely, press the "Start" button on the Updater Tool. The update will begin. You may see the following indications on the Updater Tool:
When 'F' is being displayed, it will also display a number, 1 - 100. This is to indicate what percentage of the process is completed. When it gets to F100, the process is complete. The panel will reboot, and speak status. Next, the Updater Tool will provide a long two second beep and show "done". After about 10 seconds, the Updater Tool will provide a shorter half-second beep, and it will continue to do so at 10 second intervals. At this point, it is safe to unplug the Updater Tool.
5. Re-mount and verify the version. Re-attach the main panel to the back mounting plate. Make sure it snaps securely into place with no wires pinched. Re-insert the locking screw at the top of the panel, and tighten it down. If you do not re-install this screw, the panel's own weight will pull it free off the back plate. Finally, verify the update by following the instructions outlined in Step 1 to verify the version.
Did you find this answer useful?
We offer alarm monitoring as low as $10 / month
Click Here to Learn MoreRelated Products
Related Videos

Related Categories
- Answered
- Answered By
- Julia Ross