How Do I Use the Honeywell 5800C2W With a 2GIG GC3 or GC3e?
You can use the Honeywell 5800C2W with a 2GIG GC3 or GC3e by removing the wired sensors from your old wired panel, reconnecting them to the 5800C2W zone inputs, putting the GC3 or GC3e in its programming mode, and enrolling the sensors with the system like you would for wireless sensors.
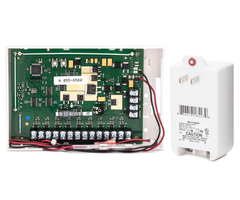
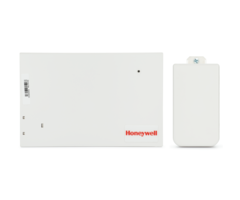
 If you are upgrading to a 2GIG GC3 or 2GIG GC3e from a wired panel, then it's likely that you have existing wired sensors that you want to continue using with your new wireless system. One way you could do this is with a compatible wired to wireless converter, such as the Honeywell 5800C2W. The hardwired sensors will connect with the wired zone terminals on the 5800C2W, and the converter module will send 345 MHz wireless signals to the GC3 or GC3e on behalf of the wired sensors. The GC3 or GC3e will treat the wired sensors as wireless sensors.
Remember that there are only nine (9) zone inputs on the 5800C2W, which translates to nine wireless zones on the GC3 or GC3e. If you need to use more than nine zones to support all of your wired sensors, then you will need to use more than one 5800C2W module. And if you are using more than one 5800C2w, then it is very important to note that you cannot share a backup battery or a transformer between multiple units. Each 5800C2W will need its own backup battery and plug-in transformer. Also, keep in mind that wired life-safety sensors like smoke detectors and carbon monoxide sensors cannot be used with the Honeywell 5800C2W.
The process for using the Honeywell 5800C2W with a GC3 or GC3e involves setting up the wired sensors with the 5800C2W, and then programming the connected sensors with the GC3 or GC3e. The entire process is outlined below in two (2) sets of steps. First, complete the following steps to set up the wired sensors with the 5800C2W:
1. Mark wires. The process of bringing your wired sensors from your old wired panel to your new GC3 or GC3e is much easier if you stay organized. It is strongly advised that you mark the sensor wires so that you know which sensors they are used with. You may find that the original installer already did this. If not, then you can do this yourself with the help of a friend. Have your friend go around and fault, or activate, all of the wired sensors on the premises (e.g. open doors/windows, walk in front of motion sensors, etc.) while you watch the system keypad and observe which zone number and/or zone descriptor appears for each sensor fault. Then check the old panel's wiring diagram, map the wires to the system zones, and mark each wire accordingly. You will surely thank yourself for this.
2. Power down wired panel. Your wired panel is being replaced, so you should power it down. Unplug the system transformer. If you're unable to find the transformer, then remove power by switching off the appropriate breaker. Remove battery power by unplugging the leads from the panel to the backup battery. Once you remove AC power and battery power, the system will power down. Check and make completely sure that the system is receiving no power before continuing.
3. Transition to 5800C2W. Now the real work begins. Whenever possible, move wires from the old wired panel to the 5800C2W one at a time. Most wired panels are housed in an enclosure, and you can continue using the enclosure to store the 5800C2W backup battery. But you cannot store the 5800C2W itself in a metal enclosure because it may cause wireless communication problems. You may be able to use the panel's existing backup battery with the 5800C2W. The requirement is that the battery must be rated at 12V, 4Ah, and it must still have sufficient charging and storage capability. If the battery is more than a few years old, it is probably best to replace it. If you need a new battery, then the UltraTech 1240 is what we recommend. Just mount the 5800C2W next to the battery enclosure if one is being used.
If your wires are well marked, you may be able to disconnect all wires at the old panel, prior to connecting them to the 5800C2W. If that's the case, once you have all the zone wires disconnected from the wired panel, you should then connect them to the 5800C2W zone inputs. For 4-wire sensors that draw panel power like motion sensors and glass break detectors, the two (2) power wires will go to the 5800C2W auxiliary terminals, which are labeled 12VAUX and GND. It is also very crucial to note that every active 5800C2W zone that is set up with a wired sensor will need an End-of-Line Resistor (EOLR). The 5800C2W supports EOLR learning for resistor values ranging from 1k to 10k. There are nine (9) resistors included with the 5800C2W for this job, in case you are replacing a panel that didn't have resistors already wired into the zones. These are 2.2k ohm resistors, color-coded Red-Red-Red-Gold. If you need to connect new resistors, then they should be wired in Series for Normally Closed (NC) sensors, or in Parallel for Normally Open (NO). Continue to the next step once all of the sensors are connected to the 5800C2W and properly set up with End-of-Line Resistors.
4. Calibrate the 5800C2W. It is now time to calibrate the 5800C2W. Put all of the sensors in their "normal" state. All doors and windows should be closed, no motion detectors or glass break sensors should be detecting activity, and no other sensors should be active. Then you can calibrate the unit. Just press and release the Zone Calibration Button on the Honeywell 5800C2W, which is the SW2 button. The first LED on the 5800C2W should flash red briefly and then turn solid green, indicating that calibration was successful. Remember that if any zone is not in its normal state, or if any sensor is not set up properly with an End of Line Resistor, then that zone will not be calibrated by the 5800C2W. In that case, the 5800C2W will behave as if that zone does not exist. Should that happen, then you must recalibrate the entire unit. Do this by putting each and every connected sensor into its normal, non-faulted state with an End of Line Resistor properly wired, and then press and release the SW2 Calibration Button on the 5800C2W again.
 |
 |
Now it's time to program the wired sensors with the wireless zones of the GC3 or GC3e. The programming process is the same on both systems. This FAQ covers GC3e Zone Programming, and you can follow that same general process for the original GC3. We also briefly cover the programming process below. Complete the following steps to program your 5800C2W zones with the GC3 or GC3e:
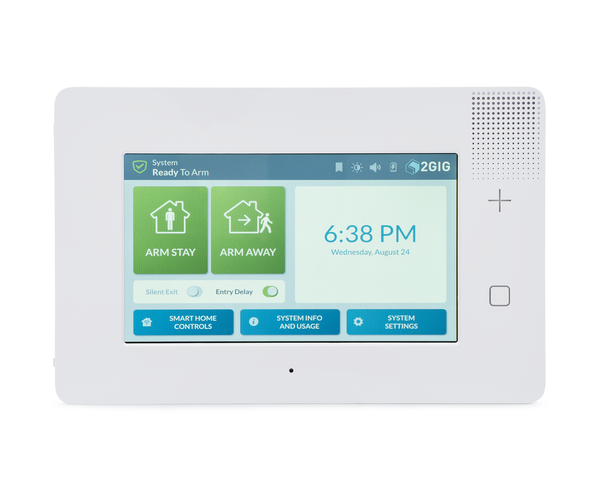
1. Get into wireless programming. From the main screen of the GC3 or GC3e, click the 2GIG logo in the upper-right. Then provide the Installer Code for the system, which is 1561 by default. Select System Configuration, then Wireless Zones. This is the wireless programming menu.
2. Choose a zone. Each zone input on the 5800C2W will use its own zone on the GC3 or GC3e. The wireless zones range from 001 to 100. Choose an open zone to program a sensor.
3. Configure the zone. Now you will configure the settings for the zone. The settings are listed below:
- Sensor Type: Also known as the Response Type. This FAQ outlines Sensor Types on the GC3e, and they are the same on the GC3.
- Equipment Code: Since you are using 5800C2W zones, just choose the equivalent "Existing" Equipment Code, such as "Existing Door/Window Contact" or "Existing Motion Sensor".
- Serial Number: The Serial Number for each 5800C2W zone will be based on the 5800C2W Serial Number itself. For example, if the sticker on the 5800C2W shows a Serial Number of 1011230, then the Zone 1 input will have a Serial Number of 1011231, and the Zone 2 input will have a Serial Number of 1011232, and so on. Click the Learn button in the bottom right. Then fault and restore the wired sensor you are learning in. A Serial Number should appear on the GC3 or GC3e. If this is the correct serial number for the input you're attempting to program, press Accept.
- Smart Areas Assignment: This is for the zone's partition assignment. Choose the desired Smart Area Partition, or just choose S1 if partitions are not being used.
- Loop Number: All 5800C2W zones will use Loop 1.
- Transmission Delay: Choose Disabled in most cases. Enabling this option will have the system delay before sending out an alarm signal when this zone triggers an alarm.
- Voice Descriptor: This is for the panel's Voice feature, and it also names the zone, i.e. Front Door, Kitchen Window, etc. Press the "Edit Voice Descriptor" button and enter in available words if you want to name the sensor. Whether or not you use the Voice feature for the zone will depend on the Sensor Chime setting, which you set later on.
- Sensor Reports: Choose Enabled, unless you don't want the system to send out an alarm signal if the zone triggers a system alarm.
- Sensor Supervised: For a 5800C2W Zone, it's advised to keep this Enabled.
- Sensor Chime: This is the sound the system will make when the zone is faulted. Remember to choose an option with Voice if you want to also hear the Voice Descriptor for this zone.
4. Repeat for other zones. Go and repeat the programming process for all of the other 5800C2W zones you are using. Continue until all of the 5800C2W zones are programmed.
5. Save the settings. Once you have programmed all of the 5800C2W zones you are using, click the Return to System Configuration button in the upper-right. Then click the Return Arrow on the left-hand side. Press Save. All of your settings will be saved.
Did you find this answer useful?
We offer alarm monitoring as low as $10 / month
Click Here to Learn MoreRelated Products


Related Categories
- Answered