How to setup an IP Camera with Tuxedo Touch
Related Products


Related Categories
Description
FEATURED PRODUCT(S)
Honeywell Tuxedo Touch https://www.alarmgrid.com/products/honeywell-tuxedo-touch
Honeywell Tuxedo Touch WIFI https://www.alarmgrid.com/products/honeywell-tuxedo-touch-wifi
FEATURED CATEGORIES
Home Automations https://www.alarmgrid.com/browse/home-automation
Alarm Keypads https://www.alarmgrid.com/browse/alarm-keypads
ALARM GRID
This video was made by Honeywell and proudly distributed by Alarm Grid Security monitoring and accessories http://www.alarmgrid.com. Alarm Grid is a home security company focused on the experience of the customer. We offer no contract alarm monitoring that allows you more choices without sacrificing the quality of your monitoring. We are here to help you protect your life's most important assets without the hassle of being caught in a contract with no way out.
Transcript
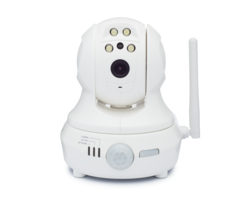
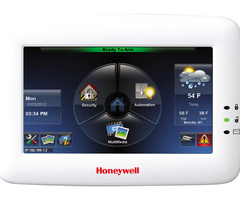
To enroll an IP camera for the first time, connect a Category 5 cable from your router to the IP camera. Then attach the power cable to the camera. From the home screen press the multimedia icon. This screen allows you to select pictures, messages, video clips, or live cameras.
Press the camera icon. You will see the camera view screen. The camera icon should be highlighted. If not, press the camera icon. Now press the camera setup icon. You will see a camera list, which is initially blank, until we enroll cameras.
We will now scan for all cameras currently connected to the router. Press the scan cameras icon. The Tuxedo will show it is scanning, and start displaying cameras by IP address, as it finds them.
Press the IP address of the camera then press the camera configuration icon. Press the name window and for this example, name this camera back door cam then press the OK icon. Press the apply icon. This will return you to the camera list screen and you will now see your named camera listed.
If you want to use the wireless capabilities of the camera do the following. Select the camera you want to set from the list. Press the wireless settings icon. We need to enter the wireless router information. The wireless router in this example shows the SSID, and the WPA key, written down by the homeowner.
Press the window next to SSID and enter the SSID name, in this case Belkin. Hold down the menu for security system, and select WPA2. Now press the window next to shared key and enter your WPA2 key. Press the, apply to all icon. You will see a prompt showing each camera setting.
Press the apply icon. Place your camera in a location of your choosing. This example shows a wireless setup. From the home screen, press the multimedia icon. Press the camera icon. Select the camera name. In this case, back door cam. Press the play icon. Now you should see video from the camera.
- Uploaded
- Duration: