How Do I Install the PROWIFIZW in a LTEM-PA or LTEM-PV?
Power down the LTEM-P Series communicator completely. Remove the front cover of the communicator. The Resideo PROWIFIZW will connect to the mainboard on the upper left side. Slide the module onto the connector making sure it locks into place. Then power the communicator back up and configure.
In the past, if a user wanted to have their Honeywell IP-capable external communicator use WIFI, they had to do so using an Ethernet to WIFI adapter, such as the Alarm.com ADC-W110. But now, with the introduction of the Resideo LTEM-PA and LTEM-PV ProSeries communicators, the PROWIFIZW or PROWIFI module can be added, allowing the device to connect directly to WIFI. These communicators also have an Ethernet port, so if hardwired Ethernet is available, it can be used. Only one IP connection, either WIFI or Ethernet, can be selected. The PROWIFI adds only WIFI capability to the system, without adding support for Z-Wave device control, but the installation process is exactly the same.
In addition to adding the capability to connect directly to WIFI, the PROWIFIZW also allows the account to support Z-Wave integration. This allows a panel such as a VISTA-20P, VISTA-15P, or even some Non-Honeywell wired systems to access Total Connect 2.0 and control Z-Wave devices. Allowing customers who don't necessarily want a Honeywell Home Tuxedo Keypad to gain access to remote home automation with less expense. While Z-Wave control is possible with this setup, it is important to note that you will not have the ability to use smart scenes within TC2. Smart scenes allow you to setup automations that are triggered by a Z-Wave device or causes an action on a Z-Wave device. This is not an option when using the PROWIFIZW module with the LTEM-PA or LTEM-PV.
To install the PROWIFIZW or PROWIFI module into the LTEM-PA or LTEM-PV, do the following:
- Power down. If the communicator has been powered up, then power it completely down by unplugging the DC power adapter, removing the cover, and unplugging the battery. We recommend unplugging the RED battery lead. All LEDS should be off, indicating that the unit is powered down. To remove the cover, you may need to remove the set screw on the bottom edge of the communicator. Then press in on the two locking tabs at the bottom of the unit, swing the bottom forward slightly, then raise straight up to clear the two tabs at the top and remove the cover.
-
Remove foam. There is a piece of foam just below where the PROWIFIZW will connect to the board on or near the Fingerstock Clip. Remove this piece of foam and make sure that the Fingerstock Clip is in the proper position based on the images below.


-
Install the PROWIFIZW. Slide the PROWIFIZW connector over the LTEM-PA or LTEM-PV communicator's upper left edge connector (shown above). The module will slide from left to right in order to be properly positioned. Press the PROWIFIZW straight back once the connector is in position so that it is secured under the clip tab shown in the image above. Install the provided locking screw to secure the PROWIFIZW in place.
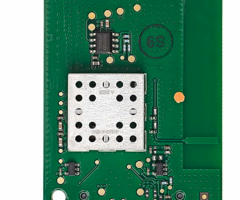
PROWIFIZW Connector, located on the back of the module:
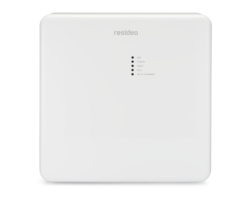
PROWIFIZW Front:
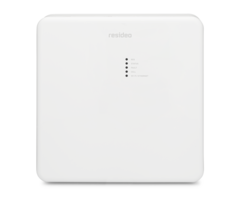
PROWIFIZW Back:
PROWIFIZW Installed:
- Power on the module. Plug in the DC adapter for the communicator, then plug the battery back in. The communicator will go through its power on self-test.
- Replace the cover. Settle the top of the LTEM-P Series cover onto the two tabs at the top of the communicator itself. Line it up properly so that the top edge of the cover is lined up with the module. Swing the front down and forward to lock the two bottom locking tabs into place. Replace the set screw in the bottom edge of the communicator. You are now ready to set the communicator up for WIFI.


The WIFI module has to be setup and connected to your local network. Please see our article on Connecting an LTEM-PA/LTEM-PV With Cell to WIFI or Connecting an LTEM-PA/LTEM-PV Without Cell to WIFI.
Did you find this answer useful?
We offer alarm monitoring as low as $10 / month
Click Here to Learn MoreRelated Products

Related Videos

Related Categories
- LTE Cellular Communicators
- Dual-Path Alarm Communicators
- LTE Cellular Communicators
- Verizon LTE Cellular Communicators
- Cellular Alarm Communicators
- Alarm Monitoring Communicators
- Cellular Alarm Communicators
- Alarm Monitoring Communicators
- Internet Alarm Communicators
- AT&T LTE Cellular Communicators
- Answered
- Answered By
- Julia Ross