How Do I Program Key Fobs Locally Into a 6150RF Keypad?
The Honeywell 6150RF can hold up to eight (8) key fobs locally. To add a fob, power cycle the 6150RF. Upon power-up press and hold the 1 and 3 keys to enter program mode. Press eight (8) to enter fob programming. Press any button on the fob to learn the serial number, then complete the setup.
Programming a key fob into a Honeywell 6150RF locally has several advantages. Because the 6150RF is a medium receiver, it can only support up to 16 RF zones programmed into the alarm panel. However, key fobs programmed locally into the keypad don't count toward this limit as they don't actually use zones. When a fob is programmed locally, and then used to arm or disarm, it's as though the user were standing at the keypad pressing in their 4-digit code and the arming or disarming command. To the alarm panel, it appears as keypad data, not as a key fob. If a panic button is desired on the key fob, it can be enabled and will emulate the [*] + [#] keypad panic. So, however that keypad panic is programmed, the key fob panic will behave in the same way. It will even report as the same zone number as the keypad panic. Usually, Zone 99, or sometimes Zone 999, depending on the panel being used.
Any 5800 Series key fob can be used in local mode on a Honeywell 6150RF. This includes some key fobs that are no longer sold like the 5804, 5804BD, and 5804BDV. The last two fobs mentioned are bi-directional key fobs that can receive status information from the alarm panel. This feature will also work with the 6150RF when the fob is programmed in local model. Non-Honeywell 345 MHz key fobs will likely not work properly when programmed in this way. The arming and disarming features may work, but the panic feature will almost surely not. Alarm Grid has not tested any non-Honeywell key fobs in 6150RF local mode, but you can certainly try them at your own risk.
To program a Honeywell 5800 key fob into a Honeywell 6150RF in local mode, follow these steps:
-
Enter keypad programming. Enter keypad programming on the 6150RF by powering down the keypad, powering back up, and pressing the 1 and 3 keys simultaneously for a few seconds within the first 30 seconds after powering up. If it is easier to power cycle the entire panel, rather than just the keypad, you can also do that. You'll know you've entered programming when you see an alternately flashing display of [ oo ] - [ -- ].

-
Default the keypad. If this is the initial setup for the 6150RF, or if this is the first time you're adding key fobs to it, it's a good idea to default the keypad first. If the keypad has been up and working, first check the existing addresses. At the main menu ([ oo ] - [ -- ] prompt) press [1]. The display will show [cA] and then a two-digit number [##]. Make a note of the number. This is the console (keypad) address. Press [*] to return to the main menu. Press [2], [rA] and then a two-digit number [##] will be displayed. Make a note of this number. This is the receiver's address. Press [*] to return to the main menu.
Back at the main menu, press [9]. The display will show [ee]. This is technically a prompt asking "Default? Yes or No". [1] = Yes, [0] = No. Enter [1] to default the keypad. You'll hear three (3) beeps, then the display will go back to the main menu prompt. The keypad has been set back to factory default. This is helpful to do prior to local key fob programming as issues with local key fobs not working properly are often resolved with a keypad default. Better to set it back to default, to begin with. -
Re-address the keypad. Press [1]. On a defaulted keypad, you should see [cA] [31] alternately flashing. This is the default console address. Enter the same number displayed from step 1 for the console address. If this is a brand new keypad and you set it back to factory default prior to programming, which is a good idea, then set the keypad address to the appropriate value based on the panel you're using. For VISTA-10P, VISTA-15P, VISTA-20P, VISTA-21iPLTE panels, this will be a number between 16 and 23. For TURBO panels, such as the VISTA-128BPT, this can be any two-digit address between 00 and 30. Just make sure that whatever address you choose is enabled in Device Programming within either panel type. Once the address has been entered, the display will flash [cA] [##] where ## is the new address. Press [*] to save and return to the main menu.
- Re-address the Receiver. Press 2. The display will alternate between [rA] [00]. This is the default address for the receiver. On VISTA-10P, VISTA-15P, VISTA-20P, VISTA-21iPLTE panels, this is the correct address for the receiver, so if you plan to use the 6150RF as your system receiver, you can leave it at the default. Address 00 won't work on a TURBO panel, though, as address 00 is always an Alpha Keypad on those panels. Enter a different two-digit address for the receiver on a TURBO panel. Resideo and Honeywell Home recommend using address 07 as your first RF receiver, as long as there is no other device already set to that address. Be sure that whatever address you choose, the equivalent address in the panel's Device Programming is enabled as a Device Type 03, RF Receiver. Once you enter the two-digit address, the display should flash between [rA] and [##] where ## is the address entered. Press [*] to return to the main menu.
-
Program the key fob. Press 8*. Assuming this is the first key fob you're programming in locally, you should see a [d1] [--] alternately flashing. d1 stands for Device 1. The number displayed will always be the next available local key fob slot. There are up to eight (8) slots available. Think of this as a sub-level of keypad programming. Once you enter a serial number for Device 1, then all the other programming questions being asked are about Device 1.
- Learn Serial Number: At [d1] [--] press any button on the key fob. The 6150RF will learn the serial number and scroll it across the display a few digits at a time. Verify that it is correct, and press [*] to accept it. The display will return to [d1][-]. This indicates you're still in sub-level programming for Device 1, but that a serial number has been learned.
- Associate to a User: Press 2, the display will show [u4]. Enter a 4-digit user code. It doesn't necessarily have to be a code that has already been learned into the panel, but remember that this key fob will not arm or disarm until whatever 4-digit code is entered here is a valid arming and disarming code on the system. By this I mean, you can program in the fob before you program in the user code, but both operations must be completed before the fob will actually work. After entering the code, press [*], and the display will return to [d1] [-]
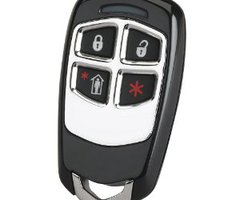
- Program Loop functions: Press 4. The display will show [Ln] for Loop Number. By default, the loop number options usually don't require changing. Loop 2 (top-right) = Disarm, Loop 3 (top-left) = Arm Away, Loop 4 (bottom-left) = Arm Stay. Loop 1 (bottom-right) by default only activates the 6150RF on-board relay for 2 seconds. If you want to make this a panic key, at the [Ln] prompt, press 1, you'll see [L1] [blank] press [#99]. The display will then show [L1] [b9 9]. Press * repeatedly until you see [d1] [-]. Be careful, don't press it so many times that you exit Device 1 programming.
- Remove relay function: If you don't want Loop 1 to control the on-board relay in the 6150RF (it may cause an audible click that some people don't like) press 5, the display should show [o-]. Press 1, the display will show [o1] [4]. This is the default programming option, which is to activate the on-board relay for two (2) seconds. To disable this, press 0. The display will change to [o1] [0]. Press [*] repeatedly until you return to [d1] [-]. If you plan to program in additional fobs, press [*] again and you should then see [d2] [--]. At this point, you can start the process over again for Device 2.
- Test the key fob: Assuming the user code you associated with the key fob is already programmed into the panel, you should now be able to arm and disarm the system using one of the key fob buttons. If you programmed Loop 1 to follow the [*] + [#] panic, you can test that as well. If your system is monitored, just be sure it's on test with the monitoring station prior to setting off the panic. If the user code associated with the key fob hasn't been programmed into the panel yet, you'll need to add that code prior to testing. The exception there is the key fob panic. The panic will always work, whether the key fob will arm and disarm or not.

*These instructions assume you have a 6150RF with the latest hardware and firmware. Very old 6150RF keypads and 6128RF keypads were programmed slightly differently. If you find the prompts you're seeing don't match up with what we show here, you likely have one of those older keypads. Refer to this Installation Guide for those keypads.
Did you find this answer useful?
We offer alarm monitoring as low as $10 / month
Click Here to Learn MoreRelated Products


Related Categories
- Answered
- Answered By
- Julia Ross