How Do I Replace a Legacy Honeywell Security Camera?
Replacing a Non-HD Honeywell security camera involves deleting the camera from your Total Connect account and then uninstalling it from its location. You can then mount the new camera, connect it to the internet and add it to Total Connect. You must contact your alarm company to do this.
Honeywell security cameras are accessed using the Total Connect interactive service platform. This platform serves as the central hub for all of a user's security cameras. If you ever want to replace a legacy camera with another camera of the same type, you'll need to provide your alarm company with the MAC address for both the old camera and the new camera. Then have them remove the old camera from your account, and replace the old camera's MAC address with the MAC for the new one.
Complete the following steps to replace a Honeywell security camera:
1. Contact your monitoring company. Notify your security dealer that you'll be replacing the old camera and that you'd like to have it removed from your account. You'll need to provide them with the old camera's MAC address, or the name the camera was given on your account. At this time, provide them with the MAC address for the new camera. Once they have removed the old camera from your account, they can then add the new camera.
2. Uninstall the old camera. Remove the old camera from its location. If the camera used a hardwired ethernet connection, make sure to disconnect the wire. This will allow the new camera to be placed in the same location.
3. Temporarily mount the new camera. Mount the new camera in the desired location. You will want to loosely mount the camera so that you can adjust its position if needed. Do not permanently mount the camera until you have tested it and are fully certain that it will work in this location.
4. Get the camera online. Use a hardwired ethernet cable or WIFI to get the camera online. The camera will use this connection to send and receive signals from Total Connect.
5. Test the camera. Login to your Total Connect account and access the Cameras menu. Locate the new camera, and click on it to view its live feed. Make sure that it is properly capturing video. You can also adjust any of its settings and configurations during this time.
6. Permanently mount the camera. Once you are sure that your new camera is working properly, permanently mount it in its location. Make sure that it will not fall down or come loose.
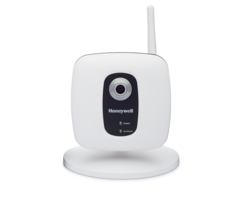
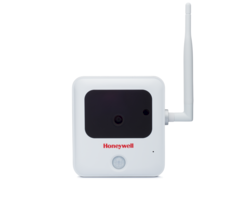
Note: The instructions above apply to the legacy Honeywell IPCAM devices. This includes, but is not limited to the IPCAM-WI2, IPCAM-WO, IPCAM-WL, and the IPCAM-PT2. The process for configuring the newer HD cameras differs.
Note: The Total Connect 2.0 Legacy IP Cameras can only be used if they were online at the time when Resideo pushed down an OTA update to make them compatible with an updated TC2 platform. Any legacy camera that was not online to receive this update can no longer be used. You must be very careful when purchasing used legacy TC2 IP Cameras, as many people will try to pass off bricked models on unsuspecting buyers. Please read this FAQ for more information.
Did you find this answer useful?
We offer alarm monitoring as low as $10 / month
Click Here to Learn MoreRelated Products
Related Categories
- Answered