Does the Qolsys IQ Panel 4 Support The Use of Prox Tags?
The Qolsys IQ Panel 4 can support the use of prox tags to arm and disarm. The key to prox tag compatibility lies in the keypad being used. The keypad actually reads the prox tag and transmits its information to the panel. To the panel, it's as though someone keyed in a valid user code.
 The most important note about this compatibility is that this is a wired keypad, therefore it requires a Corbus connection. On the Qolsys IQ Panel 4, this is achieved using the DSC PG9WLSHW8 PowerG Wired to Wireless Converter Module (or PG9HRDW8 which is the same module in a large enclosure). In addition to converting up to eight (8) wired zones to PowerG wireless, it also offers support for a wired siren output, provides power for any of the wired devices that may need it, such as motion detectors and glass break detectors, and supports up to four (4) programmable outputs.
In addition to all of the above, each DSC PG9WLSHW8 or PG9HRDW8 converter module allows the addition of up to four (4) compatible wired keypads, though Qolsys recommends that you only use two (2) wired keypads per converter module. Currently, each Qolsys IQ Panel 4 can support up to two (2) of these modules, which means it can support up to eight (8) wired keypads (though the use of only four (4) keypads is recommended). In order to support the use of either of these converter modules, the IQ Panel 4 must be on firmware 4.1.0+.
The converter module should be on version 1.2+. The converter module can be updated using the DSC DLS 5 software, but DIY users will likely not have access to this option. If you purchased your module from Alarm Grid, it should be on a firmware version that supports use with the IQ Panel 4. If you believe that may not be the case, contact our support team by email at support@alarmgrid.com.
Below is a list of compatible hardwired keypads. Those marked with an asterisk support prox tags:
There are also two (2) Visonic keypads that support prox tags that will work with this configuration. They are the Visonic KP-241-PG2 and the Visonic KP-141-PG2. These keypads are discontinued in the United States, but if you happen to have an older one, or find a working one in the secondary market, it should work with the IQ4. Just be sure that it works at the 915 MHz frequency, not 868 MHz. Visonic keypads are still sold in Europe, but those keypads operate at the 868 MHz frequency and will not work with an IQ Panel 4 sold in the US.
Once you find a keypad that is compatible with the Qolsys IQ Panel 4 and supports prox tags, the process for enrolling the prox tags is easy. In some earlier firmware versions, after going to the User Management screen you would automatically see an "Add Prox Tag" option. In 4.3.0, this changed. Now, in order to see information about prox tags, there must be hardware that supports them enrolled in the system first. So, if you're on the latest firmware, and you have a compatible keypad enrolled with the system that supports prox tags, follow these steps to enroll prox tags into the system. These steps assume you have already enrolled the wired-to-wireless converter as well as the compatible keypad with prox tag reader into the IQ Panel 4:
- Enter User Management. Press the gray bar at the top of the Home Screen. Tap on Settings > Advanced Settings. Enter the Installer, Dealer, or Master Code (default 1111, 2222, or 1234 respectively). Go to Installation > User Management.
-
Tap "Add Prox Tag". At the bottom left of the screen, tap the "Add Prox Tag" button. Please note that in panel version 4.3.0 and higher, you won't see the Add Prox Tag button until you have enrolled hardware into the system that can support the use of prox tags. Earlier versions of the panel always show the Add Prox Tag button.


-
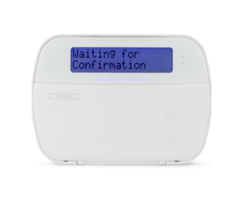
Scan the prox tag. The IQ Panel 4 will indicate that it is waiting for a prox tag to be read. Present the prox tag at the indicated spot on the compatible keypad. On the front of the keypad's cover flap is an icon that looks like a bullseye. This shows where the prox reader is inside the keypad. You can scan the tag whether the cover flap is open or closed, this is just a way to show you where the reader is until you're accustomed to using it. Once the prox tag has been read, you must press OK to accept the enrollment. Next, the system will prompt you to assign it to a User.


-
Assign to a User. Assuming the user you want to assign the prox tag to already exists, choose the appropriate user code from the dropdown list. If you are adding a new user code to go along with the prox tag, choose Add New User. Assigning the prox tag to a user helps with event logging, to show who has armed and disarmed the system, and when.

-
Configure new user. If you choose Add New User, you'll be taken to a screen where you can configure the user code. Enter a First and Last Name, a user code (with confirmation reentry), and a Type or Authority Level. Any type of code can be given an Expiration Date. Remember, this is a valid user code, so make it something that won't be easy for an unauthorized user to guess. Once you have completed setting up the user code press Add User.

-
Don't forget to choose the code. After you click Add User, you're taken back to the previous screen. You must hit the dropdown and choose the user code you created in Step 5, then press Add one final time to complete the prox tag setup for a new user. If you just reflexively hit the Add Button when it returns to this screen, the prox tag will be assigned to the first user in your list (in my example, Julia). Once you've finished you can press the Home icon at the bottom of the screen to return to the main screen. Be sure to test your new prox tag and verify that it is working.


Did you find this answer useful?
We offer alarm monitoring as low as $10 / month
Click Here to Learn MoreRelated Products


Related Videos

Related Categories
- Alarm Keypads
- Alarm Keypads
- Prox Tags
- Prox Tags
- 1000-Feet 18/2 Alarm Wire
- 1000-Feet 18/2 Alarm Wire
- Wired Alarm Keypads
- Answered
- Answered By
- Julia Ross