How Do I Arm My Alarm System?
You can arm your alarm system by following the appropriate arming instructions for your system. Most alarm systems follow a similar arming process. This usually requires the user to choose an arming type and to provide a valid system user code. The system will then go into an armed state.
When a system is armed, that means that it puts its sensors in an active state. Whenever a sensor is triggered, it sends an alert to the system. This is true whether the system is armed or disarmed. However, the system will respond differently depending upon whether the system is armed or disarmed.
For example, if a perimeter window is opened while the system is disarmed, the system will simply display that the window has been opened. But if the same perimeter window is opened while the system is armed, an immediate alarm will occur. It is important to remember that 24-hour zones, which are typically used with life-safety sensors, will trigger a system alarm whenever they are activated, regardless of whether the system is armed or disarmed.
There are a few things to remember about system arming. First, there are two main arming types. These are arming away and arming stay. Arming away means that every security sensor will be active. This arming type assumes that nobody is in the building, and any interior or perimeter sensor that activates indicates a break-in. And if an entry/exit sensor activates, the user will need to disarm the system within the programmed entry delay period, or else an alarm will occur.
But arming stay means that there is at least one person staying in the building. Any interior sensor that activates will not trigger an alarm. This is because the system is allowing the occupant to move freely throughout the building. But if a perimeter sensor is activated, then an alarm will still occur. Likewise, if an entry/exit zone is activated, then the system must be disarmed within the entry delay period, or an alarm will occur.
Additionally, many alarm systems will allow users to bypass sensors when arming. A bypassed sensor will not cause a system alarm if it is activated while the system is armed. A user can pick and choose which sensors they want to bypass so that they can create a customized arming state. A sensor that is not bypassed will still be able to cause an alarm on the system like normal.
Another thing to keep in mind is that there are multiple ways to arm an alarm system. First, a system can be armed from an interactive service platform, such as Total Connect 2.0 or Alarm.com. To do this, a user will need to access their interactive service account and choose the option to arm their system. A signal will be sent to the security system to put it into an armed state. A user can choose the arming type and bypass sensors all from the interactive service. It is also possible to arm a system using a key fob. Using a key fob is a quick and easy way to arm the system when you are leaving. Key fobs can also be used for quick disarming.
But the traditional process for arming a system is done by arming directly from the panel. This arming process is relatively similar across any alarm system. The steps involved when arming from the panel depend on whether the system uses a touch-button keypad or a touchscreen. For hardwired systems with a touch-button keypad, the command is usually just [User Code ] + [Arming Type Number]. So on a Honeywell VISTA System, if the user was using the default Master Code of 1234 to arm, they would enter in [1234] + [2] to arm away. Entering in [1234] + [3] would arm stay. Entering in [1234] + [1] will disarm. If a user enters in [1234] + [7], they will arm instant. Arm instant is essentially the same as arming stay, but this arming type does not have an entry delay period.
Remember, [1234] is just the default Master Code for a Honeywell VISTA, and the user will need to enter in a valid user code for their system when arming. We also only recommend arming with a user code or the Master Code. While it is also possible to arm with the Installer Code, we do not recommend doing this.
For one, an Installer Code can only disarm the system if it was the code used to arm the system in the first place. Getting into the habit of arming and disarming with the Installer Code could result in a false alarm when a user code or the Master Code is used to arm the system and the Installer Code is unable to disarm. Second, it is possible that an intruder might know the system's default Installer Code and use it to disarm the system if the Installer Code was used to arm the system.
Remember, it is strongly recommended that the Installer Code remains at the default. However, we do recommend changing the default Master Code, as leaving it at the default presents a major security risk. If you would like to learn more about differences between Installer Codes and Master Codes, please consult this helpful FAQ.
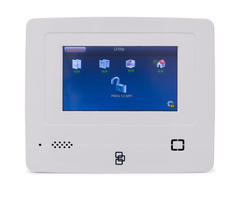
As for wireless systems with touchscreen controllers, they generally follow a similar arming process. Complete the following steps to arm your wireless alarm system:
1. Bypass sensors. Most systems require users to bypass sensors before arming the system. The process for this varies between different types of systems. However, some systems, like the Honeywell Lyric Controller, will allow users to bypass sensors during the actual arming process. Remember, any bypassed sensor will not cause an alarm if it is activated while the system is armed. If you do not need to bypass any sensors, and you want every system sensor to be active, you can skip this step.
2. Choose an arming type. The first step when arming a wireless system is to indicate whether you are arming stay or arming away. There will usually be a button on the main screen for this function. Some systems will have separate buttons for arming away and arming stay, while others will have you select the arming type after pressing the initial arming button.
3. Configure arming settings. Many systems will allow you to configure various settings for arming the system. For instance, a "silent exit" feature will have the system not produce any sounds during the exit delay period. Other systems may allow you to select a certain set of sensors to arm. Check and make sure the appropriate settings are selected before continuing.
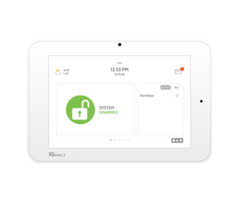
4. Provide a code. Most wireless systems will require that a valid system code be entered when arming. This can be the Master Code or a valid user code. The Installer Code can also be used, but we do not recommend using the Installer Code to arm the system. Also note that some systems, like the Qolsys IQ Panel 2, do not require any code to be entered.
5. Wait out exit delay. Once the code has been confirmed, the system will begin arming. This will trigger the exit delay. The exit delay gives the user an opportunity to exit the building if they set the system to arm away. If the system was set to arm away, the user must have exited the premises within this time period. The system will not be fully armed until the exit delay period has expired.
6. Disarm the system. When the user returns to the building, or if they intend on activating a secured sensor, they will need to disarm their system to prevent an alarm from occurring. The traditional way is to disarm from the panel by entering a valid user code or the system Master code. They can also disarm using a programmed key fob or through an interactive service platform, like Total Connect 2.0 or Alarm.com.
Did you find this answer useful?
We offer alarm monitoring as low as $10 / month
Click Here to Learn MoreRelated Products


Related Categories
- Home Security Systems
- Business Security Systems
- Apartment Security Systems
- Alarm Control Panels
- Small Business Security Systems
- Monitored Home Security Systems
- DIY Wireless Security Systems
- Burglar Alarm Systems
- DIY Wired Security Systems
- Answered