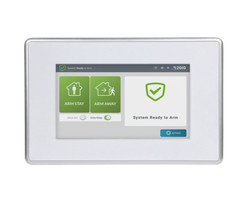
How Do I Pair the 2GIG SP2 with the 2GIG GC3e?
You can pair the 2GIG SP2 with the 2GIG GC3e by connecting both the panel and the keypad to the same WIFI network and then completing the pairing process on both devices. No firmware update for the GC3e should be needed. The SP2 will use one of the eight (8) keypad slots on the GC3e.
 One important note for the 2GIG SP2 is that it can only control the Smart Area Partition on the GC3e that it has been assigned to. This is in contrast to the more powerful 2GIG SP1 Keypad that can control any enabled system partition, regardless of assignment, as long as you have a valid code. You will assign the 2GIG SP2 to one of the four (4) Smart Area Partitions on the GC3e when you are configuring its Keypad Settings. You cannot assign the SP2 to multiple partitions, so make sure to choose the one that you need the keypad to control the most.
For the purpose of this FAQ, we will assume that you have already provided power to both the GC3e and the SP2 Keypad. We will also assume that WIFI connectivity is already set up for the GC3e. Technically speaking, WIFI connectivity is optional, as the GC3e and the SP2 can be paired using a wireless Access Point (AP). We will not be covering the process for pairing via AP in this FAQ. Instead, you can check out this helpful FAQ if you want to learn how to pair the device using AP mode. Although that FAQ was written with the original GC3 in mind, the same process applies for the newer 2GIG GC3e.
Complete the following steps to pair a 2GIG SP2 Keypad with a 2GIG GC3e Security System:
1. Join SP2 to network. You will start by connecting the 2GIG SP2 Keypad to a local WIFI network. From the default screen of the SP2, select Wireless. Then find the WIFI network that the GC3e is using. You must have the GC3e and the SP2 Keypad both connected to the same wireless network in order for the pairing process to be successful. Click on that network, and provide the network password. Then click Next in the bottom-right corner. A Pairing Key screen will pop up. Leave this window alone and move to the next step.
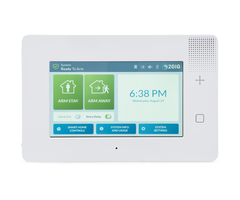
2. Access GC3e Keypads Menu. Shift your focus to the 2GIG GC3e. From the home screen, press the 2GIG logo in the upper-right corner. Provide the Installer Code for the alarm system. This code is 1561 by default. Select System Configuration, and then Keypads. You will enter into the GC3e Keypads Menu.
3. Configure the Keypad Slot. The 2GIG SP2 will be assigned to one of the eight (8) Keypad Slots on the 2GIG GC3e. Select one of these slots on the left-hand side of the screen. Then begin making configurations to various settings on the right-hand side of the menu. The following selections and inputs should be made:
- Keypad Used: Set to Enabled.
- Equipment Code: Select 1074 - 2GIG SP2 Touchscreen
- Device ID: Press the blue Pair button. The 2GIG GC3e will then begin listening for a keypad. Then switch over to the SP2 Keypad. Click the Blue Checkbox option in the lower right of the Pairing Key screen. As long as the GC3e and SP2 are on the same WIFI network and within signal range, the pairing process should complete successfully. This may take a few moments, so just be patient. You will see a message "Keypad Successfully Paired", press "OK". You will likely see a message "System Unavailable Please check master panel". This is normal and is coming up because the panel is still in programming mode and is not communicating with the SP2. No further action is needed on the SP2 at this time. When you go back to the GC3e, do not press the "Pair New" button. Rather, just continue configuring the other keypad settings.
- Smart Areas Assignment: This setting determines which Smart Area Partition the SP2 is able to control. The SP2 can only arm and disarm the partition that it is assigned to, so make sure to choose this setting carefully depending on how you want to use the keypad. The SP2 can only be assigned to one (1) partition. This setting also determines which partition will display trouble conditions that directly affect the SP2 Keypad. Some examples could be keypad AC power loss or the back cover of the keypad being opened.
- Equipment Age: This setting has zero impact on the SP2. Choose New or Existing.
- Emergency Keys: Enable this selection if you want the SP2 to have the ability to trigger emergency panics, such as police, fire, and auxiliary medical.
- Voice Descriptor: This serves as the name that the GC3e will speak out when acknowledging the SP2 Keypad. It is also used for general identification purposes. The setting is optional, but you can set it to something that will help you identify the SP2 Keypad. Some examples of names could be "Basement Keypad" or "Bedroom Keypad".
4. Save changes and test. After you have adjusted all the settings, press the Return to System Configuration button in the top-right corner. The Keypads option should be orange to indicate that changes have been made to Keypad Settings. You can then press the return arrow on the left-hand side. Click the green Save button to save the changes.
Check the 2GIG SP2. It should now be displaying a screen where you can arm and disarm the system, or it may still be loading. If the keypad is still at its loading screen, then simply wait a few minutes for it to finish. Once you are at the main SP2 screen, try using it to arm and disarm. When you arm using the SP2, the main GC3e Panel should also indicate that the system is being armed. The same is true when you disarm using the SP2. Being able to control the GC3e from the SP2 Keypad indicates that it is set up properly. Remember that you can only control the single Smart Area Partition to which the SP2 was assigned. You may need to check the Smart Areas Menu on the GC3e to verify that the corresponding partition is being armed or disarmed.
Did you find this answer useful?
We offer alarm monitoring as low as $10 / month
Click Here to Learn MoreRelated Products

Related Videos

Related Categories
- Answered