How Do I Upgrade My 2GIG GC3 to an LTE Communicator?
To upgrade to an LTE radio from an earlier version, contact your monitoring company to coordinate the process. When instructed, go to System Settings > Cell Radio Swap > Begin. Remove the radio cover. Replace the existing radio with the LTE radio. Replace the cover, then tap "Done".
Unlike replacing the cellular communicator for the 2GIG GC2, replacing the communicator in a 2GIG GC3 is a quick and painless process. Make sure to coordinate the switch with the monitoring company, and don't replace the existing unit with the LTE communicator until told to do so by them. You will need to provide them with the module's serial number. The 2GIG GC3 must be on version 3.1.3 or later to support the 2GIG LTEV1-A-GC3 Verizon LTE communicator. If you intend to upgrade using the 2GIG LTEA-A-GC3 AT&T LTE Communicator then you'll need to be on Firmware Version 3.2.3 or higher. If you need to upgrade the panel's firmware, click here. Once the monitoring company gives the go-ahead, follow these steps:
1. Prepare the 2GIG GC3. From the Home screen choose System Settings. Enter the Installer Code. The default Installer Code is 1561. From within System Settings, choose "Cell Radio Swap". You will see a screen with the prompt: Select Begin to start swapping cell radio module. With options for "Radio Test" and "Begin". Select "Begin".

2. Remove the existing radio. You will be prompted by the GC3 to "Remove the cell radio module now". Open the hinged door on the left side of the control panel. If you can't open the door, it may be locked. To unlock it, remove the GC3 faceplate trim ring by inserting a flat head screw driver between the trim ring and the main panel and then prying up. Do this in each corner until the trim ring comes free. With the trim ring removed, you will see a screw toward the bottom left. If this screw is in the hole marked "L" for locked, remove it, and install it into the hole marked "U" for unlocked. Once this has been completed, you will be able to remove the cell radio cover on the left side of the panel. With this cover removed, grasp the pull tab on the existing radio, and pull it out and away from the panel.

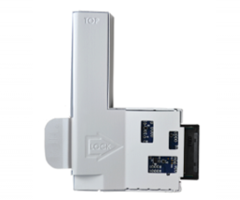
3. Install the new radio. Slide the 2GIG LTEV-A-GC3 into the appropriate place. It can only be installed one way. Push the module in as far as it will go. When you're finished, the cellular radio cover can be snapped back into place. If you wish to lock the cell radio cover, remove the screw from the hole marked "U", and insert it into the hole marked "L". Turn the screw until it is completely tightened. Snap the cell module cover into place, and then snap the GC3's faceplate trim ring back into place. On the screen, tap "Done". The screen will display "Working". This display may last for several minutes.
4. Test the LTE communicator. Let your monitoring company know you've physically installed the LTE communicator. When they prompt you to do so, select "Radio Test" from the 2GIG GC3 touchscreen. Select "Start Radio Test". You will be shown the status of your cell test, which should be "Successful". Let the monitoring company know the status. Press the "Done" button, and return to the Home screen.
Did you find this answer useful?
We offer alarm monitoring as low as $10 / month
Click Here to Learn MoreRelated Products

Related Videos

Related Categories
- Answered
- Answered By
- Julia Ross