How Do I Wire and Program the Winland EA200 or EA400?
To wire and program the Winland EA200 or EA400, first make all wiring connections. Be sure to connect power last. Once the unit has power, enter programming and configure settings for each temp input. Connect each output to a zone on the alarm. Program each zone for the proper response.
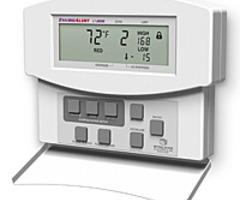
 First, let's discuss what each of these devices is capable of. The Winland EA200 has a built-in ambient temperature sensor. This input is referred to as Zone 1 and has temperature setting limits of 32℉ - 122℉ (0℃ - 50℃). In addition to the built-in temperature sensor, one remote probe can be added. The available programming parameters for the remote probe will depend on the probe being used. We will discuss the available remote probes in more detail a bit later. If the ambient temperature sensor is not going to be used, it can be left to the default setting of no (non-operational).
The Winland EA400 does not have a built-in sensor. Instead, it can use up to four (4) separate remote probes. Each remote probe will correspond to a Zone Number. Remote Probe Input 1 will be tied to Zone Output 1. Remote Probe Input 2 will be tied to Zone Output 2, and so on. Though the capabilities of these two sensors are quite different, the way in which they are programmed is nearly identical. In addition to the fact that there is an EA200 and an EA400, there is also a 12-Volt DC and a 24-Volt DC version of each of these. We have both versions of each sensor available on the Alarm Grid website at the links listed above. The only difference between the 12V and 24V versions is the input power requirements for each, and the fact that the 24-Volt versions do not support the humidity sensing probe. You can see the full specifications for the EA200 here, and for the EA400 here.
There are a number of Remote Probes that can be used with either the EA200 or the EA400. Some of the most commonly used options are listed below:
| Remote Probe Type | Model Number | Sensing Range | Compatibility |
|---|---|---|---|
| Temp Low (Blue) Stainless Steel | TEMP-L-S | -58℉ - 158℉ (-50℃ - 70℃) | EA200*, EA400* |
| Temp Low (Blue) Waterproof | TEMP-L-W | -58℉ - 158℉ (-50℃ - 70℃) | EA200*, EA400* |
| Temp High (Red) Stainless Steel | TEMP-H-S | 32℉ - 299℉ (0℃ - 150℃) | EA200*, EA400* |
| Temp High (Red) Waterproof | TEMP-H-W | 32℉ - 221℉ (0℃ - 105℃) | EA200*, EA400* |
| Humidity | HAIII+ | 5% - 95% RH | EA200-12, EA400-12 |
| Water Surface Sensor (Supervised) | W-S-S | Wet/Dry | EA200*, EA400* |
| Water Under Carpet (Supervised) | W-UC-S | Wet/Dry | EA200*, EA400* |
| *Denotes that a probe is compatible with both the 12 Volt and 24 Volt versions of the product. | |||
The instructions that follow will assume that we are using the TEMP-L-W probe to monitor low-temperature water in a swimming pool. A combination of the Winland EA200 or EA400 with various probes can be used in a number of different applications.
Wiring
The examples shown here are of the EA200-12, but the principles will be the same for any of the available versions:
-
Connect all wiring. Some probes may observe polarity, the TEMP-L-W does not. It has a prepared connection with a red and a white wire. The probe itself has a wire length of about three (3) feet. The probe wiring can be extended up to 1,000 feet to accommodate the installation requirements. Use 18 - 22 AWG 2-conductor wire for this purpose.

The backplate of the EA200-12 has a large hole as shown in the picture below. All wiring should be routed through this opening so that the device can be properly closed once the installation is completed. If the EA200-12 will be mounted to a wall, a wire routing hole will need to be made in the wall material, and then power, probe, and zone wiring will need to be routed through this hole, then through the backplate, and finally connected to the EA200-12.
To make connecting wires easier, each of the small terminal blocks can be removed by pulling them straight up and away from the printed circuit board. The wires can then be inserted and the screw terminals tightened down. Once that has been completed the terminal block can be placed over the pins and pressed back into place. Be sure to line the pins up properly, particularly when connecting the power terminal block.

Connect the probe wires, and replace that terminal block. Remember, the TEMP-L-W does not observe polarity. If you intend to use this configuration with an alarm panel, be sure to wire the Zone 2 Output from the EA200-12 to the proper zone input on the alarm control panel. We will be showing this setup using a Normally Closed Zone output. This means that if a resistor is used it will need to be wired in series, as shown below. Be sure to make all other wiring connections at the EA200-12 before connecting the power wires and putting the power terminal block in place, making sure to observe proper polarity.

In this example, we are powering the EA200-12 from a VISTA-21iP alarm panel. If you aren't connecting to an alarm panel, be sure to use a power supply with the proper output voltage and current. It is recommended to use a power supply with a battery backup. Full power specifications can be viewed in the data sheets that are linked above.


Programming the Winland EA200-12
- Unlock programming. Once the device has been powered up, all segments of the display will briefly light as part of a self-test. Among other icons that may display, a lock icon should appear. This means that programming is currently locked and can't be changed. Press and hold both Alarm Silence and Enter buttons at the same time. The unlocked icon should appear. Programming can now be changed.
- Set Time/Date. In a new setup, you must first set the Time and Date. Press the Time/Date Key. The hour will begin to flash on the display. Use the Increase or Decrease keys to scroll through available numbers until you get to the correct hour. Press Enter to save and move on. Now the minutes will flash, follow the same steps to set the correct minutes, then press Enter. Either AM or PM will be displayed. Again, use Increase or Decrease to change this setting, if needed. Press Enter once the proper setting is displayed. The next setting will be for the year. This will be displayed in a 4-digit format. Use Increase to go to the correct year, then press Enter. The next setting is the month. Using Increase or Decrease, set the proper number for the month, then press Enter. Finally, in the same manner, set the day of the month, and then press Enter. The Date and Time have now been set. If the device loses power, these settings will be lost and will need to be reconfigured. However, all other programming options will be retained in the event of a power loss.
- Program Zone 1. In our example, we don't plan to use the built-in temperature sensor for the EA200-12. By default, this zone is programmed as no or non-operable. To verify this setting press the Zone key. Use the Increase or Decrease key to select the zone number to program. We want to verify that Zone 1 is disabled, so choose Zone 1, then press Enter. You should see the screen below. If not, press the Increase button until you do see this screen, then press Enter:
-
Program the probe. Press the Zone key, when you see a flashing 2 in the Zone location, press Enter. You should now see a flashing Fahrenheit indicator. Use the Increase or Decrease key to switch between the various options. You'll see icons for Fahrenheit, %, Water, no, Celsius Red, Celsius Blue, Celsius, Fahrenheit Red, and Fahrenheit Blue. We want to use Fahrenheit, and we have a blue probe, so in our example, we've chosen Fahrenheit Blue. In the picture above in the wiring section, you can see the blue band on our probe. Other probe models may have a red band. If we had one of those probes, we'd have selected Fahrenheit Red, and our high and low-temperature options would differ slightly.
After making the proper display selection, press Enter. Because of the display option selected, the EA200-12 knows that a temperature probe that has a blue band is connected, however, it will not prevent programming errors. For example, the TEMP-L-W supports a temperature range of -58℉ - 158℉ (-50℃ - 70℃) but the EA200-12 will allow the high-temperature limit setting to go up to 299℉. This is an invalid entry. So, be careful when setting the high and low-temperature parameters.
The option for the High-temperature threshold setting should now be blinking. Use the Increase or Decrease button to set the proper high-temperature setting. If you only care about one temperature, for example, in this case, we only care about the low-temperature threshold, then it is best to set the high-temperature threshold, or whichever threshold you don't care about, as high or as low as it can go (158℉ in our case) to prevent any nuisance alarms. There is no way to tell the EA200-12 to ignore information from any of the probes. Press Enter to move to the Low-temperature threshold setting.
Use the Increase or Decrease buttons to set the low-temperature threshold. In our example, we're monitoring the pool temperature. We want to be notified if the temperature in the pool drops below 85 degrees Fahrenheit. We set the low-temperature threshold accordingly. After making the selection, press Enter.
The next setting is the Delay Time Entry Mode, indicated by an hourglass icon. This can be used to prevent false alarms. The setting is programmed in minutes and can be set anywhere from 0 (no delay) to 120 Minutes. With this delay set, the temperature must stay above or below the threshold for this number of minutes before an alarm will be indicated. Once this option is set press Enter
The last programming option is a selection between Energized or De-energized. Basically, by choosing Energized you're telling the EA200-12 that you want an alarm output based upon the information provided by the probe, AND/OR upon loss of power or a malfunction on the EA200-12. If you choose Energized, you won't be able to tell if the notification is for power loss, or for a temperature threshold breach unless you're actually onsite and are able to look at the EA200-12. By choosing De-energized the output on the EA200-12 will only be activated based on information provided by the probe. When powering the EA200-12 by an alarm panel, it is customary to choose De-energized. The alarm panel will provide its own indication of a power loss situation.

Some notes about our experience setting this up:
The probe wires come pre-stripped, but the amount of wire stripped is minuscule. Be prepared to strip them yourself with a slightly longer bit of exposed wire.
Be careful when pulling the front and back of the plastic apart, particularly at the top, they seem to break easily. The good news, one of ours broke slightly, but the cover still stays on snugly.
We used and showed pictures of the EA200-12, but the EA400-12, as well as all the 24 Volt variations, will program in the same way.
If you wanted to be able to monitor high-temperature and low-temperature, and you wanted to be able to tell the difference between the two on an alarm panel, you'd need to use the EA400, and two separate remote probes. One probe would be set for the low-temperature threshold while setting the high-temperature option to its highest setting to avoid nuisance alarms. The second probe would then be set for high-temperature, with the low-temperature option set as low as it could go to avoid nuisance alarms. Each of these separate outputs would then be wired to two separate zones on an alarm panel.
If you want to monitor both high-temperature and low-temperature, and you don't need to be able to tell the difference between them, you could still use the EA200 and the single probe we mentioned above can monitor for both conditions. The problem is not with the probe, but with the single output capability per probe.
Any of the available probes can be used, as long as the probe selected covers the temperature range you wish to monitor for. Each temperature probe can monitor for both high-temperature and low-temperature, but again, each probe will only tie to a single output on the EA200 or EA400.
We show this setup for a wired VISTA panel because it's much easier to power the EA200-12 that way, but you could easily set this up with one of the wireless all-in-one panels using a power supply a battery, and a transformer. We have created guides for the PROA7PLUS, the Qolsys IQ Panel 2 Plus, and the Honeywell Lyric that explain how to do this.
Did you find this answer useful?
We offer alarm monitoring as low as $10 / month
Click Here to Learn MoreRelated Products

- Answered
- Answered By
- Julia Ross