How Do I Install The Qolsys IQ Panel 4?
To install a Qolsys IQ Panel 4, you need to determine where it will get the best cellular signal in addition to other considerations, such as convenience and aesthetics. The panel will also need to be near a non-switched power outlet. Program all sensors and work with your dealer to register.
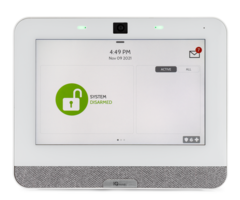
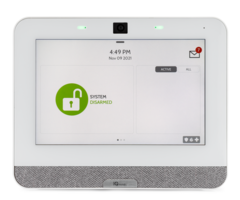
The Qolsys IQ Panel 4, available in Black and White:


Step 1. Choose Your Panel Version:
Before you can install the Qolsys IQ Panel 4, you need to decide which panel version is best for you. Among the things to consider is which cellular carrier will work the best for you in the installation location, and which sensors you want the panel to use. This last consideration may come down to whether this is a brand new security system installation, or if you're replacing an older system.
In addition to being available in an AT&T LTE cellular version and a Verizon LTE cellular version, each Qolsys IQ Panel 4 can support PowerG devices. If you're installing the panel in a location that's never had a security system before, you may want to just stick with PowerG sensors. They have a tremendous transmitting range 4,000' (1219m) or more in open air. PowerG sensors offer secure, 128-bit AES encrypted 2-way communication with the panel, they look good and they're competitively priced. Read all about why we love PowerG so much here.
In addition to PowerG, all Qolsys IQ Panel 4 versions (with the exception of this AT&T LTE Version and this Verizon LTE Version) support a second legacy RF frequency. This is so they can support existing wireless sensors that are still functional. These sensors may be from older Qolsys panels, or from other manufacturer's panels. One variation supports 345 MHz sensors that are manufactured by Honeywell and 2GIG. Another version supports 433 MHz sensors manufactured by DSC. And yet another variation supports 319.5 MHz sensors manufactured by Qolsys and Interlogix. There are limitations with regard to the sensors supported for each of these legacy frequencies. So, be sure to check out the RF Compatibility Document to see if your sensors are compatible. This version of the document is current as of this writing (May, 2024). Each panel variation also comes in either Black or White, as shown above.
Qolsys IQ Panel 4 Variations
| SKU | Product Description |
|---|---|
| IQP4001 | IQP4, Verizon-LTE, PowerG+319.5 MHz, White |
| IQP4001BLK | IQP4, Verizon-LTE, PowerG+319.5 MHz, Black |
| IQP4004 | IQP4, AT&T-LTE, PowerG+319.5 MHz, White |
| IQP4004BLK | IQP4, AT&T-LTE, PowerG+319.5 MHz, Black |
| IQP4003 | IQP4, Verizon-LTE, PowerG+345 MHz, White |
| IQP4003BLK | IQP4, Verizon-LTE, PowerG+345 MHz, Black |
| IQP4006 | IQP4, AT&T-LTE, PowerG+345 MHz, White |
| IQP4006BLK | IQP4, AT&T-LTE, PowerG+345 MHz, Black |
| IQP4002 | IQP4, Verizon-LTE, PowerG+433 MHz, White |
| IQP4002BLK | IQP4, Verizon-LTE, PowerG+433 MHz, Black |
| IQP4005 | IQP4, AT&T-LTE, PowerG+433 MHz, White |
| IQP4005BLK | IQP4, AT&T-LTE, PowerG+433 MHz, Black |
| We also have kits available for the Qolsys IQ Panel 4 in various configurations. You can find those here. | |
Step 2. Choose Your Mounting Option:
Once you have the right panel, you need to decide whether you want to mount it to the wall or desk mount it. In addition to the regular desk stand, you can also choose to mount the panel using the IQ Base. The powered base acts as both a desk stand and a sub woofer. This makes listening to music through the IQ Panel 4 via Bluetooth a much more satisfying experience.
Wall Mounting:
All of the hardware needed to wall mount the panel comes included with it. Once you determine how and where you will mount the panel, prepare for wall mounting. Whenever possible, the power wire should be fished behind the wall. This will give your system its most appealing look. The power cord that comes with the panel is approximately 10' (3m) long. If this isn't long enough, you can use a custom length of wire not more than 98.5' (30m) in length. Everything you need to know about powering the IQ Panel 4 can be found in this FAQ and video.
Once the power wire has been run, you're ready to mount the backplate. Loosen the captive set screw in the bottom edge of the panel using a Phillips screwdriver. You don't need to completely remove the screw, just loosen it enough to pull the bottom edge of the wall mount free of the panel. Once the bottom edge is free, pull the top of the wall mount straight down to remove it from the panel. The battery is usually connected to the panel from the factory. If it is not connected, go ahead and connect it now. It will not power up on battery alone.
Below is an illustration of the inside of the SmartMount Wall Plate. This is what you will see when you hold the plate up to the wall as you prepare to mount it. The first thing you should do is make sure it's level. Once it's level, use flat head screws to mount the plate to the wall. The wire you run for power should be sticking through the wall, and through the large center hole of the wall plate. If you cannot run your power wire through the wall, you should consider mounting to a desk stand instead.

- After making sure the wall plate is level, install using flat head screws and drywall anchors where necessary. These are keyhole style screw holes (the three along the top) so don't tighten the screws down until the wall plate is set.
- This is the panel tamper switch. Any time the wall plate is removed from the panel, the tamper will activate, assuming the system has power. For UL 2610 and EN Grade 2 installations a screw is required in this mounting hole. This ensures that if someone tries to rip the panel off the wall, the breakaway section (shown with the bold dotted outline) will remain connected to the wall, causing the tamper to activate. If possible, install where this screw will be in a stud.
- If you must run a custom length of wire for power, this is where those wires terminate on the panel end. Where you see the (-) and (+) markers there are holes for each of these wires. Press down the gray tab opposite the hole, insert the stripped wire, then release the gray tab to secure the wire. Be sure you observe proper polarity. When you mount the panel to the wall plate, the power connection will be made automatically.
Once the wall plate is secured to the wall, and before the panel's transformer is plugged in, position the panel over the top tabs with the bottom edge of the panel sticking out slightly away from the wall. Once the panel is caught on the top two tabs, swing the bottom edge down and toward the wall until it snaps into place. Once it does, tighten the captive set screw using the Phillips screwdriver.
At the power supply, connect the other end of your power wires. Again, make sure to observe proper polarity. Below, you can see the marks for (-) and (+). Once all power wiring has been completed, you can plug in the power supply. The panel will begin to boot up. If not, then press and hold the power button located on the right panel edge down for three (3) seconds, then release it. The panel should begin to boot up.

Desk Mounting:
Desk mounting the panel is easier than wall mounting. In most cases, the provided power wire will be long enough for desk mounting. That's good because to desk mount the system, you must use the barrel connector. You may choose to desk mount the system because you aren't particularly handy with a drywall saw, or maybe you just don't want to make holes in your walls. You could also be in a position where you can't cut those holes, such as in a rental property. Whatever the reason, using the desk stand or IQ Base is a great option.
Make sure the panel is powered completely down. When you need to power the system down for any reason, you should do so through the menu rather than by unplugging the transformer and battery. Failure to power down properly can result in damage to the system. To properly power down the system tap the gray bar at the top of the screen, above the date and time then tap Settings > Advanced Settings > Enter Installer, Dealer, or Master Code (1111, 2222, or 1234 respectively, by default) > Power Down. Wait for the screen to go dark and all LEDs to turn off.
The desk stand replaces the wall plate that comes with the panel. In case you want to wall mount your system at a later time, or in a different location, hold onto the SmartMount wall plate. At this time, it doesn't appear to be sold separately. Loosen the set screw in the bottom edge of the panel just enough to remove the wall plate. You do not have to remove the screw completely. Pull the bottom edge of the wall plate away from the panel, then pull the wall plate down toward the bottom edge of the panel to remove it. Set it aside in a safe location, in case you need it at a later time.
Once the back of the panel is removed make sure the battery is connected. If it isn't, go ahead and connect it now. The panel won't power up on battery only. At this point, the power adapter should not be connected to the wall outlet. Route the power wire through the hole in the back of the table stand. Plug the male barrel connector from the provided power wire into the female barrel jack in the back of the panel. Insert the tabs at the top edge of the desk stand into the opening in the back of the panel, then snap the bottom edge of the stand into place. Tighten the set screw which will secure the desk stand to the panel. You can now plug in the power adapter. The panel will likely boot up automatically. If not, hold down the power button located on the right panel edge for three (3) seconds, then release it.


IQ Base:
Using the IQ Base also requires the use of the barrel connector. Follow the instructions above to remove the wall plate from the back of the panel, making sure to power it down first, if necessary. We recommend saving the SmartMount wall plate, in case you decide to use it at a later time. Power for the panel will pass through the IQ Base. For this reason, you connect the IQ Base to the panel, and the barrel connector to the IQ Base.
The IQ Base has a short wire with a keyed header that connects it to the back of the IQ Panel 4. It will only connect when properly oriented. Plug the base into the panel, then snap it into place in the spot where the SmartMount wall plate was removed. Then plug the male barrel connector into the female port in the back of the IQ Base. This video, available courtesy of Qolsys, Inc., walks you through the installation.

Step 3. Program the System:
When you first power up the panel, you'll be offered the option to go through a setup wizard. The wizard will help you connect the panel to WIFI. It will test power and any daughter cards that are installed. Then, it will walk you through programming zones, adding users, and setting up automation devices if applicable. Any section of programming that you don't need to complete, you can choose to skip. The wizard can be accessed at any time through the Advanced Settings menu. Tap the gray bar at the top of the page, then Settings > Advanced Settings > Enter Installer or Dealer Code (1111 or 2222 by default, respectively) > Setup Wizard > Launch Wizard.
Connect to WIFI:
Connecting to WIFI is highly recommended. The panel will get any firmware updates that it needs via WIFI. The Qolsys IQ Panel 4 will not update using cellular data. If WIFI is not available at the site where the panel will be installed, you can either use a cell phone as a hotspot temporarily, long enough to download and install the update. Or, you can choose to use the panel's access point mode to transfer the firmware file from your phone or tablet to the panel. You can read more details about upgrading the panel here.

The first thing the installation wizard helps you do is connect to WIFI. Once you press the Start Button, you'll be taken to the WIFI setup screen. The panel will scan for available networks. Select the proper WIFI network and then enter the password. Remember that WIFI passwords are case sensitive. Once you've entered the password, press Connect. The panel will connect to WIFI then run a WIFI path test. It will then begin testing all of the other system components. It'll check that primary power is good, and that the battery is connected and charging. Then it will check each daughter card to verify that each one is connected and able to communicate with the system.


The screens you see during the system test will depend on which version of the IQ Panel 4 you have. When all of the various system checks have been completed, tap NEXT. This is where you'll begin to configure your system.
Program Sensors:
The first programming option offered is Sensor programming. When you press Start, the panel enters Auto Learn. In this state, it's listening for sensors to check in, and when it picks up a sensor transmission, it will show you the serial number and ask if you want to add that sensor to your system:

The easiest way to Auto Learn your sensors is to do so prior to mounting them. This will take a bit of organization to make sure each sensor is mounted in the correct location based on the description you give it during programming. The best option may be to write the description on the box the sensor came in, then after learning it into the system, put the sensor back in the box and then install each sensor based on the written description.
Most PowerG sensors can be learned in simply by pulling the battery tab and powering up the sensor. Some older PowerG devices have an enroll button that you must press to pair the device with the panel. Check the documentation that comes with each sensor to determine the best way to learn it into your panel. This FAQ covers how to enroll of a wide variety of PowerG sensors.
For most other types of wireless sensors, you can simply fault and restore the sensor to enroll it. If it's a door/window sensor this means simulating an opening and closing by moving the magnet away from the sensor and then back toward it. For motion sensors, you can move your hand in front of the lens. For some other sensors, like glass breaks, there may be a tamper switch you can fault and restore to learn the sensor into the system.
Some devices may have a QR code that you can scan to learn the device into the system. However, it may be difficult to line the QR code up with the panel's camera to allow the panel to read it. When you tap "SCAN QR CODE" it brings up the panel's camera. Hold the QR Code in front of the camera and line it up until the camera can scan it. Once scanned, you should see the screen where you can configure the zone.

Zone Configuration Screen:

- Sensor DL ID - This is the device's Serial Number. Shown above is the zone configuration screen for a Zigbee device. Different wireless devices from different manufacturers will have a variety of serial number configurations, so be sure to check the device to confirm what's been learned in matches what's printed on it.
- Sensor Type - This is the general sensor type. For example, Door/Window, Motion Sensor, etc. The Sensor Type will determine which sensor groups you can choose.
- Sensor Group - The Sensor Group programming option tells the system how a particular sensor will behave and be treated by the system. This FAQ describes each Sensor Group, and shows which Sensor Type supports each group.
- Sensor Name - This is the description that you see on the screen to describe this sensor. This is also what the panel speaks when voice prompts are enabled. You can use the existing vocabulary descriptions, or you can type in a custom name. The panel has text-to-speech capabilities, so it will be able to speak what you type.
- Chime Type - This is the chime sound you will hear when this sensor is faulted. Each sensor can have a chime, voice, both, or neither enabled. When the system is disarmed and a sensor with a chime sound enabled is opened, the system will play that chime sound to let anyone nearby know that the sensor has been faulted. If Voice Prompt is enabled for the sensor, the Sensor Name will also be announced.
- Voice Prompts - This is either On or Off. When On, the voice description for the zone will be annunciated along with the chime sound selected when the system is disarmed and the sensor is faulted/opened. When Off, no voice annunciation will be made for the sensor.
- Source - Source is usually filled in automatically when you use Auto Learn to enroll sensors. If you are manually entering the information, be sure to choose the correct source based on the sensor type. The available source types depend on the panel version and whether any additional daughter cards have been installed. If you're unsure about the source, it is recommended that you use Auto Learn.
- Save - Be sure to save your work once you have completed the zone configuration. Once you've configured all of the zones you have, tap Next to move on to the next segment of the Installation Wizard. You'll see a Sensor Signal Test screen. This will show you the signal strength of your sensors. This is also available in panel tests, and should be checked while sensors are in their permanent mounting location. You can read all about panel tests in this FAQ. Tap Next again to move to the next step in the Installation Wizard.
Enable Panel Glass Break?:
This feature uses the panel's built-in microphones to listen for the sound of nearby breaking glass. If this feature is enabled, the ambient noise detection feature must be disabled (and vice versa). To use the panel glass break, certain criteria must be met. The panel must be wall mounted, and it must have primary power connected and working. When you enable this feature, it will use the next available zone in programming. The panel glass break can be active in Away or Stay, depending on the sensor group selected in zone programming.
The panel must be at least 3' (.91m) from the protected glass and not more than 15' (4.5m) from it. It should have an unobstructed path between the panel and the glass. The IQ Panel 4 provides a 90° detection area. The glass being protected must be framed.
Below are the remaining specifications for glass that can be protected using the panel's built-in glass break detector:
- Tempered Glass - 1/8” to 1/4” (3.2mm to 6.4mm)
- Plate Glass - 1/8” to 1/4” (3.2mm to 6.4mm)
- Insulated Glass - 1/8” to 1/4” (3.2mm to 6.4mm)
- Minimum Dimensions - 12” by 12” (30.5mm by 30.5mm)
Once you either Enable or Disable the panel's built-in glass break detector, you can press Skip to move to the next programming option.
SmartHome & Lifestyle:
This section allows you to configure Z-Wave, Zigbee (if the daughter card is installed), Deako, and PowerG Automation devices. When you press Start, you'll see options to Clear Device, Add Device, Scan QR Code, or Add Zigbee Device (if enabled). Clear Device will put the system into Z-Wave exclusion mode. Add Device will put the system into Z-Wave inclusion mode. Scanning a QR Code will add the device based on the parameters for that device. The device could be a Z-Wave device using Smart Start, a Zigbee automation device, or a PowerG automation device. The programming defaults will reflect the device type when the QR Code is scanned.
Pro Tip: For most Z-Wave devices, it's a good idea to exclude them before attempting to include them with the system. This will erase any Z-Wave network information that may be leftover from the factory. Refer to the individual device's instructions to see how to activate it for inclusion or exclusion. To access Z-Wave settings outside the Installation Wizard tap the gray bar at the top of the panel screen then tap Settings > Advanced Settings > Enter Installer or Dealer Code (1111 or 2222 by default, respectively > Installation > Devices > Z-Wave Devices.
Pair Bluetooth:
If you plan to use the panel's Bluetooth Low Energy (BLE) capabilities for automatic Bluetooth disarming, this is where you can pair your Bluetooth devices. Up to five (5) separate Bluetooth devices can be paired with the system and used for automatic disarming.
A Bluetooth device, usually a phone, is paired with the system. When the system is armed in Away Mode and one or more paired Bluetooth devices leave the area for a specified amount of time, when any of those devices return to within Bluetooth range of the alarm panel, it will automatically disarm without any input from the user. This is particularly handy when you're entering with your hands full. You can also set up a geofence based on one or more Bluetooth device locations to automate such items as thermostats, lights, and more.
To get to Bluetooth settings outside of the Installation Wizard, tap the gray bar at the top of the main panel screen, located above the time and date. Then tap Settings > Advanced Settings > Enter Installer or Dealer Code (1111 or 2222 by default, respectively) > Installation > Devices > Bluetooth Devices. Here, you can toggle Bluetooth on or off, adjust the disarm settings and adjust the Bluetooth disarm timeout. This is the amount of time the system waits after the system has been armed before seeing a paired device causes it to perform a Bluetooth disarm.
When you're finished pairing a device, you can choose to View Paired Devices. Once you're completely finished adding Bluetooth devices, tap Next.
IQ Remote:
There are a few different iterations of the IQ Remote. To determine if your IQ Remote is compatible with the IQ Panel 4, check out this FAQ. The IQ Remotes that are supported by the IQ Panel 4 use either WIFI or Access Point Mode to connect the remote keypad to the panel. This means that the distance between the keypad and the main panel is limited based on both the panel and the keypads respective distance from a WIFI source.
The IQ Remote-PG is compatible with the IQ Panel 4 (panel firmware 4.3.0+). This remote touchscreen keypad can connect to the panel using WIFI, PowerG, or the panel's AP Mode. With support for PowerG, this keypad can be mounted nearly a mile away from the panel and still work. You will be able to verify the signal strength of the IQ Remote-PG once it's been installed and working for a bit. The video attached to this FAQ gives you a walkthrough on programming an IQ Remote-PG with an IQ Panel 4.
Add Users?:
Next, the Installation Wizard walks you through adding secondary user codes. This is a quick and easy way to add users to the system. It is recommended that each alarm user have their own unique code. This allows you to know which user armed (if quick arming is disabled) or disarmed and at what time. You never know when this may be critical information to have
To begin, tap Add User:

Next, enter details for the user. Provide a First and Last Name, and a unique 4-digit code (or 6-digit, depending on your user code settings). This should be something the user can remember, but that others cannot guess easily. Enter the code, then re-enter it to confirm. The user type will be either, Usesr, Guest, or Master. User and Guest are the same and can only arm and disarm. A Master user can arm and disarm, but also access all user-related features and Settings, including connecting to Wi-Fi, User Management, Sound App and Sensor customization. When you've finished entering information, press Add User. Once you've finished with users, you can press Skip to proceed to the next section.


Contact Info:
The next screen you see will be your alarm dealer's contact information. If your system will be monitored, this information should be filled in automatically. If your system won't be monitored, then this information can remain blank. Press Skip to move to the next section.:

Check for Updates?:
If you have your system connected to WIFI you can perform this step. Press Start and the system will contact the Qolsys servers and download any updates that may be available. Once an update file has been downloaded, the system will automatically begin the update. Don't touch the panel screen until after it has rebooted and completed the update. Your panel may already be on the latest firmware, in which case, you'll see a screen telling you that:


Scan To Download Mobile App:
The next screen provides a QR Code for each app store. One for the Apple App Store and one for the Google Play Store. This QR Code will take you straight to the Alarm.com app within the respective store. If you haven't already downloaded the app, now is the perfect time. Once you're finished on this screen, press Skip:

Congratulations:
We've come to the end of the Installation Wizard. There is a quick tutorial video you can watch that shows you the basics of operating the system. If you're new to Qolsys panels, or alarm panels in general, it's a good idea to watch it. When you're finished, press Exit. This will exit the Installation Wizard and begin normal operation for the panel.


Did you find this answer useful?
We offer alarm monitoring as low as $10 / month
Click Here to Learn MoreRelated Products
- Answered
- Answered By
- Julia Ross
