How Do I Troubleshoot a Low Battery Condition on a Vista Panel?
To troubleshoot a low battery condition on a Vista Panel, use a multimeter to check battery voltage. A good battery should provide 13 to 13.5 Volts DC. If the battery is low, then a systematic check of all panel voltages will determine if the issue lies with the battery or with the panel.

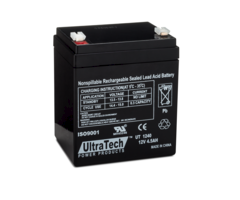
Vista Alarm Panels use a 12 Volt DC sealed lead-acid battery to maintain power to the system when AC Power is lost. The alarm panel provides a trickle charge to the battery when AC Power is present. When AC Power is removed, the charging circuit reverses, and the battery then powers the panel. The battery is also used to provide current for the bell output circuit. A missing or low battery will prevent the panel's siren output from providing the current required to sound the alarm.
An alarm panel supervises its battery in two ways. It checks periodically to see if the battery is present. Also, at preset intervals, the panel runs a load test of the battery to make sure that it is capable of powering the panel while under load. If either test fails, then a low battery condition will be indicated by the alarm panel, and a rapid trouble beep may sound.
For VISTA P-Series Panels like the VISTA-20P, as well as Turbo Series Panels like the VISTA-128BPT, the low battery threshold is 11.5 Volts DC. The P-Series Panels check for the presence of the battery every three (3) minutes. The Turbo Series Panels perform this check every 60 seconds. Both types of VISTA Panels perform an extended load test every four (4) hours. For more information about clearing a low battery condition once a new battery has been installed, read here.
But how do you determine if you need to replace the panel battery or if something else is causing your low battery issue? To troubleshoot a low battery condition, follow these steps:
-
Check AC voltage. With this troubleshooting, we will assume that there is not an "AC Loss" condition showing on the panel display. Both of the panel types we are discussing use a 16.5 Volt AC transformer. To check the panel's incoming voltage, set the meter to read VAC, as shown below:

In situations where you must select a scale for the meter, always choose the scale closest to, but higher than, the voltage you expect to see. On a 16.5 VAC transformer, you can expect to see about 18 - 19 Volts. In the example above, select the 200 Volts AC scale.
On both the panel types we are discussing, the AC transformer connects to the alarm panel on terminals 1 and 2. Because AC voltage does not observe polarity, you can put either of the meter leads on terminal 1, and the other lead on terminal 2. If you see voltage between 17 Volts AC and 20 Volts AC, you can rest assured that the transformer and the transformer wiring are both okay.
If you see 16.5 Volts AC, this would not cause the alarm panel to display AC Loss, but it does indicate that AC voltage is at the threshold of an AC Loss condition. An unusual load on the panel may cause this. Low AC voltage coming from the outlet to the transformer may also cause this. A bad transformer can also cause this issue. An outlet should meter somewhere between 110 Volts AC and 122 Volts AC. Use the meter to verify that the outlet for the transformer has good voltage.
To determine which of these issues may be present, remove the AC wires from terminals 1 and 2, and meter the wires themselves. If the voltage comes up by a Volt or more, then the transformer and the wires are good, and there is something connected to the panel causing the voltage to be lower than expected. If the AC voltage on the wires is still low, then move toward the transformer. Remove the wires from the transformer, and check the voltage at the screw terminals of the transformer itself. You may not be able to do this with the transformer plugged into the wall. You may need to move it to a power strip to gain access to the terminals. If voltage is still low at the transformer with nothing connected to it, replace the transformer. If the panel is not getting sufficient AC power, it can not properly charge the battery. In that scenario, low battery indications are to be expected. If the transformer voltage is good, then try replacing the wires between the transformer and the panel. Meter the new wires themselves first, once connected to the transformer. Assuming voltage is good there, connect the wires to the panel and check again. If voltage is now good, move on to Step 2.
If you determine that the wires and the transformer are both good and that there is an unusual load on the panel that is causing AC voltage to be low, then reconnect the wires to terminals 1 and 2. Put the meter back on these terminals. Begin removing wires from the panel (except for the AC wires) one at a time, and leave them off. Check the meter after each wire is removed. If you remove a wire that causes the AC voltage to come up to normal, mark this wire. Then put each of the removed wires back on, one at a time. Make sure that no other wire causes AC voltage to drop again. If it does, mark it, disconnect it, and continue putting other wires back in their normal positions. From there, figure out what the issue is on the wire(s) you removed. It could be something as simple as a staple through a wire, a wire pinched in a corner, or even a device at the end of the wire that is causing a problem.
If you get to a point where all wires have been removed, including the battery, and the panel's AC voltage is still considerably lower with the wires connected to the panel than with the wires removed from the panel, take the panel loose from the can and allow it to hang free, making sure nothing on the back of the printed circuit board can possibly be touching the metal enclosure, or anything else that is made of metal. If the AC voltage is still too low (right at 16.5 Volts AC or lower), then it's a bad panel. - Check Auxiliary Power. Set the meter to DC Volts. If you need to choose a scale, a 20 Volt scale is appropriate. Put the black meter lead on terminal four (4) and put the red meter lead on terminal five (5). You should see about 13.5 Volts DC here. Anything 13 Volts DC or higher is acceptable.
-
Check Charging Voltage. With the meter still on DC Volts, and set at a 20 Volt scale if necessary, put the black lead into the connector for the black battery tab. Put the red lead into the connector for the red battery tab. These connectors will be on the wires that would normally connect the alarm panel to the battery. Do this with the battery itself disconnected. This measures the amount of voltage that the panel is providing as a trickle charge to the battery when AC voltage is present. This voltage should be the same as the Auxiliary Power voltage. If it is considerably lower, or if there is no voltage, this indicates a possible bad charging circuit. At this point, power the panel down, remove the panel from the metal enclosure and again either allow it to hang free or lay it on something non-conductive, such as a piece of cardboard. Power the panel back up with AC power only, and check the charging circuit again. If it is still low or missing, replace the panel.
If all other voltages are good, but the battery voltage is low, replace the battery. After three (3) to five (5) years, the batteries used in these panels will begin to fail and will no longer hold a charge. This will result in the battery failing the load test and will cause the panel to indicate a low battery condition.

Did you find this answer useful?
We offer alarm monitoring as low as $10 / month
Click Here to Learn MoreRelated Products

Related Videos

Related Categories
- Answered
- Answered By
- Julia Ross