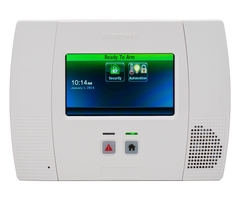
How Do I Upgrade My Honeywell L5200 to a Honeywell PROA7PLUS?
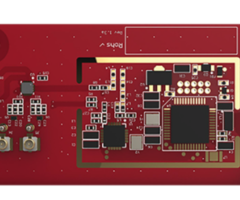
You can upgrade your Honeywell L5200 to a Honeywell PROA7PLUS by installing a Honeywell Home PROTAKEOVER inside of the PROA7PLUS and enrolling the existing sensors from the L5200 with the new PROA7PLUS System. Most L5200 sensors can ultimately be brought over, but there are exceptions.

Honeywell 5800 Sensors are the most frequently used sensors for a Honeywell L5200 LYNX Touch. The Honeywell 5800 Sensors are 345 MHz peripheral devices that can interface with a PROA7PLUS System if a PROTAKEOVER Module is used. The PROTAKEOVER is installed inside the PROA7PLUS so that the system can support one (1) of five (5) legacy sensor frequencies. For Honeywell 5800 Sensors, you must set the dial on the PROTAKEOVER to 0.
Please note that you can only use one PROTAKEOVER Module and one selected legacy wireless frequency with the PROA7PLUS. If you opt to have the dial on the PROTAKEOVER at 0 for Honeywell 5800 Sensors, then you cannot use the other frequency options, such as DSC 433 MHz, Interlogix/GE 319.5 MHz, Bosch Sensors, etc. Alarm Grid has made this process even easier by creating kits that include the PROA7PLUS Panel, and the PROTAKEOVER Module. There are three variations:
PROA7PLUS RF Takeover Kits
| Kit Name | SKU | Communicator Type |
|---|---|---|
| Honeywell Home PROA7PLUSWLTAKE | PROA7PLUSWLTAKE | Built-in WIFI Communicator |
| Honeywell Home PROA7PLUSWLTAKEA | PROA7PLUSWLTAKEA | Built-in WIFI Communicator AT&T LTE Communicator |
| Honeywell Home PROA7PLUSWLTAKEV | PROA7PLUSWLTAKEV | Built-in WIFI Communicator Verizon LTE Communicator |
But not all Honeywell 5800 Sensors will work with the PROA7PLUS and PROTAKEOVER combination. An important distinction must be made here, as only the uni-directional Honeywell 5800 Sensors that use "one-way" connectivity can interface with the system. Any bi-directional sensors from the Honeywell 5800 Series that rely on a "House ID" setting will not be able to be used. Furthermore, you cannot use any life-safety sensors from the Honeywell 5800 Series with the PROA7PLUS System in this way. This rules out any smoke detectors, heat detectors, and carbon monoxide (CO) sensors, so please keep that in mind. Lastly, you may find that certain Honeywell 5800 Sensors are not listed as compatible, sometimes for seemingly no reason. For instance, if you check the compatibility chart, then you will see that no key fobs are listed. Also missing are the Honeywell 5800MINI Door/Window Sensor and the Honeywell 5800C2W Wired to Wireless Converter. Any sensor that is not listed in the previously linked compatibility chart is not guaranteed to work with the PROA7PLUS and the PROTAKEOVER Converter. Check the chart for any questions about compatibility.
Complete the following steps to upgrade to a PROA7PLUS from a Honeywell L5200:
1. Install the PROTAKEOVER Module. The first thing you must do is install the PROTAKEOVER Module inside the PROA7PLUS. Start by powering down the PROA7PLUS System. This is done by unplugging the system's AC transformer from the wall outlet and disconnecting its backup battery. You can access the battery by removing the panel's bottom set screw and pulling the panel off its backplate. Locate the backup battery pack, and unplug it from its port.
When the PROA7PLUS is used with the PROTAKEOVER, you must use it with the backplate that came with the PROTAKEOVER. You can no longer use the original backplate that came with the PROA7PLUS System. The PROTAKEOVER backplate has a special antenna inside that is needed for the receiver to work properly. Two (2) metal prongs from the PROTAKEOVER Module make direct contact with the antenna inside the backplate. Without this connection, the wireless range from the PROTAKEOVER would not be usable. If you had the system mounted on the original backplate, you can take that one down at this time. Then install the new PROTAKEOVER backplate in its place.
Once the PROA7PLUS is off its backplate, flip the system over so that its backside is toward you. On the right-hand side (when facing the panel's back), you should see a cover that you can remove. You will take off this cover so that you can insert the PROTAKEOVER Module. Before inserting the module, do not forget to set the rotary dial on the PROTAKEOVER to 0, which is the option for Honeywell 5800 Sensors. Once you are ready, carefully slide the PROTAKEOVER Module into the slot. It should secure into place. You can also apply a set screw to keep it secure. If the hole for the set screw in the PROTAKEOVER is properly lined up with the hole in the panel plastic, you know that the PROTAKEOVER module is properly seated. Next, reapply the side cover. You can then restore system power. When doing this, connect the backup battery first, followed by AC power second. Lastly, mount the PROA7PLUS on the backplate that came with the PROTAKEOVER Module. If you have any questions about the physical installation, do not hesitate to check the PROTAKEOVER Installation Guide.
2. Enroll existing L5200 sensors. The next step is to take the sensors that were used with the Honeywell L5200 System and enroll them with the PROA7PLUS. The only L5200 sensors that you can bring to the PROA7PLUS are uni-directional, "non-encrypted" sensors. As a result, you won't need to clear or remove these sensors from the L5200 System. They can just be brought over to the PROA7PLUS.
At the time of this writing in March 2021, the PROA7PLUS does not allow for local programming at the panel. All system programming, including zone programming for enrolling new sensors, must be done remotely by the user's monitoring provider. In other words, the PROA7PLUS System must be actively monitored to complete this process. If you are retaining your existing monitoring company as you transition to the PROA7PLUS, then they can most likely access the programming information for your L5200 System, without you needing to do anything. But if you are switching monitoring companies, or if your monitoring company cannot access the programming information for the L5200, then you can access the programming information at the L5200 and provide it to your monitoring company to make the process easier for them.
If you need to access to zone programming information on your L5200, then start from the main screen of the system. Choose Security > More > Tools > enter the Installer Code (default 4112) > Program > Zones. This area of the system is called Zone Programming. Clicking on any zone and then clicking the Edit button will show its settings. Your monitoring company needs to know the Zone Number, Device Type, Response Type, Zone Description(s), Serial Number, and Loop Number for any sensor being brought over to the PROA7PLUS. You may find it easiest to just take a picture of the settings screen for each relevant zone. To return to the zone list, press the back arrow in the upper-right corner. Repeat, and go through each programmed zone until you have all the info needed to send to your monitoring provider. It is best to organize the information into an easy-to-read document or spreadsheet so that your monitoring company can easily program the PROA7PLUS. Once you have finished business on the L5200, return to the main screen by repeatedly pressing the return arrow in the upper-right. At some point, you will be asked if you want to allow the installer to re-enter programming. Make sure to choose "Yes" to avoid being locked out later.

Remember that you cannot bring over any L5200 sensors that used two-way bi-directional communication to the PROA7PLUS. Any life-safety sensor that was used with the L5200, such as a smoke detector or CO detector, is also incompatible with the PROA7PLUS. The PROA7PLUS System supports up to (123) legacy RF zones for Honeywell 5800 Sensors, so you should be able to bring over every compatible Honeywell 5800 Sensor from your L5200 System, and still have some room left over on your PROA7PLUS. Also, the PROA7PLUS will support (127) encrypted zones for PROSIX Sensors and Honeywell SiX Sensors. These encrypted zones are separate from the legacy RF zones used with 5800 Sensors.

3. Test the system. As a final step, you should test your PROA7PLUS System to make sure that all of the new sensors function properly. You can test sensors on the PROA7PLUS by starting from the main screen and choosing the three (3) horizontal bars menu button at the bottom. Then choose Tools, enter the Installer Code (default 4112), select System Tests, and then Test Sensors. This will build a list of all programmed sensors. Begin the test by pressing the Start Test button in the upper-right. You should then go through and fault (activate) every sensor you enrolled with the system. Each faulted sensor should move from the bottom of the screen to the top and will show in bold to indicate that the PROA7PLUS received a signal from that sensor. Once you've physically faulted every sensor, check the panel to be sure all listed sensors were recognized by the system. Always put your system on Test Mode with the central station before doing this. Failing to put your system on test mode could result in false alarms.
Did you find this answer useful?
We offer alarm monitoring as low as $10 / month
Click Here to Learn MoreRelated Products


Related Categories
- Answered
