How Do I Wire/Program a DSC NEO for Use With a COSMOD2W?
Wire the COSMOD2W power to Aux (+) and PGM2 on the DSC NEO. Connect the smoke and CO initiating circuits to two separate zones on the NEO panel. Connect the COSMO-2W and any 2WTA-B smokes in parallel to IDC (+) and (-). Connect the EOL resistors where directed, then program as indicated.

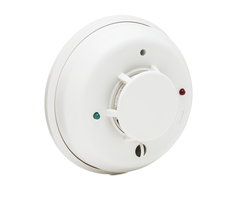
The purpose of the COSMOD2W is to interface between System Sensor's COSMO-2W combination smoke and CO detectors and an alarm panel that supports the monitoring of smoke and carbon monoxide zones. Because the COSMO-2W is a wired, combination smoke and CO detector, it needs the COSMOD2W to interpret the incoming alarm signals, determine if it is a smoke alarm, CO alarm, or both, and then activate the appropriate zone input or inputs on the alarm panel.
In addition, the COSMOD2W can act as a reversing polarity and syncing module, so that when one of its input devices signals an alarm, all like devices connected to the COSMOD2W will sound in sync with the proper Temporal-3 (smoke) or Temporal-4 (CO) sound. Compatible System Sensor i3 smokes, such as the 2WTA-B 2-Wire smoke detectors can also be used with the COSMOD2W.
Important Note: This is an example of a very simple setup with the COSMOD2W and COSMO-2W. This setup will allow the panel to indicate a fire alarm and/or a CO alarm based on the activation of the COSMO-2W devices and any other smoke detectors connected to the COSMOD2W. It will also provide a reset of the smoke detectors after an alarm. This wiring and programming will NOT cause all of the devices to sound when any single smoke or CO device signals an alarm.
Before performing any wiring connections, be sure the DSC PowerSeries NEO panel is powered down. Disconnect the transformer from the wall outlet, and disconnect the panel's backup battery. Be sure that the panel is completely powered down prior to beginning the wire connections.
Wiring Connections Between the DSC PowerSeries NEO and the COSMOD2W:
- Connect Power IN + from the COSMOD2W to Terminal 3, Aux + on the NEO.
- Connect Power IN - from the COSMOD2W to PGM 2 on the NEO.
- Connect SMK IDC + from the COSDMOD2W to any hardwired zone's positive terminal. (Note the zone number)
- Connect SMK IDC - from the COSMOD2W to the same hardwired zone's negative terminal.
- Connect CO IDC + from the COSMOD2W to any other hardwired zone's positive terminal. (Note the zone number)
- Connect CO IDC - from the COSMOD2W to the same hardwired zone's negative terminal.

In the case of the DSC PowerSeries NEO panel, any of the panel's hardwired zones can be used for the smoke zone, and any other hardwired zone can be used for the carbon monoxide zone. Both of these zone inputs will come into the panel from the COSMOD2W. Not all panels will allow you to use any hardwired zone for each of these inputs. This FAQ outlines how to use the COSMOD and COSMO detectors on a VISTA-20P and similar panels.
Wiring Connections Between the COSMOD2W and the COSMO-2W and 2WTA-B:
- Connect a 5.6k resistor across EOL SMK and EOL SMK terminals (in parallel). Do this by connecting each of the resistor's ends to one of the aforementioned terminals. Be sure the smoke zone is programmed to use the 5.6k resistor.
- Put another 5.6k resistor across EOL CO and EOL CO terminals (in parallel) by connecting it in the same way as described in Step 1. Again, be sure the zone used is programmed to look for a 5.6k resistor.
- Connect IDC (+) from the COSMOD2W to the first (+) terminal on the first COSMO-2W in the circuit. Each COSMO-2W has one (1) Negative (-) terminal and two (2) Positive (+) terminals. The first Positive (+) is for the incoming wire from the COSMOD2W or from the previous detector in the circuit. The second Positive (+) terminal is for the outgoing positive wire for the next detector in the circuit.

- If there are any System Sensor 2WTA-B smoke detectors being used, they will wire in parallel with the COSMO-2W detectors on the same circuit. They also have a single Negative (-) terminal, and two (2) Positive (+) terminals for the zone wiring. When you reach the last detector on the circuit, whether it is a COSMO-2W or a 2WTA-B, connect the 3.9k resistor (provided with the COSMOD2W) in parallel with one leg of the resistor connected to the Negative (-) terminal, and the other leg of the resistor connected to either of the Positive (+) terminals


Important Note: The PGM2 output provides up to 300mA of current. This is enough to power the COSMOD2W and one or two detectors. Each 2WTA-B draws 130mA in alarm (when reversing polarity is not used). Each COSMO-2W draws 50mA while in alarm (when reversing polarity is not used). The COSMOD2W draws 174mA of current in alarm, not counting the reverse polarity current of any attached detectors. If your installation will require more than 300mA of current, then you will need to wire a relay, such as an Altronix RB5, to the panel's Aux + and PGM2 terminals, and then use a power supply to provide current to the COSMOD2W. Because the power supply will have its own AC transformer, it will also need its own backup battery.
For installations that will use more than 300mA of current, we recommend the following wiring configuration. Fortunately, the panel programming remains the same, regardless of which wiring configuration you use.

In the above image, we show an AD12612 power supply from Resideo. Any 12 Volt DC power supply can be used here, as long as it provides enough current. DSC manufactures a power supply called the HSM2300 that can be used for this. It provides 1A of current and has connections for its own battery as well. We do not show the connections for AC power and battery on the power supply in the diagram above. The two AC terminals will connect to the transformer. The battery leads are color-coded Black and Red, to aid in observing proper polarity. In case the image is unclear, the connections in the diagram above are as follows:

Once all wiring connections have been made, power on the DSC NEO panel by plugging in the transformer and then connecting the panel's backup battery. Once the panel powers up, you can complete the programming. DSC PowerSeries NEO Panel Programming for Either of the Above Wiring Scenarios:
- Enter programming. On a full alpha display keypad, like the DSC HS2LCDRF9 N, enter [*] + [8] + Installer Code. The default Installer Code is 5555. The keypad will display "Select (000) Program Labels" and the Lock icon will light solid to let you know you have entered programming successfully.
- Navigate to Zone Definitions. The easiest way to navigate is to use the [<] and [>] arrow keys on the top left of the keypad. Arrow right [>] to programming section 001, aka Zone Definitions. Press [*] to enter the Zone Definitions sub-menu. The Lock icon will begin to flash, indicating you are in a sub-menu of programming. You'll see "Select (001) Zone 1". If you press [*] here, you'll be editing Zone 1. If you need to program a different zone number, you can arrow right [>] until you're on the correct zone number, then press [*] to edit that zone. Once you have entered programming for the correct zone number proceed to the next step. Remember, this refers back to the zone number you connected the COSMOD2W SMK IDC and CO IDC outputs to on the DSC NEO. For our example, we're going to assume that the Smoke output is connected to Zone 1, and the CO output is connected to Zone 2.
- Program the smoke zone. After entering programming for Zone 1 by pressing [*] at the Select (001) Zone Definitions" screen and then pressing [*] again at the "Select (001) Zone 1" screen, you'll know you're in a sub-sub-menu because the Lock icon will go out and the Green Check icon will light solid. The display should show "Zone 1 (000) Null Zone" if the panel has never had this zone programmed before. Arrow right [>] until it displays "Zone 1 <008> Standard Fire". Press [*].
- Program the carbon monoxide zone. When you press [*] in the previous step, you will automatically be taken to Zone 2, or the next available zone in programming. If this is your CO zone, as it is in our example, you can immediately begin arrowing to the proper zone type for carbon monoxide. You can use the right arrow [>] key, or you can simply type in the number 041. This is the proper zone definition for 24 Hr CO. Press [*]. This completes the zone programming for this FAQ, so press [#] to back out of Zone Definitions. Press [#] again until you get the solid Lock icon, which indicates you are in the first level of panel programming. Don't exit programming completely, as this will cause an alarm because the PGM 2 programming hasn't been completed yet.
- Program PGM2. From the main programming screen, where the Lock icon is lit solid, arrow right [>] until you reach section 009, PGM Definitions then press [*]. This is a sub-menu, so the Lock icon will begin to flash. PGM 1 will be displayed, arrow right [>] to PGM 2 and press [*]. The default programming for PGM 2 will be displayed, which is "PGM 2 (101) Fire and Burg". Arrow right [>] until the display shows PGM 2 (103) Sensor Reset". Press [*] then press [#] as many times as it takes to back completely out of programming.
- Reset PGM2. After you exit programming, it's a good idea to reset PGM2, which will begin providing power to the COSMOD2W. To do this, press [*] + [7] + [2]. The display should show "Output Deactivated". In this case, output 2, otherwise known as PGM2. This will ensure that PGM2 is in its normal state. The top LED on the COSMOD2W should begin flashing to indicate normal operation and the LEDs on the smoke and CO detectors should begin flashing to indicate normal operation.
- Test operation. It is strongly recommended that you perform a functional test. Follow the directions for testing provided with the detectors. It is a good idea to have the recommended canned smoke and canned CO that is recommended for testing. Once the alarm has sounded, silence it and verify that the reset occurs as it should. Remember, this is a minimal setup, and this wiring will not cause all of the detectors to sound when any one of them goes off.
Did you find this answer useful?
We offer alarm monitoring as low as $10 / month
Click Here to Learn MoreRelated Products


Related Categories
- Answered
- Answered By
- Julia Ross