How Do I Upgrade My DSC Impassa to a Honeywell PROA7PLUS?
You can upgrade your DSC Impassa to a Honeywell PROA7PLUS by installing a Honeywell Home PROTAKEOVER Module inside the PROA7PLUS. With this module installed, the PROA7PLUS System can support most of the uni-directional 433 MHz sensors that were previously used with the Impassa System.

The DSC Impassa is a wireless all-in-one panel that supports legacy 433 MHz sensors from DSC. However, the Impassa is an older and outdated system by most accounts, and many users with the system want to upgrade to something more modern that offers more features and capabilities. One such option is the PROA7PLUS. The PROA7PLUS System supports a legacy receiver called the PROTAKEOVER Module that allows you to integrate older 433 MHz sensors with the system. This can save you money, as you will be able to use any existing working sensors from your old system, instead of needing to purchase new ones. That being said, there are a few things to keep in mind if you plan on using a PROTAKEOVER Module to integrate any existing 433 MHz sensors with your PROA7PLUS.
For one, only one legacy frequency can be supported by the PROTAKEOVER Module and the PROA7PLUS System at any given time. The PROTAKEOVER Module has a rotary dial on it. You use this dial to pick the legacy frequency that will be supported. To use DSC 433 MHz Sensors, you must set the dial to 2. By doing this, you won't be able to select the other available legacy frequencies, such as 345 MHz, 319.5 MHz, etc. It is also important to understand that only one (1) PROTAKEOVER unit can be installed inside a PROA7PLUS System. In other words, it's not like you can just get a second PPROTAKEOVER Module and expect it to add a second legacy frequency for the system. You can only add one (1) PROTAKEOVER Module, and you can only choose one (1) legacy frequency. This is not really a big concern for anyone upgrading from an Impassa, as the Impassa is only capable of supporting 433 MHz sensors. Just don't forget that if you choose to support the 433 MHz frequency to bring over existing DSC Impassa Sensors, then you are essentially giving up the ability to support any other legacy frequencies.
Note that a sensor can be assigned any Zone Number, no matter if the senor is legacy or encrypted. New sensors are assigned Zone Numbers in the order in which they are enrolled. You just can't exceed 127 encrypted zones or 123 legacy zones. Adding the 127 encrypted zones with the 123 legacy zones is what gives a ProSeries Alarm Panel its 250 total zones.
The next thing to keep in mind is that there are certain types of sensors that can never be used with the PROTAKEOVER Module under any circumstance. Most significantly, this includes life-safety sensors, such as smoke detectors, heat detectors, and carbon monoxide (CO) detectors. Most key fob units are also not supported by the PROTAKEOVER. If you are in doubt about a certain sensor being supported by the PROTAKEOVER Module, then you might want to check the PROTAKEOVER Compatibility Chart. Any sensor listed on the chart is guaranteed to work with the unit. If a sensor is not listed, then it cannot be promised to work. On that note, it is known that there are some sensors not listed on the chart that have been proven to work with the unit. You are certainly able to try any sensor you want at your own discretion. Still, the simple rule that we have to abide by is that if a sensor isn't on the chart, then it should be assumed that it will not work. Our understanding is that Resideo intentionally made life-safety devices incompatible with the PROTAKEOVER Module due to liability concerns. If you are looking for life-safety sensors for use with a PROA7PLUS System, then we strongly recommend checking out certified compatible devices from the Honeywell SiX and PROSIX lineups.
If you are starting from scratch, then it is likely that you will need to get both a PROA7PLUS Alarm System and a PROTAKEOVER Module. You can make things a bit easier on yourself by buying one of our bundled kits. With one of these kits, you will get a PROA7PLUS Panel, a PROTAKEOVER Converter, and a Honeywell LT-CABLE for easily connecting power. The difference between these three (3) kits is the type of communicator(s) they use. One (1) kit is WIFI only, and it does not include a cellular backup. There other two (2) are dual-path and offer both internet and cellular. Of those dual-path kits, one uses AT&T LTE, and the other uses Verizon LTE. Whether you decide to go IP only or dual-path with both cellular and IP is up to you. Just keep in mind that if the internet goes down and you don't have cellular backup, then your panel won't be able to alert you and/or the central station during an emergency. The trade-off though is that cellular monitoring is usually more expensive than internet-only monitoring. You should consider your needs and your own situation to decide if the extra cost associated with cellular monitoring is worth it. Alarm Grid always recommends cellular monitoring, but we will always support any user who decides that internet-only monitoring is sufficient. If you do decide to get cellular monitoring, and you are having trouble choosing between AT&T and Verizon, then just go with whichever network provides more reliable service in the area where the system will be used. Coverage maps are available if you are unsure. Remember, deciding between AT&T and Verizon for your security system has nothing to do with the service you use for your personal cell phone! You may also want to check out this blog post to learn more about all the monitoring plans offered by Alarm Grid.
PROA7PLUS RF Takeover Kits
| Kit Name | SKU | Communicator Type |
|---|---|---|
| Honeywell Home PROA7PLUSWLTAKE | PROA7PLUSWLTAKE | Built-in WIFI Communicator |
| Honeywell Home PROA7PLUSWLTAKEA | PROA7PLUSWLTAKEA | Built-in WIFI Communicator AT&T LTE Communicator |
| Honeywell Home PROA7PLUSWLTAKEV | PROA7PLUSWLTAKEV | Built-in WIFI Communicator Verizon LTE Communicator |
Complete the following steps to upgrade to a PROA7PLUS from a DSC Impassa:
1. Install the PROTAKEOVER. First, drop all power to the PROA7PLUS System if it is already powered on. You must drop AC power and battery power. AC power can be dropped by unplugging the system's transformer, by unplugging the LT-Cable barrel connector if you are using one, or by turning off power at the circuit breaker. Battery power is removed by disconnecting the system's backup battery. To access the battery pack, you must remove the panel's bottom set screw and take the panel off its backplate. Continue once the system is completely powered down.
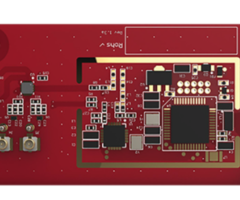
The PROTAKEOVER Module comes with a new system backplate. You are required to use this backplate because it has an antenna for the PROTAKEOVER integrated inside. Without this antenna, the PROA7PLUS System will have virtually zero range when communicating with the chosen legacy RF sensors. There are two (2) metal prongs on the PROTAKEOVER Module that make direct contact with the inner antenna on the PROTAKEOVER backplate when everything is set up properly. If you were previously using the panel's original stock backplate, then feel free to dismount it, and install the PROTAKEOVER backplate in the exact same spot.
Once the panel is powered down and off the backplate, flip the system over. You should be facing its backside, which is opposite the touchscreen. Assuming that the system is not upside-down, you will find a panel slot cover on your right-hand side. You should be able to easily slide this cover off. With the cover removed, you can then carefully insert the PROTAKEOVER Module into the opening. Before you do this, make sure to set the dial on the unit to 2 so that DSC 433 MHz Sensors will be supported. There is no clicking sensation when you move the dial, so carefully line the arrow up with the correct number, in this case, number 2. You will be able to tell that the PROTAKEOVER is installed properly, as its set screw slot will be aligned with the corresponding slot in the panel. We recommend applying the set screw to keep things more secure, but it is technically optional.

From there, you can reapply the side cover, and then restore system power. Battery power should be connected first, and AC power should be restored second when reapplying power to the system. Restore battery power by plugging the connector back into the corresponding port. Then restore AC power by either plugging the transformer back in, or by restoring power at the circuit breaker. Obviously, this will depend on how you dropped system AC power earlier. You may also refer to the PROTAKEOVER Installation Guide if you need further help. Reinstall the panel in the new backplate and reapply the set screw in the bottom.
2. Enroll sensors. With the PROTAKEOVER installed and its dial set to 2, you can now begin enrolling your existing DSC 433 MHz Wireless Sensors. How you proceed here will largely depend on whether or not your PROA7PLUS System supports local end-user programming. As of May 2021, local programming for the PROA7PLUS is only available as a Beta Development feature, and it is not yet available to the general public. However, Resideo has assured us on multiple occasions that the feature will be released to the public very soon. We will be covering this step as though you have access to local end-user programming. But if your panel does not support the feature, then you must reach out to your monitoring provider to assist you with the enrollment process. Once Resideo releases the feature to the public, a firmware update will be made available so that you can upgrade your panel and get it to support local programming. In other words, even if your panel doesn't support the feature now, the expectation is that it will later once Resdeo releases the feature and the corresponding firmware update is applied. Without local programming, all sensor enrollment will need to be performed by your monitoring provider working with you or a technician on site. This is because all legacy RF sensors MUST be learned into the PROA7PLUS. Their serial numbers cannot be manually entered.
Once you have local end-user programming on the PROA7PLUS, sensor enrollment is relatively simple. Start from the main system screen. Press the three (3) horizontal bars menu button at the bottom-center. Select Tools, and then enter the system's Installer Code (default 4112). Then choose Programming, and then Peripherals, and then press the plus (+) button in the top-right corner. The system will begin listening for sensors to enroll. Fault or activate a sensor to get it to show up. You might also try activating the sensor's tamper switch by opening it up. Make sure that the sensor you are trying to enroll is powered on and within wireless range of the PROA7PLUS Panel. The system should receive a signal from the sensor and bring you to an Edit Sensor Menu so that you can set various configurations for the zone. Do not be surprised if the Serial Number you see doesn't match the one listed on the transmitter, this is normal. The PROTAKEOVER receives the serial number of the sensor and then converts it into a 7-digit number that the PROA7PLUS panel can understand. This is the reason that all legacy RF sensors MUST be learned in.
The following fields will be programmed:
Sensor Type: This should be picked up during auto-enrollment. Do not reconfigure this setting.
Serial Number: This should be detected during auto-enrollment, so there is no need to change this setting.
Partition: This is used for assigning the sensor to one of the four (4) system partitions. Decide which partition the zone is being used with, and set this entry accordingly.
Zone Descriptions: These are used for naming the sensor. The panel will also speak whatever is put in these fields, along with the Device Type, when an alarm occurs, or when Voice is enabled. You do not need to put the type of sensor (e.g. door, motion, glassbreak, etc.) into the Zone Descriptor. Also, you are not required to program the second Zone Descriptor if you only need one word in addition to the Device Type. Programming both is optional. Remember, the panel will speak Zone Descriptor 1 + Zone Descriptor 2 + Device Type. So if Zone Descriptor 1 is "South", Zone Descriptor 2 is "Bedroom", and Device Type is "Door", then the panel will speak "South Bedroom Door" whenever the zone is faulted. If you make Zone Descriptor 1 "Front", and Zone Descriptor 2 "Door", and Device Type "Door", then the panel will actually say, "Front Door Door". This is very annoying!
Device Type: Set based on the type of sensor you are using (e.g. door, window, motion, glassbreak, etc.) The setting here will determine which Response Type options are available. If you want access to ALL Response Types, then you can set the Device Type to "Other". Remember that this setting will be spoken along with the Zone Descriptions when the sensor is faulted unless you set the Device Type as "Other", in which case it will not be spoken.
Response Type: This is a very important setting, as it determines what action(s) the system will take when the sensor is faulted. The available Response Types will depend on what you selected for Device Type. To gain access to ALL Response Types, set the Device Type to "Other".
Supervised: Enable if you want the system to show a trouble condition due to the sensor failing to periodically check-in with the panel, usually due to a dead sensor battery or due to the sensor being taken out of range. This setting is usually disabled or may be unavailable for sensors that may be moved, such as key fob devices and wearable medical alert devices. Remember, sensors will still send check-in signals even if this setting is disabled. This setting merely determines whether or not the panel will look for these check-in signals and display a trouble condition whenever a check-in signal is not received within a certain time interval. For most security sensors, you should enable this option.
Alarm Report: If disabled, then the system will not send an alarm signal to the monitoring station if this zone causes an alarm on the system. For most security sensors, you want this enabled. Otherwise, no alerts will be sent to the central station if the zone causes a system alarm. This is essentially the most important function of your alarm system, so for almost all security, the general practice is to have Alarm Report enabled.
Chime: This is the sound the panel will make when the sensor is faulted while the system is disarmed and the Chime feature is toggled on. Set it to a Chime sound that you like, or set it to Disabled if you do not want the panel to make a chime sound when this zone is faulted. The Chime option can be selected on a zone-by-zone basis, and there are ten (10) separate sounds to choose from. Zones with a Device Type of "Other" will not have the option for Chime.
After you have properly set the configurations for the zone, you can move on to the next zone by pressing Save & Add Another in the top-right corner. Or, if you have programmed the last sensor, then you can press Save in the upper-right. Continue to the next step after you have programmed all the legacy sensors.
Keep in mind that the PROA7PLUS System has room for 123 legacy sensor zones when using the PROTAKEOVER. The system also has 127 additional zones used with Honeywell SiX Sensors and PROSIX Sensors. In total, the system can support 250 wireless zones. Only the 123 legacy zones will be used with the legacy 433 MHz sensors that may have been used previously with a DSC Impassa. The DSC Impassa Security System only has 64 zones, so you should definitely have room for all the compatible sensors used with your old Impassa System. You will even have some extra room so that you can add more 433 MHz sensors if you want to. Just don't forget that you can only use one-way (uni-directional) 433 MHz sensors with the PROA7PLUS and the PROTAKEOVER Module. The PROTAKEOVER cannot support any bi-directional (two-way) sensors. As a reminder, you cannot use any 433 MHz life-safety sensors with the PROTAKEOVER, and Resideo does not list any key fob devices as being supported by the PROTAKEOVER. Lastly, make sure that the PROTAKEOVER dial is set to 2 if you intend on using 433 MHz sensors from a DSC Impassa. If the dial is not set to 2, then existing 433 MHz Impassa Sensors will not be supported.
3. Test the system. Upon enrolling the last sensor and saving the changes, you should conduct a Walk Test. This is the best way to ensure that everything is working properly. Before beginning, make sure to put your system on test mode with the central station. Begin from the main screen of the system. Press the three (3) horizontal bars menu button at the bottom of the screen. Select Tools. Then enter the system's Installer Code (default 4112). Then choose system Tests, followed by Test Sensors.
You should see every programmed sensor on the screen. If a sensor is absent, then that means it was not programmed properly. Click the Start Test button in the upper-right corner. Then click OK to start the test. The panel will emit a loud beep. You can then go around and fault (activate) each programmed sensor. You should see any activated sensor appear at the top of the screen in bold. Make sure that every programmed sensor shows up at the top of the screen when faulted. After testing every sensor, press the End Test button in the upper-right corner. You can then return home by clicking the security logo in the bottom-right corner. Alternatively, you can return home by repeatedly pressing the return arrow in the upper-left corner.
Did you find this answer useful?
We offer alarm monitoring as low as $10 / month
Click Here to Learn MoreRelated Products


Related Categories
- Answered