How Do I Install a First Alert VISTAH3?
If you're installing a First Alert VISTAH3 yourself, the steps are a little different from those outlined in the manual. First, choose a mounting location that ensures strong reception for RF sensors and the LTE communicator. Once mounted, add a touchscreen keypad. Then, program the system.
The official Install Guide for the VISTAH3 alarm panel starts by advising you to create an AlarmNet360 account. However, since homeowners don't have access to this platform, this step will be handled later in the process for DIY installers. If you choose Alarm Grid for your monitoring service, we have a variety of plans available from self-monitoring plans, to full central station monitoring, including an option for video-only surveillance. You can explore all of our available plans here.
You'll need a touchscreen keypad to program a First Alert VISTAH3 system without using AlarmNet360. Currently, only wireless touchscreen options are available: the PROWLTOUCH, PROWLTOUCHC, or VISTAHTCHWLC. Since these are all WIFI keypads, you'll also need a PROWIFI or PROWIFIZW module which adds WIFI capability to the system. The PROWIFI adds WIFI only while the PROWIFIZW adds both WIFI and Z-Wave Plus.
Choose a Mounting Location
The mounting location of your First Alert VISTAH3 panel is key. The panel houses vital components, including wired zones and expanders in addition to the LTE communicator (if installed), the WIFI communicator (if installed), the PROSIX receiver, and the VISTAHTKVRWL (if installed). Because of all this wireless equipment, strong signal strength and reliable reception are essential. Choose a central location within the protected area, but ensure it's also safe from potential intruders.
Keep in mind that large metal objects, like mirrors, ductwork, and appliances can reflect wireless signals, and potentially interfere with communication between wireless sensors and the receiver. While it's impossible to eliminate all potential interference, if a sensor in a specific location has trouble communicating, or if a previously reliable sensor suddenly experiences RF supervision issues, consider potential metal obstacles or recent changes in the surrounding environment.
If your PROLTE-A2 or PROLTE-V2 LTE communicator has weak signal strength, an antenna can be added to improve it. The PROLTE-ANT is an indoor/outdoor antenna with a 9.8' (3m) cable included.

Wireless repeaters can extend the range of your sensors by receiving a wireless signal on a specific frequency and then retransmitting it to the receiver. However, repeaters typically can't relay signals from other repeaters. Also, if the communication issue is caused by environmental factors, rather than distance, a repeater may not be an effective solution.
The PROSIXRPTR can potentially double the range for PROSIX wireless sensors. The range for most PROSIX sensors is ~300' (92m) or more in open air. Check the documentation for any specific sensors you plan to use as the range may vary depending on the sensor and its unique form-factor.
The First Alert VISTAHTKVRWL offers compatibility with several legacy wireless sensor frequencies:
- Honeywell 5800 Series (345 MHz)
- 2GIG (345 MHz)
- Qolsys/Interlogix (319.5 MHz)
- DSC (433 MHz)
- Bosch (433 MHz)
However, it does not support encrypted versions of 2GIG (345 MHz) or Qolsys/Interlogix (319.5 MHz) sensors, nor does it support the use of key fobs or bi-directional sensors.
While Honeywell and 2GIG both use 345 MHz, and DSC and Bosch use 433 MHz, their protocols differ, making them incompatible with each other. The module supports only one of these frequencies at a time. The First Alert VISTAHTKVRWL Compatibility List outlines all sensors that have been tested and found to work from each manufacturer.
If you plan to use the VISTAHTKVRWL with 5800 Series wireless sensors or 2GIG unencrypted 345 MHz sensors, the Resideo 5800RP repeater or the 2GIG RPTR1-345 can be used. Most Resideo 5800 series devices have a nominal range of ~200' (60.9m). Either repeater can potentially double that range and neither can repeat a signal from another repeater. Always check signal levels and reception before permanently mounting the panel. Address any signal problems early in the installation process.
You can do this by placing the sensor with the shortest listed range in the farthest planned location from the panel. Also test in any areas potentially affected by environmental factors, like large metal objects. Just remember that an adjustment of even a few inches can make a big difference in wireless sensor reception.
Run Wiring
Assuming this is a new install, rather than replacement of an existing panel you'll need to run wires for any hardwired zones, hardwired keypads, hardwired expansion modules, and Ethernet if you plan to have a hardwired internet connection. You'll also need to run the wire for power.
Power Wiring:
For new construction projects, alarm system wiring is typically done before drywall and other finishes are installed. The pre-wire cabling technician will need to know the planned mounting locations of the alarm panel and all other wired devices.
Use the provided transformer (P/N R300-12131 in the US, P/N R300-12131-CAN in Canada) to power the system. Follow the wiring gauge and length limits in the chart below. For example, if you use 18 gauge wire, the total acceptable length of wire between your power supply and the panel is between 50' and 60' (15.2m - 18.2m). Failure to abide by these limits will almost definitely result in power issues for the panel:
Wire Length Limits Based on Wire Gauge:
| Wire Gauge | Wire Length Limit |
|---|---|
| #22 AWG | Up to 25' (7.6m) |
| #20 AWG | 30' - 40' (9.1m - 12.1m) |
| #18 AWG | 50' - 60' (15.2m - 18.2m) |
| #16 AWG | 75' - 100' (22.8m - 30.4m) |
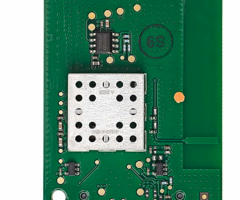
The panel has a wiring access opening inside the cabinet, just below the panel board (see picture and key below). Additional wiring access is available through knockouts on the sides, top, and bottom of the enclosure. If the main opening isn't sufficient or conveniently located, use a screwdriver (or similar tool) to push a knockout inward from the outside and remove it.
The VISTAH3 is the first panel produced by Resideo (formerly Honeywell and Ademco) that can support every different type of zone ever produced by the company. This includes hardwired, older 5800 Series wireless, PROSIX wireless, V-PLEX wired expansion, and ECP wired expansion. However, unless you're replacing an existing system, it's likely you won't use most of these different expansion options. We'll touch briefly on each option below after we discuss hardwired zones.
Hardwired Zones:
By default, Zones 1 - 8 employ 2,000 Ω (2k) resistors for end-of-line (EOL) supervision, indicated by the Red-Black-Red-Gold color code. These resistors, supplied within the panel's hardware package, are absolutely necessary for ensuring the integrity of zone wiring. For instance, in a normally closed door zone, the absence of an EOL resistor allows a potential intruder to bypass the zone by applying a wiring short across its terminals, within the wiring, or at the sensor preventing the system from recognizing any change in the door's status.
Zones 2 - 8 can be doubled. That means that two separate circuits can be connected to the same zone terminals, giving you two separate zones. Doubling is achieved by employing different resistor values to each of the circuits. For example, if you decide to double Zone 2, you'll connect two separate circuits on Terminals 3 and 4. The circuit that goes with Zone 2 will require a 3,000 Ω (3k, color code Orange-Black-Red-Gold) resistor wired in series at the last sensor on the circuit. Once you program Zone 2 as Zone Doubled, the next available zone number, starting with Zone 9, will automatically be paired with Zone 2. The circuit for the higher numbered zone will require a 6,200 Ω (6.2k color code Blue-Red-Red-Gold) resistor wired in series, just like Zone 2.
Notes:
- Sensors on doubled zones must be Normally Closed.
- A short on either zone in a doubled pair will result in a trouble condition on both zones in the pair when the system is disarmed. If the system is armed this will result in an alarm on both zones. This is the reason you can't use normally open devices when zone doubling. Restore is sent when either condition is cleared at the keypad.
- Never attempt to double a life-safety zone.
- First Alert VISTAHEXPHW wired zone expander zones can also be doubled and the same rules apply.
First Alert VISTAHTKVRWL - Legacy Wireless Takeover Module:
The First Alert VISTAHTKVRWL allows you to use older wireless devices with the VISTAH3 panel. It's compatible with several legacy frequencies, acting as a receiver for Honeywell 5800 Series (345 MHz), 2GIG (345 MHz), Qolsys/Interlogix (319.5 MHz), DSC Legacy (433 MHz), and Bosch (433 MHz) sensors. While some manufacturers use the same frequencies, their technologies are different. Therefore, you can only use sensors from one (1) manufacturer. Only one-way wireless devices are supported; key fobs, bi-directional, and encrypted sensors are not compatible.
When the VISTAHTKVRWL is used, it is recommended to use the knockouts shown in this screenshot, if necessary, to avoid interfering with the takeover modules antennas:

Identification Key for Above Image:
| Identifier | Description |
|---|---|
| 6 | VISTAHTKVRWL Module |
| 8a | Rear Wiring Access Knockout |
| 8b | Large Right-Side Knockout |
| 8c | Small Right-Side Knockout |
| 8d | Small Bottom-Right Knockout |
First Alert VISTAHTKVR-V - V-PLEX Takeover Module
The VISTAHTKVR-V takeover module enables the integration of compatible serial V-PLEX devices with the VISTAH3 system. It connects to the VISTAH3's iBus terminals, providing connection points for serial V-PLEX devices. The module features an 'INPUT' for the panel's iBus wiring and an 'OUTPUT' for daisy-chaining to other iBus modules, simplifying installation by reducing the need for direct wiring back to the VISTAH3 panel.

VISTAHTKVR-V Summary of Connections:
| Terminal Number | Connection |
|---|---|
| iBus Input From VISTAH3: | |
| 1 | Panel iBus Positive (+) - Red |
| 2 | Panel iBus Negative (-) - Black |
| 3 | Panel iBus B (Data IN) - Yellow |
| 4 | Panel iBus A (Data OUT) - Green |
| iBus Output, for daisy-chained V-PLEX devices (Optional): | |
| 12 | Outgoing iBus Positive (+) - Red |
| 11 | Outgoing iBus Negative (-) - Black |
| 10 | Outgoing iBus B - Yellow |
| 9 | Outgoing iBus A - Green |
| V-PLEX Connections: | |
| 5 | 12VDC Positive* (+) - Red |
| 6 | 12VDC Negative* (-) - Black |
| 7 | V-PLEX Positive (+) - Red |
| 8 | V-PLEX Negative (-) - Black |
| *A connection to terminal 5 and 6, DC Positive (+) and DC Negative (-), is optional for devices such as the 4208U or 4208SN that have power input terminals. The purpose of this connection is to minimize the current drawn directly from the V-PLEX polling loop. Available V-PLEX current is 128mA from Terminals 7 and 8. | |
Serial V-PLEX devices that are compatible with the VISTAHTKVR-V:
| Product Name | Product Description | Image |
|---|---|---|
| 269SN | Hold-up Switch w/Stainless Steel Cover |

|
| 4101SN | 1 Zone/1 Programmable Relay |

|
| 4190SN | 2 Zone Expander |

|
| 4191SN | Recessed Contact |

|
| 4193SN | 1 Zone |

|
| 4193SNP | 1 Zone |

|
| 4208SN | 8 Zone Expander |

|
| 4208SNF | 8 Zone Expander w/Class A Zones | See Above Image. They look alike, but work differently. |
| 4208U* | 8 Zone Expander *Must be set to serial mode |

|
| 4209U* | 4 2-Wire Smoke Zones *Must be set to serial mode |

|
| 4939SN | 1 Zone, Surface Mount |

|
| 4959SN | 1 Zone, Overhead Door Contact |

|
| 5193SD | V-PLEX Smoke Detector |

|
| 5193SDT | V-PLEX Smoke/Heat Detector |

|
| DT8050A-SN | Dual-Tec Motion w/Anti-mask |

|
| DT7500SN | Dual-Tec Motion |

|
| FG1625SN | FlexGuard Glass Break Sensor |

|
| IS2500SN | PIR Motion Sensor |
|
| IS3050A-SN | PIR Motion w/Anti-mask |

|
| V-PLEX VSI | V-PLEX Short Isolator |

|
Mount the panel
Once you've decided on an ideal mounting location, you're ready to install the panel. If you will have hardwired zones, keypads, or other hardwired devices, now is the time to run those wires as well. If this is a new installation in a home or business under construction, you'll likely be pre-wiring the system. Be sure to discuss all wiring requirements with the low-voltage technicians who will be providing this service.
To mount the VISTAH3 control panel, you should follow these steps:
- Locate the mounting points. Fully open the cabinet door. You may want to remove it entirely. To do so, first lay the panel on its back on a flat surface, ensuring the cover remains fully open. Then, firmly press down on the door/cover right at the hinge, pushing down towards the flat surface and the rear of the cabinet. Please note: The door/cover can be very tight the first time you try to remove it! There are three (3) mounting points for securing screws across the top of the cabinet, and three (3) more across the bottom. See the image below for reference.
- Remove wiring knockouts. In particular, if you plan to use the rear wiring access, remove this knockout prior to mounting the panel. Refer to the image and table above to determine the best knockouts to choose if you plan to use a VISTAHTKVRWL wireless takeover module.
-
Mount the control panel cabinet. Using the provided screws and drywall anchors if necessary, mount the cabinet to a sturdy wall in a clean, dry, climate-controlled area. Choose a location that is not readily accessible to the public. It is recommended that you use a level when installing the alarm panel cabinet.
In the image below, refer to the items marked with a three (3). These are the six (6) mounting points for screws. This image is taken from the VISTAH3 Install Guide, Page 4.
-
Secure the wall tamper. With an anchor and screw, secure the wall tamper. If possible, it is strongly recommended to attach this screw to a stud (anchor not required). Once installed, if an intruder tries to pull the panel off the wall, the perforated tamper will break away and remain attached to the wall while the rest of the cabinet is removed, disengaging the rear tamper. This will cause a trouble condition if disarmed or an alarm if armed.

-
Install additional modules. Once the panel has been mounted to the wall securely, before power up, you can install any additional modules you currently plan to use:
- Install LTE communicator. Install the PROLTE-A2 or PROLTE-V2 on the panel's top left edge connector. If your panel has a factory-installed securing strap (as shown in the image above), remove the screw and strap first. Slide the PROLTE communicator into place over the edge connector. Finally, replace the strap and install the screw to secure it.
- Install PROWIFI or PROWIFIZW. If you will be using a PROWIFI (WIFI) or a PROWIFIZW (WIFI and Z-Wave Plus), you can install it by sliding it down over the edge connector at the top-right edge of the board. Be sure the module seats over the connector securely. Use the provided screw to secure the module to the VISTAH3 cabinet.
-
Install VISTAHTKVRWL takeover module. You can also install the VISTAHTKVRWL at this time. The takeover module slides over the connector on the right edge of the panel PCB, near the top. This module comes with two (2) antennas that must be installed. Without the included antennas, the reception range for legacy wireless devices will be severely compromised. Be sure to set the selector dial on the module for the appropriate legacy RF frequency prior to installation!
VISTAHTKVRWL Rotary Dial Settings for Compatible Legacy RF Protocols:
Below, the VISTAHTKVRWL is shown with the antennas properly installed. This image is taken from the VISTAH3 Install Guide, page 10.RF Protocol Dial Setting Honeywell 5800 5 2GIG 345 MHz (unencrypted) 6 DSC 433 MHz 7 Qolsys/GE 319.5 MHz (unencrypted 8 Bosch 433 MHz 9 


Complete Hardwired Zone Wiring
If you are adding wired expansion zones through a VISTAHEXPHW, connect the module to the panel's iBus terminals for power and data, then wire each field zone to the expander itself. The VISTAHEXPHW provides eight additional hardwired zones per module.
The VISTAHEXPHW supports end-of-line resistor (EOLR) supervision with resistor learning. This allows the module to accept different resistor values, which can be helpful when reusing existing wiring. However, if you're performing a new install, it is recommended to use consistent resistor values across all hardwired zones for best results. Install the resistor at the last device on each circuit.
The VISTAHEXPHW draws current from the panel’s auxiliary power output. When adding expansion modules and powered field devices, be sure to calculate the total current draw. If the combined load exceeds the panel’s available 950 mA AUX power, a separate, regulated 12VDC power supply with backup battery is required.
When using an external power supply for any device that connects to the iBus, you must connect its negative terminal to the panel’s GND terminal. This common negative reference is required for proper operation and communication between the panel, expansion modules, and other connected devices.
Estimating Auxiliary (AUX) Power Load
The VISTAH3 provides 950mA of auxiliary power (AUX) to connected devices such as keypads, motion detectors, glass break sensors, and expansion modules like the VISTAHEXPHW. Each of these devices draws current, and the total must remain within the panel’s AUX power limits.
Add all device current draws together to get your total AUX load. If this total approaches or exceeds the panel’s AUX output rating of 950mA, you should plan to use a separate, regulated 12VDC power supply with backup battery.
When using a separate power supply, always connect its DC negative terminal to the panel’s GND terminal. This establishes a common reference and ensures proper operation of all connected devices.
Failure to properly manage AUX power can result in devices resetting, failing to operate correctly, or causing system instability, including false alarms. Always allow some margin below the maximum rating rather than running the system at full capacity.
Common Device Current Draw (Typical Values):
| Device Type | Qty | Standby Current (mA) | Alarm Current (mA) | Total (mA) |
|---|---|---|---|---|
| Keypad (VISTAHLKP, VISTAHPKP) | _____ | 20 | 70 | _____ |
| Motion Detector (PIR) | _____ | ~10 - ~30 | ~10 - 30 | _____ |
| Glass Break Sensor | _____ | ~15 - ~25 | ~15 - ~25 | _____ |
| VISTAHEXPHW Hardwired Expander | _____ | 40+* | 40+* | _____ |
| VISTAHTKVRWL | _____ | <35 | <35 | _____ |
| VISTAHRELAY Relay Module | _____ | 25 | +20 per active relay | _____ |
| *40mA is the current drawn by the VISTAHEXPHW. You should also add the current drawn by any devices that connect to its AUX terminals. | ||||
Add the total current for each device type to determine your overall AUX load. Always calculate based on the maximum current the device may draw. Make sure the combined total stays below 950mA. For best performance, leave some margin rather than operating at the maximum limit.
Connect Any Bell or Siren Output
If you will be using a wired sounder, connect it to the bell output terminals. Bell supervision is enabled by default. That means the supplied 820-ohm resistor should be installed in parallel at the last sounding device on the circuit, not at the panel. If the resistor is installed at the panel, the circuit will not be properly supervised. Keep the total current draw within the panel's 2 Amp limit, and be aware that the backup battery must be connected and charged for the sounder to operate.
It is possible to disable bell supervision through panel programming, but this will not eliminate the voltage used to supervise the bell. This voltage can sometimes make a siren hum or buzz. For this reason, even if you opt to disable bell supervision through panel programming, you should still install the 820-ohm resistor to eliminate supervision voltage at the siren. In this scenario, you can connect the resistor at the bell terminals. But understand, if someone cuts the wires to the panel's siren, the panel can not tell that there's an issue.

Connect Ethernet, If Used
If you plan to use Ethernet for IP communication, now is the time to connect a network cable to the onboard Ethernet port. Remember that Ethernet and WIFI are mutually exclusive on the VISTAH3. You can use one IP path or the other, but not both at the same time. If you will instead use WIFI, add a PROWIFI (WIFI only) or PROWIFIZW (WIFI and Z-Wave) as mentioned above.
Connect the Backup Battery
Place the 12VDC backup battery inside the cabinet. The panel's red and black flying leads connect directly to the battery terminals, red to positive and black to negative. The panel verifies battery presence automatically and will display a low-battery condition if the battery is disconnected or can no longer hold a charge. The battery does not start the panel by itself, so the panel will not power on when you connect the battery.
Earth Ground, If Required
If your installation includes earth ground, complete that connection before power-up. This is more common in commercial installations, lightning-prone areas, or jobs where grounding is specifically required by local code or by the installation plan. If you are unsure whether earth ground is needed for your installation, consult a qualified low-voltage professional.
Add a Touchscreen Keypad
For local programming, the VISTAH3 requires a touchscreen keypad such as the PROWLTOUCH, PROWLTOUCHC, or VISTAHTCHWLC. These are all WIFI touchscreens, so a PROWIFI or PROWIFIZW module must be installed in the panel first. The touchscreen can be enrolled using the home's router or the panel's built-in access point. If you are using the home network and there is a WIFI extender or additional access point, be sure the panel and touchscreen are both connected to the same one.
At this stage, you do not need to go deep into programming. The main point is that at least one touchscreen must be powered, connected, and able to communicate with the panel before you can do local programming comfortably.
Power Up the System
After all field wiring is complete, reconnect the battery if it was disconnected during any module installation. Then plug the transformer into an unswitched outlet. The panel should boot up and begin its startup process. If the polarity is reversed at the DC terminals, the panel will not power up until the wiring is corrected. Once primary power is present, the green AC LED should remain lit. If AC is lost, that LED turns off and the red battery LED comes on.
If a PROWIFI or PROWIFIZW module is installed, be aware that the panel may shut down the WIFI module after a few minutes on battery if primary AC power is lost. This is done to conserve battery power.
Perform Basic Hardware Checks
Before you get into full system programming, take a few minutes to verify that the physical installation is sound:
- Make sure the cabinet tamper and wall tamper are properly seated.
- Verify that all installed modules are firmly seated and secured with their screws.
- Confirm that the battery is connected with correct polarity.
- Check that the transformer wiring polarity is correct and that the panel powers up normally.
- If using Ethernet, confirm link activity on the network connection.
- If using a PROLTE-A2 or PROLTE-V2 communicator, check that signal strength is acceptable. If it is weak, consider adding a PROLTE-ANT.
- If using wireless sensors, do not permanently mount every device until you have confirmed acceptable signal strength at each location.
- If using a wired siren, verify that the bell circuit is properly supervised, if applicable.
Close the Cabinet and Move On to Programming
Once the hardware is mounted, wired, powered, and checked, reinstall the cabinet door if it was removed. At that point, you are ready to move on to system programming, configuring zones, and establishing communication. DIY users typically handle this locally through the touchscreen keypad. If you would rather have remote help with setup in AlarmNet360, you will need to work through your alarm dealer, since end users do not have direct access to the dealer platform.
Did you find this answer useful?
We offer alarm monitoring as low as $10 / month
Click Here to Learn MoreRelated Products


- Answered
- Answered By
- Julia Ross