How Do I Swap Out A Keypad on a VISTA-20P, VISTA-15P, or VISTA-21iPLTE?
If you want to swap an old keypad for a new one, first hold down the 1 and 3 keys simultaneously on the old keypad. This should make the keypad display its address. Note the address. Power down, remove the old keypad, replace it with the new keypad, and upon power-up, set the address.
The above information assumes a few things:
- That the system only has one keypad, and after the swap it will still have only one keypad
- That the existing keypad and the new keypad are the same type, i.e., Touchscreen or Push-button.
- That the default keypad settings in the panel have not been changed.
Each VISTA-20P, VISTA-15P, and VISTA-21IP /VISTA-21IPLTE has certain programming options enabled by default. The default programming for keypads changed recently. In VISTA-20P/VISTA-15P panels from Revision 1 - 9, and VISTA-21IP/VISTA-21IPLTE panels from Revision 1 - 3, only push-button keypad address 16 is enabled by default. To add more than one of these style keypads, there must be an existing keypad set to address 16 connected to the panel. The user must then enter programming using that keypad to enable additional keypads. Do this using programming fields *190 - *196. Programming field *190 is used to enable keypad address 17, programming address 191 is used to enable keypad address 18, and so on up to address 23. The other way to enable more than one keypad is by programming the system through the Compass Downloading Software.
In VISTA-20P, VISTA-15P, and VISTA-21IP/VISTA-21IPLTE this default setting was changed. For the VISTA-20P and VISTA-15P, this change occurred in Revision 10.21. For the VISTA-21IP/VISTA-21IPLTE, this change took place with Revision 4.21. In these versions and higher, all push-button keypad addresses come enabled by default. This makes adding a secondary keypad, or replacing an existing keypad much easier.
When discussing keypads and keypad replacement, we should also consider touchscreen keypads, also known as AUI (Advanced User Interface) Keypads. The Honeywell Tuxedo Touch WIFI, Honeywell Home 6290W, and Honeywell Home Tuxedo are all AUI keypads that can be used on the panels mentioned above. The Honeywell Tuxedo Touch WIFI, and the Honeywell Home Tuxedo both act as Z-Wave controllers in addition to their role as an alarm panel keypad. The Honeywell Home 6290W does not have Z-Wave capability. It is simply a bigger, nicer keypad. However, all of these AUIs are treated slightly differently by the panels when it comes to addressing them as a keypad.
In the VISTA-20P/VISTA-15P, support for these touchscreen keypads was first added in Revision 3.0. At that time, up to two (2) touchscreen keypads were supported per panel. These panels allow the use of Address 1 and Address 2 respectively for this type of keypad, and both of these addresses come enabled by default in these panel versions. In Revision 5.2, the number of touchscreen keypads supported by the VISTA-20P increased to four (4) however it is still the case that only Address 1 and Address 2 are enabled by default. Because the VISTA-21IP was released several years later than the VISTA-20P all Revisions of the VISTA-21IP/VISTA-21IPLTE support up to four (4) AUI keypads.
The reason we've gone through all this information prior to discussing how to replace a single existing keypad with another keypad is that a basic understanding of addressing is helpful to do this successfully. Also, if you remove your only working keypad, and attempt to replace it with a new keypad, but some portion of programming, such as enabling an address hasn't been done, then you will wind up with a system you can't interact with, and you'll be required to reinstall the old keypad to figure out where things went wrong. Our goal is to avoid that!
To remove the panel's existing keypad and replace it with a new keypad, follow these steps:
1. Check your panel model and version. It may seem unnecessary, but if you know your panel's model and version, then with the information above, you can determine which addresses are or aren't enabled by default. The VISTA P-Series panels have a 1" x 1" square chip slightly to the left of center, near the heat sink. It should have a white sticker with something like this: WA20P-10.23 (as shown in the image below). VISTA-15P and VISTA-20P panels can be chip upgraded, as long as their existing revision is 2 or above. You can purchase the latest version VISTA-20P chip here. The latest VISTA-15P chip is available here. This may be a good option if you have a Revision 3 Vista-20P, but you'd like to be able to use more than two (2) AUI keypads. If you also need an upgraded communicator, and you'd like to upgrade the panel's chip while you're at it, then we have several kits to choose from that make the process easier. We offer a dual-path capable AT&T LTE-IA-TC2 kit as well as a dual-path Verizon LTE-IV-TC2 kit. They each contain a new communicator and a PROM upgrade chip. We also offer cellular only upgrade options with the Verizon LTEMXV-TC2 and the AT&T LTEMXA-TC2 kits. When in doubt, give us a shout! We'll be glad to assist.

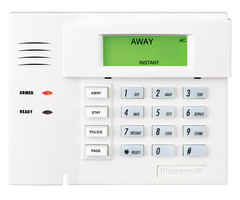
2. Verify keypad address. Before you remove the old keypad, assuming you will be replacing a push-button keypad, hold down the 1 and 3 keys simultaneously. This should bring up the keypad address. On Fixed-English keypads, such as the Honeywell 6150, a 2-digit number will appear, this is the current keypad address. On Alpha-numeric keypads like the Honeywell 6160, it should show "CON ADDRESS = ##" where "##" is the address.

If you are dealing with an RF keypad, then what you see may differ. On the Honeywell 6160RF, the above description still holds true. When using a Honeywell 6150RF, the display will flash between the keypad address and the built-in receiver address. The keypad address will be a 2-digit number between 16 and 23. The receiver address will be 00.
If you only have one keypad on your system, it should be a push-button keypad. AUI keypads are wonderful, but they're not always suitable for things like system programming. Alarm Grid always recommends that each VISTA system have at least one push-button keypad attached, even if it's just attached directly to the front of the alarm panel's metal enclosure. If you need to find the address of an AUI keypad check out one of the following FAQs:
How Do I Check the ECP Address and RIS Address on a Tuxedo Touch?
How Do I Check the ECP and RIS Address On a Resideo Tuxedo?
The steps to find the ECP address on the Honeywell Home 6290W are the same as those for the Resideo Tuxedo.
3. Perform any necessary programming. If you need to enable an address for the new keypad, now is the time to do so. Remember that AUI keypads will use addresses 1, 2, 5, or 6 and that on the VISTA-15P, only two (2) AUI keypads (Address 1 and Address 2) are supported, rather than four (4). Only address 1 and 2 are enabled by default on any of these panels, and both are enabled for Partition 1 by default on the VISTA-20P, and VISTA-21IP panels. Also note that if you will be using Total Connect 2.0, this service emulates an AUI keypad on the panel. By default it uses address 2 but this can be changed when necessary. So, when using Total Connect 2.0, a VISTA-20P or VISTA-21IP can only support up to three (3) actual AUI keypads connected to the system. The VISTA-15P will only support one (1) actual AUI when used with TC2. If you are replacing a push-button keypad with another push-button keypad, then you can set the new keypad to the same address as the keypad being removed with no further programming required. All AUI keypads are enabled or disabled in programming location *189.
The image below is taken from the VISTA-15P/VISTA-20P Program Guide:

4. Power down the panel. Before making hardware changes, the panel should always be powered down. Disconnect one of the leads going from the panel to the battery. It is recommended that you disconnect the RED lead. Once the battery has been disconnected, power down by unplugging the panel's transformer. You will need a flat-head screwdriver for this process because the transformer should be attached to the outlet with a screw. If you cannot find the transformer, you can opt to remove AC power by turning it off at the breaker box. It is not recommended that you attempt to power down by removing the power wires at the screw terminals in the alarm panel. You may accidentally short the wires, or touch them to the wrong spot in the panel and damage your system.
Your transformer should look very similar to this:
![]() 5. Remove the existing keypad. Usually, the keypad will be mounted to the wall. Look at the bottom edge of the keypad, there are two tabs that can be pressed in which allows you to tilt the bottom edge of the keypad forward. Once you've done this lift straight up on the front of the keypad and the front should come off of the mounting plate. Be careful, there may not be much slack in the keypad wires, and you don't want to damage them.
5. Remove the existing keypad. Usually, the keypad will be mounted to the wall. Look at the bottom edge of the keypad, there are two tabs that can be pressed in which allows you to tilt the bottom edge of the keypad forward. Once you've done this lift straight up on the front of the keypad and the front should come off of the mounting plate. Be careful, there may not be much slack in the keypad wires, and you don't want to damage them.
Holding the front of the keypad in your hand, you should see where the four (4) wires come through the wall and through the back of the mounting plate, to connect to the four (4) terminals inside the keypad. Using a small flat head screwdriver, loosen each of these screws, and remove the wires. At this point, you can also remove the mounting plate from the wall, making sure to pass it over the existing wires as you remove it.
Important Note: Hang on to these wires. Don't let them fall back down inside the wall. It might be helpful to have a piece of tape to hold them in place while you get ready to install the new keypad.
5. Connect the new keypad. Turn your attention to the new keypad. It will have its own mounting plate. Pass the wires you disconnected from the old keypad through the large wiring hole in the new keypad's mounting plate. If using tape to hold the wires, reapply it after the wires have been passed through the mounting plate. Make sure the new mounting plate is level, and mark the spots for the new screws holes, if necessary. If you are replacing one keypad with another of the same type, then you should be able to use the same holes used by the original keypad. You might decide to just keep the original mounting plate in place. This is up to you, and will probably depend on how long the original keypad was installed. If the original keypad was older, the plastic for the original keypad mounting plate may not exactly match the color of the new keypad.
Drill new pilot holes, if necessary. Fix the new mounting plate to the wall using either the existing holes, or the newly drilled ones. Once it has been affixed, take the wires that you ran through the wiring hole and match them up with the proper screws on the back of the new keypad. Below is a cross-reference chart. On the far left, you'll see the symbols that are displayed at the screw terminals on the back of the keypad. These are quite small, so look at them carefully. The G stands for Green, and the arrow points toward the direction of Data Flow. As you can see from the chart below Green is the traditional wire color used for Data INTO the alarm panel. The green wire will connect to Terminal 6 at the alarm panel. The dash (-) indicates the negative power wire, and is usually connected with a black color wire, this wire will connect to Terminal 4 at the panel. The plus (+) symbol indicates power positive and is usually connected using a red wire, this wire should connect at Terminal 5 at the panel. And last, Y indicates Yellow or sometimes White, and the arrow indicates DATA OUT from the alarm panel. This will be connected to Terminal 7 at the alarm panel. Once the four (4) wires have all been connected at the keypad, give each one a brief tug to be sure they are securely connected.

After connecting the wires, insert any extra wiring back through the wiring hole. Start at the top, and attach the top of the keypad to the top of the back mounting plate. There will be two tabs there to show you where this should connect. The top of the keypad will rest over these tabs. Next, swing the bottom of the keypad into place and press in hard to re-engage the tabs at the bottom that will hold the keypad in place. You should be able to both hear and feel when it is properly seated.
6. Power the panel back on. Reconnect the positive battery lead. The panel will not yet power on, this is normal. Next, restore AC power by either plugging in the transformer, or turning the breaker back on. The screw that was used to hold the transformer in place at the outlet should be re-installed just as it was before powering down. This screw helps to keep the panel's power supply secure, and it also prevents the weight of the transformer from pulling it loose from the outlet and accidentally removing AC power. When AC is restored, the panel will begin to boot up.
7. Address the keypad. If you need to address a push-button keypad, then go to the keypad at this time. Press and hold the 1 and 3 keys simultaneously. If this is a brand new keypad, you don't need to be in a hurry to perform this step once you power up. A brand new keypad that has never communicated with a panel can be addressed at any time simply by holding down the 1 and 3 keys simultaneously and then following the rest of these instructions.
However, if this is a keypad that has been used before, then you have only 60 seconds to get to the keypad and hold down the 1 and 3 keys once the keypad has been powered on. Once you do this, you can then set the keypad address. If you take longer than 60 seconds, the keypad will allow you to view the address, but it will not allow you to change it.
For a new keypad, the default address is 31. In order to change this, you must first 00 out the current address. Then you must enter the new 2-digit address that the keypad should be set for. So the steps would be:
- Power on
- Press and hold the 1 and 3 keys within 60 seconds
- When the address pops up, enter 00, you will see the address change to 00
- Enter the desired address, on VISTA P-Series panels this should be a number 16 - 23
- After you see the new address listed (16 - 23) press * to exit addressing
If programming was done correctly in Step 3, or if you will be using the same address that was used on the keypad that you removed in step 5, and assuming that keypad was working before removal, then the keypad should show the current panel status.
If you are replacing a push-button keypad with an AUI device, then the AUI cannot use the same address as the keypad being removed. If this will be the only keypad on the system, then the default address of 1 should be available for you to use. A new AUI keypad will be set to this address by default, and any panel that supports an AUI should have address 1 enabled by default.
Did you find this answer useful?
We offer alarm monitoring as low as $10 / month
Click Here to Learn MoreRelated Products


Related Categories
- Answered
- Answered By
- Julia Ross