Industry News and Discussions Posts

Posted By

The DSC HS2TCHP(N) touchscreen keypad can work with a Qolsys IQ Pro, but only after a software update. Keypads running version 1.39 or lower need new interface files first, and you can get them from our HS2TCHP firmware updates page.

The update is a quick job. It takes an SD card, a few minutes, and no new hardware.

Why the HS2TCHP(N) Needs an Update

The HS2TCHP(N) was made for DSC PowerSeries NEO systems. Its touchscreen software, called the user interface or UI, is written for a NEO panel. The IQ Pro needs a different UI. Until the keypad gets the new firmware files, it is not ready to be used with an IQ Pro.

Check the part number on your keypad before you start. If it says HS2TCHPRO and runs version 1.40 or higher, the touchscreen will not work on an IQ Pro. The update is only for the HS2TCHP(N) at version 1.39 or lower.

When Does This Comes Up?

The most likely reason is a panel swap. Say a home has a NEO system with HS2TCHP(N) keypads already mounted on the walls. The owner decides to switch to an IQ Pro. The wiring is already in place, so reusing those keypads saves money and a lot of work. The update is what makes that possible.

There is one catch. Once a keypad has been updated for the IQ Pro, it cannot go back to a NEO control panel. Do not update a keypad that still needs to work on a NEO system. If you are still running a NEO panel, we show you how to add an HS2TCHP to a PowerSeries NEO panel in a separate guide.

How to Update the Keypad

The update uses an SD card. Download the files from the firmware page linked above and unzip them. There are three files, and all three go in the root directory of a blank SD card. Format the card as FAT32 first, and use a card with a capacity of 32 GB or less.

Next, slide the card into the bottom of the keypad. On the touchscreen, tap the Options icon, then Installer Menu. Enter the IQ Pro Installer or Dealer Code (defaults 1111 or 2222 respectively). Tap Keypad Programming, tap Firmware Upgrade, and follow the prompts to finish. When it is done, the keypad shows the "IQPanel" logo in the top right corner instead of the "DSC" logo.

Do not pull the keypad off its backplate while the SD card is inside. That can damage the card slot. For the manufacturer’s full notice, see the HS2TCHP(N) touchscreen keypad update instructions.

Connecting the Keypad to the IQ Pro

An IQ Pro can support up to 16 keypads. They connect to the panel over the Corbus, which is a four-wire connection. Here are the basics:

  • Match the colors. Connect the keypad’s red, black, yellow, and green terminals to the corresponding Corbus terminals on the IQ Pro board.
  • Use the right wire size. Use 18 - 22 gauge 4-conductor wire. Two twisted pairs are recommended. Do not use shielded wire.
  • Watch the distance. Keypads can sit up to 1,000 feet from the panel. They can be home run, wired in series, or T-tapped.
  • Power comes last. Keep the panel’s battery and power adapter disconnected until all the wiring is done.
  • Enable keypad. Once the keypad is connected, you'll need the IQ Installer App, available for free from the Apple and Google stores, to enable the keypad, assign partitions if necessary, and set any other keypad options.

Each keypad also has a zone input, so you can hook up a wired sensor, like a door contact, right at the keypad. It works with normally closed loops, single end of line resistors, and double end of line resistors. To turn the input on or off, go to Installation, then Devices, then Security Sensors. Pick the enrolled keypad, tap Edit, and choose Keypad Input. Then select Enable or Disable. For all the details, check the IQ Pro install guide.

Need Keypads or Monitoring?

If you're updating your panel and you're interested in a new monitoring plan to go with it, check out our no-contract monitoring options. We don't charge activation fees, and you can cancel at any time. Need another keypad for your project? Browse our PowerG keypads and the IQ Remote PowerG touchscreen keypad.

Need Help?

Stuck on the update or the wiring? Our support team is happy to help. Phone and email support are open from 9:00 AM - 8:00 PM Eastern. Call us at 888-818-7728 or email support@alarmgrid.com. Live chat on our website is also available until 6:00 PM Eastern.

Tags: , , , , , , , , , , , , , , , , , , , , , , , , , ,

Comments


Posted By

Verizon recently asked the FCC for permission to retire copper landline phone service in as many as 18 states. However, after heavy public pushback, the FCC paused automatic approval, and Verizon has started telling some individual customers their copper line isn’t going anywhere just yet.

Nothing about this is settled. Here we'll discuss how we got here, why the process stalled, where things stand, and action you can take.

A Quick Timeline

Date Event What Happened
September 9, 2026 Verizon files with the FCC Verizon asks the FCC for permission to retire copper landline (POTS) service in a first group of states, affecting roughly 277,000 lines.
Mid-September 2026 A second, larger filing Verizon files a follow-up request covering nine more states plus Washington D.C., New York, California, and Pennsylvania, affecting about 750,000 more customers. Combined, outside reporting puts the total at 18 states.
September 26, 2026 Automatic approval deadline Under FCC rules, a filing like this is automatically approved if the FCC doesn't act by a set deadline.
September 28, 2026 FCC hits pause The FCC confirms it is not letting the filings win automatic approval, after comments from rural customers, retirees, consumer groups, and lawmakers.
October 2-12, 2026 Verizon walks it back, area by area Verizon tells customers in places like Pennsylvania's Lehigh Valley and Little Compton, Rhode Island that their copper line isn't being cut until a working alternative is in place.


Why Does Verizon Want to Retire Copper Landlines?

Verizon’s copper network is old, and it’s only getting more expensive to keep running. The company says the copper lines are more prone to failure in bad weather, are a target for metal theft, and are increasingly hard to repair since replacement parts are difficult to find. Verizon has framed the shift as freeing up money currently spent maintaining copper so it can be put toward newer infrastructure, in line with the FCC’s broader push to modernize phone and broadband networks nationwide.

To be clear, Verizon isn’t proposing to cut customers off with nothing. The company says no one will lose service until a reliable alternative, like fiber or a cellular home phone replacement, is actually available to them.

Why Is This On Hold?

The filings were on track for automatic approval once their FCC deadlines passed, with the first hitting September 26, 2026. Instead, the FCC confirmed it was pausing automatic approval after a wave of public comments came in. Rural residents with spotty cell coverage, retirees who rely on a landline for medical alerts, consumer groups, phone-company labor unions, and at least one state lawmaker all weighed in. Their argument: cutting copper service too fast could leave people without a reliable way to call for help.

The FCC’s public comment docket remains open, and dozens of comments have already been filed by residents in New York’s Catskill region, western Massachusetts, and elsewhere. On top of the formal FCC process, Verizon has also been responding directly to specific communities that offered pushback. In Lehigh Valley, Pennsylvania, a company spokesperson said Verizon wants to make sure no customer is left behind. In Little Compton, Rhode Island, Verizon told state lawmakers it won’t end copper service there until fiber actually reaches the town.

Where Things Stand Now

As of this post, Verizon’s FCC filings are still pending, not withdrawn. The plan to retire copper landlines hasn’t been canceled, just delayed. There’s currently no new target date to replace the original October 23 and November 30, 2026 approval deadlines. Verizon seems to be handling the pushback on a community-by-community basis, instead of scrapping the plan everywhere at once. That’s why two neighbors in the same state might get different answers, depending on whether fiber or another alternative communication method has reached their specific area yet.

How to Make Your Voice Heard

If you or someone you know still depends on a Verizon copper landline, you have a few options:

  1. File a public comment with the FCC. The agency’s Electronic Comment Filing System lets anyone submit a comment on a pending application. The relevant docket number should be available on your Verizon notice letter, if you received one.
  2. Contact your state or local elected officials. Several of the pauses and clarifications so far followed direct pressure from lawmakers, not just the FCC process itself.
  3. Hold onto any letter Verizon sends you. It will usually include a timeline and a docket number specific to your area, which you’ll want on hand if you file a comment or call in with questions.

What This Means If Your Alarm System Uses a Phone Line

If your security system still connects over a POTS phone line, don’t wait on Verizon’s final word before making a plan. The review is open-ended, but copper phone lines are being phased out nationwide regardless of this specific fight, and a phone line going down with no backup means your system can’t communicate with the monitoring station at all.

Switching to cellular monitoring is the most reliable upgrade path for most homes, since it doesn’t depend on a copper line or your home internet staying up. Alarm Grid carries LTE cellular communicators for most major panel brands, and we’re happy to help you figure out which one fits your existing system.

Not sure where to start, or want help picking the right communicator for your panel? Give us a call at 888-818-7728 (Monday - Friday, 9 AM - 8 PM ET) or email support@alarmgrid.com. If you prefer, you can chat with a live agent by visiting our website (chat available 9 AM - 6 PM ET.) We’ll help you make a plan before your copper phone line becomes nothing but a memory.

Tags: , , , , ,

Comments


Posted By

Resideo has extended AlarmNet360 (AN360) connectivity for the Lyric® security system. This extension runs through June 1, 2028, reversing notices sent out earlier this year that signaled an end to remote Lyric management. Here's what changed, and why an upgrade is still worth planning.

A Quick Timeline

Notification Date What It Said
TN-140 March 17, 2026 Legacy Lyric authentication on AN360 was expiring April 15, 2026, ending all remote management features.
TN-142 April 6, 2026 Superseded TN-140 with more detail on what would move to local programming only.
TN-150 September 21, 2026 Replaced TN-140. An extension was secured, restoring full AN360 support through June 1, 2028.


The First Two Notices: TN-140 and TN-142

Resideo's first notice, Technical Notification #140, explained that the legacy authentication process Lyric panels use to connect to AN360 was expiring on April 15, 2026. After that date, AN360 would no longer support adding new Lyric systems, enrolling new sensors, syncing configuration changes, modifying system settings remotely, applying dealer branding, pushing firmware updates over the air, or changing central stations. Core system functionality (arming, disarming, user codes) and connected services (Total Connect, alarm reporting, two-way voice) were not affected.

TN-142 arrived three weeks later and officially superseded TN-140 with more detail. It confirmed that communicator-level settings, like TC2 configuration, comm path, and central station changes, would keep working through AN360 as before. Panel-level settings, like partition and system changes, two-way voice, Home Kit, Lyric Lock, and firmware updates, would instead require USB (firmware update only) or local panel programming. TN-142 also warned that AN360 would automatically disable the Local Programming Lockout and Lyric Lock features on all panels during the week of April 6, 2026.

The Latest Update: TN-150 Restores Support Through 2028

Technical Notification #150, issued September 21, 2026, explained that the root cause of these changes was an expired security certificate with Resideo's certificate provider. While alarm routing continued working throughout, remote capabilities like configuration changes, sensor additions, and device replacements were no longer available.

Resideo has now secured an extension with the certificate provider, restoring full AN360 remote management for Lyric systems through June 1, 2028. TN-150 officially replaces TN-140, and no immediate action is required on your part.

Can You Still Activate a New Lyric System?

We're not sure yet whether a brand new, previously unregistered Lyric panel can currently be activated on AN360. In theory, the answer is yes. We want to confirm the current activation process ourselves before telling you it's a 100% safe bet. We'll update this post as soon as we know more.

UPDATE 09/25/26: We have confirmed that it is possible to activate a new, previously unregistered Lyric. However, we still firmly believe it's time to begin planning your system upgrade. Don't wait until the last minute and get caught up in a backlog of users trying to upgrade.

It's Still Time to Plan Your Upgrade

Even with support extended, June 2028 isn't that far off. If you're running a Lyric system today, now is a good time to start planning a move to a newer platform. Alarm Grid recommends the PROA7 or PROA7PLUS when you're ready to upgrade.

Both of these panels work with the full line of SIX Series wireless sensors right out of the box, so much of what you already own will likely carry over. If your Lyric setup uses older 5800 Series sensors instead, you'll need to add a PROTAKEOVER module along with the Pro Series panel.

Not sure which upgrade path fits your needs? Give our support team a call or send us an email. We're here Monday - Friday from 9:00 AM - 8:00 PM (ET). Our support number is 888-818-7728 or email support@alarmgrid.com. We also offer chat support with a live agent from 9:00 AM - 6:00 PM (ET). Just visit our site.

Tags: , , , , , , , , , , , , ,

Comments


Posted By

2GIG released Firmware Version 1.2 for the GC Touch security panel in August 2026. This update adds new chime options, additional Dark Mode options, and the ability to control door locks straight from the video doorbell screen.

Adding these new features doesn't require a new panel or a truck roll. The update can be installed over the air or via the panel's USB port, and it makes a panel you already own more convenient and user-friendly every day. The GC Touch is available in both AT&T and Verizon versions, with the cellular communicator included from the factory.

What's New in Firmware 1.2

  • Custom chime options. The primary user can now select which chime plays for door and window activity, instead of being stuck with one default sound.
  • Voice annunciation with chimes. Voice announcements can now run alongside the chime options above, so the panel can speak and chime when a zone is faulted.
  • Manual date and time. Date and time can be set right on the panel instead of relying only on automatic updates.
  • Improved localization screens. The screens used to set language and region have been cleaned up.
  • Scheduled Night Mode. Night Mode can now be set to turn on and off automatically at times you choose.
  • Scheduled or automatic Dark Mode. Dark Mode can run on a schedule you set, or follow sunset and sunrise automatically.
  • Lock control from the video doorbell screen. Locks can now be controlled directly from the video doorbell streaming screen, without backing out to a different menu.
  • Faster code entry on PAD1. PAD1 no longer requires pressing "Enter" after a code, so arming and disarming take one less step.
  • Chime added to walk test. Walk tests now include a chime, making it easier to confirm a sensor triggered during testing.

How to Update Your GC Touch

2GIG makes this update available over the air, through cellular or WIFI via Alarm.com. If you'd like your panel updated to Firmware 1.2 now, contact Alarm Grid support and we can get it scheduled. Updates using WIFI are free. If you don't have WIFI, there is a small charge for sending the update. The amount depends on the size of the download.

If you don't have WIFI at your panel and want to avoid this charge, you can update your panel yourself. Download the firmware from our site and apply it through the USB-C port on the back of the panel. Full instructions are available in our GC Touch firmware update guide, and you can download the firmware file from our downloads page. Alarm Grid passes the cellular update fee along at cost, with no markup, and it's added to your next billing cycle.

Get More From Your Security System

Not set up with a GC Touch yet? Alarm Grid carries the full lineup of 2GIG touchscreen panels, and every system we sell can be paired with monitoring that has no contracts, no activation fees, and no termination fees.

Check out our monitoring plans and get live 24/7 monitoring for your home or business. If you have questions, reach out to our support team. We're here Monday - Friday from 9:00 AM - 8:00 PM Eastern Time. You can reach us at 888-818-7728 or by email at support@alarmgrid.com. If you visit our website between 9:00 AM and 6:00 PM Eastern, you can also chat with a live agent.

Tags: , , , , , , , , ,

Comments


Posted By

If your Alarm.com or Total Connect 2.0 alerts show up as text messages, they may rely on an old email-to-text trick that carriers are now shutting down. You might not notice when it quietly stops working. AT&T and T-Mobile have already cut theirs off for good, and Verizon's shutdown looms.

This isn't a rumor or a future warning. For two of the three major carriers, it has already happened. If you set up your alarm notifications years ago and haven't touched them since, this is worth five minutes of your time today.

What Is Email-to-Text, and Why Did People Use It?

Before Alarm.com and Total Connect 2.0 offered push notifications through their own apps, there was a popular workaround for getting alarm alerts as text messages. Every major carrier had (or still has) a special email address format that turns an email into a text. Send an email to a phone number followed by the carrier's domain, like 5551234567@vtext.com for Verizon or 5551234567@tmomail.net for T-Mobile, and it lands on that phone as an SMS.

Alarm.com and Total Connect 2.0 both let you add an email address as a notification destination. Plenty of customers used that feature with a carrier's email-to-text address instead of a real email inbox, which let them get alarm alerts as texts without needing a smartphone app at all. It worked well for a long time, especially before push notifications existed as an option.

Carriers Are Shutting the Gateway Down

Email-to-text was never officially part of how Alarm.com or Total Connect 2.0 were designed to send alerts. It only worked because carriers allowed it, and carriers are walking that back.

Carrier Status Effective Date
AT&T Shut down. Confirmed by AT&T June 17, 2025
T-Mobile Appears to be shut down, with no official announcement Reportedly around June 17, 2025, based on user reports online
Verizon Being phased out. Confirmed by Verizon Full shutdown by March 31, 2027, though some users may lose access sooner

T-Mobile hasn't published anything official about this, which is why we can't point you to a source the way we can for AT&T and Verizon. Based on reports from users online, the shutdown appears to have happened quietly around the same time as AT&T's, on June 17, 2025.

Why This Is Risky If You're Still Using It

The dangerous part isn't that this feature is going away. It's how it goes away. There's no error message on your alarm system and no warning in the app. The text messages just stop arriving, and unless you're specifically testing your system, you may not find out until you need an alert and it never comes.

For an alarm or fire notification, that gap is exactly the wrong place to lose reliability.

Alarm.com Already Saw This Coming

This shift didn't come out of nowhere. Back in March 2024, Alarm.com rolled out a push notification migration tool aimed at customers on carriers with degraded SMS and MMS delivery, T-Mobile, Sprint, and Rogers in Canada among them. At the time, Alarm.com called the migration voluntary, but noted it "may become mandatory" if carrier changes made it necessary. That's more or less what's happening now.

Switch to Push Notifications Today

Push notifications don't depend on carrier text messaging at all. They travel over your phone's internet connection, cellular data or WiFi, straight to the Alarm.com app or the Total Connect 2.0 app. That also means they can do things a text message can't, like let you act directly on an alert or come through even when your phone is set to Do Not Disturb.

Open your notification settings in the Alarm.com app or the Total Connect 2.0 app and make sure push notifications are turned on for the alerts you care about, arming and disarming, sensor activity, and alarms especially. If you're not sure how your account is currently set up, or you want help moving away from an old email-to-text address, contact our support team and we'll walk through it with you.

Not an Alarm Grid customer yet? Take a look at our monitoring plans. No contracts, no activation fees, and no cancellation fees, just straightforward alarm monitoring.

Tags: , , , , , , , , ,

Comments


Posted By

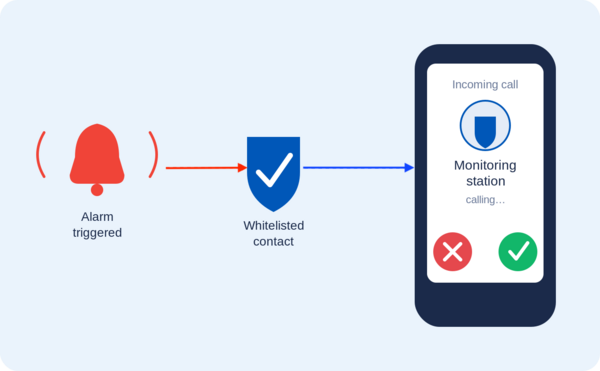
If your alarm goes off, your monitoring station calls you right away to confirm it's real before dispatching help. Call screening apps and phone features are more common than ever, and they can't always tell that dispatch call apart from spam, so it might get silenced or blocked completely.


These tools are great at stopping robocalls and telemarketers, which is exactly the point of using them. The trouble is, your monitoring station's number may be unfamiliar to your phone too, so it can get caught in that same net. If the call is about a break-in or a fire, missing it could delay the help you need.

The good news is there's an easy fix. Whitelist your monitoring station's phone numbers (add them to your contacts or an "allowed" list) so they always get through, no matter what call screening tool you use.

How Call Screening Can Block Your Monitoring Station

Call screening comes in a few common forms, and most people use more than one at a time without realizing it.

  • Phone-based screening apps. Google's Call Screen feature (built into Pixel phones) can automatically answer unknown calls with an AI assistant, ask who's calling, and hang up on anything it flags as spam. Apple's Silence Unknown Callers feature works differently. It sends any call from a number that isn't already in your contacts, recent calls, or Siri suggestions straight to voicemail without ever ringing your phone.
  • Phone carrier services. Carriers like Verizon, AT&T, and T-Mobile all offer built-in spam protection, such as Verizon's Call Filter or T-Mobile's Scam Shield. These services label suspicious calls and can automatically send anything flagged as "spam" or "junk" to voicemail.
  • Third-party call-blocking apps. Apps like Truecaller, Hiya, and RoboKiller work similarly. They compare incoming numbers against huge spam databases and block or silence calls that they deem suspicious.

Every one of these tools works the same basic way. Numbers that aren't already saved to your contacts (or added to the app's own allow list) get treated with suspicion. Since your monitoring station's number probably isn't saved anywhere on your phone, it can easily get caught in the same net as spam calls.

How to Whitelist a Number

Whitelisting is simple, and it works across almost every call screening tool. Save the monitoring station's phone number (or numbers in the case of stations like CMS) as a contact on your phone. Most call screening apps and phone features automatically let contacts through without screening them.

If a carrier or third-party app has its own separate "allow" or "safe" list (Verizon's Call Filter does, for example), add the number or numbers there too. Check the settings menu of whatever call screening app or feature you use to see if this option is available.

Alarm Grid's Monitoring Station Numbers

If you're an Alarm Grid customer based in the United States, you're monitored by Criticom, aka CMS, save all five of these numbers as contacts. A CMS call could come from any of them, so no single number is enough on its own:

  • (800) 432-1429
  • (800) 631-2299
  • (714) 373-7000
  • (800) 468-4640
  • (800) 482-9800

If you're monitored by Rapid Response (Canadian customers), save this number:

  • (800) 932-3822

CMS sends all text message and automated notifications from the short code 60281. If your phone or messaging app filters unknown senders, add this short code to your contacts or allow list as well, so you don't miss those alerts either.

Saving these numbers only takes a minute, but it makes sure a screening app never stands between you and help. If you're an Alarm Grid customer and aren't sure which monitoring numbers apply to your account, contact our support team at support@alarmgrid.com and we'll help you sort it out. we're here Monday - Friday from 9:00 AM - 8:00 PM Eastern Time. You can also call us at 888-818-7728 or visit our website to chat with a live agent (9:00 AM - 6:00 PM Eastern Time).

Not signed up for monitoring yet? Alarm Grid offers central station monitoring with no contracts, no activation fees, and no termination fees. Check out our monitoring plans and protect your home or business today.

Tags: , , , , , , ,

Comments


Posted By

Memorial Day is one of those rare holidays that holds two things at once. It's a day of gratitude, for the men and women who gave their lives in service to this country, and for the families who carry their memory forward. It's also a day of togetherness, of backyards full of family, of communities coming together to remember and to celebrate the freedoms those sacrifices made possible.

So today, a thank you. To every service member and the families who carry their memory forward. To those who served alongside them. And to every man and woman who has ever worn the uniform, thank you. Today, and every day.

Holiday Hours

The Alarm Grid office will be closed on Monday, May 25, 2026. We'll be back Tuesday, May 26 at 9:00 AM Eastern Time for our regular support hours (9:00 AM – 8:00 PM ET).

Monitoring Station Contact Information

Even while our offices are closed, professional monitoring continues without interruption. Our central station partners at Criticom Monitoring Services (CMS) and Rapid Response are open 24/7/365 and will continue monitoring alarms and dispatching help exactly as they always do.

If you need to report a false alarm or place your system on test mode, use the appropriate number below:

US customers with full monitoring: Call CMS at (888) 818-7728 and press Option [9]. Have your name, address, and false alarm password ready when the operator answers.

Canadian customers with full monitoring: Call Rapid Response at (800) 932-3822 with your name, address, and false alarm password ready.

Please make sure you provide your false alarm password when you call. Giving the wrong password, or your duress password, will result in a dispatch of emergency services, as designed.

If You Need Technical Support, Email Us

The monitoring station can only help with alarm related events and system tests. For technical support, programming questions, or account changes like zone names and contact lists, shoot us an email at support@alarmgrid.com.

We'll prioritize support emails first thing Tuesday morning and get back to everyone as fast as we can. Please be patient while we respond to all requests. If it's urgent and you're an Alarm Grid customer, you can also reach us at (888) 818-7728.

From all of us at Alarm Grid, have a safe and meaningful Memorial Day!

Tags: , , , , , ,

Comments


Posted By

Replacing a First Alert PROA7 or PROA7PLUS panel sounds simple enough. Alarm dealers perform replacements daily using AlarmNet360 (AN360), and when the recommended process is followed, everything works fine. But for a DIYer with no AN360 access, the proper order of things may not be clear.

DIY users often run into a unique problem. While in the process of replacing their existing PROA7 or PROA7PLUS, they also decide to add to the system and purchase new PROSIX sensors for that purpose. The hood's already up, might as well give it a tune up, right?

We've seen customers receive their replacement panel and immediately begin adding new sensors before performing the actual panel swap. We get it, new sensors are exciting! But please curb your enthusiasm until you've worked with one of our support agents to move all existing PROSIX sensors from the old panel to the new one. Otherwise, you may lose either your original PROSIX sensors or the new ones you've already added.

Why This Happens

Unlike older wireless sensors, PROSIX devices become permanently paired, or “married,” to a specific alarm panel during enrollment.

Once a PROSIX sensor is learned into a system, it cannot simply be moved to another panel later unless it is properly released from the original system first.

That means if you:

  • Power up a replacement PROA7 or PROA7PLUS
  • Enroll new PROSIX sensors into it
  • Then later perform a panel replacement in AN360

...you may unintentionally overwrite sensor programming during the restore process.

This can go wrong in any number of ways, but the end result of not following the proper steps is that you lose sensor programming, and the affected sensors may not be recoverable. Once a PROSIX sensor has been paired with a system and powered on for 24 hours or more, it can no longer be factory defaulted. So a sensor in this position, paired with a system that no longer exists with no possibility of being factory defaulted, is a sensor that must be replaced.

But the Panel Does Exist!

Yes...and no. When a PRO Series panel is registered and communicating properly with AlarmNet360, the panel and server stay in constant sync. If programming changes, AN360 updates the panel "image" stored on the server. During a panel replacement, this saved image is transferred to the new PROA7 or PROA7PLUS.

If you get a new panel and begin programming it with new PROSIX sensors, you're creating a new and separate image. One that isn't synced with AN360. When the panel pairs with a PROSIX sensor, it chooses a channel for communication. You may be familiar with this process from older 2.4 GHz WIFI networks. The panel makes its choice based on the least noisy channel at the time of sensor programming. This information becomes part of the new image.

If that channel later becomes noisy, the panel can switch to a cleaner channel and notify all enrolled PROSIX sensors to follow it. If a sensor misses that message, it may remain stuck trying to communicate on the old channel. For more information on PROSIX wireless best practices, check out this FAQ.

The proper channel setting, the encryption key for each PROSIX sensor, and all other panel programming are stored in AN360 as part of the original panel's "image". When you initiate a panel replacement, you're telling AN360 to send the most recent image taken from the old panel to the new one. By necessity, this process replaces the new panel image you began creating when you started adding PROSIX sensors to the new panel prior to the swap. There is no way to merge these two images together.

If the replacement succeeds, the new panel becomes an exact copy of the last synced version of the old panel. That's the intended result. However, if you enrolled new PROSIX sensors into the replacement panel beforehand, those sensors will be overwritten during the replacement process. If they were powered on and paired for more than 24 hours prior to this, they cannot be factory defaulted and will have to be replaced.

The Most Important Rule

If you are replacing a PROA7 or PROA7PLUS system: DO NOT power up or enroll any new PROSIX sensors before the panel replacement is fully completed.

This includes:

Leave any new sensors in the box until the replacement process is completely finished.

The Correct Way to Replace a PROA7 or PROA7PLUS

Follow these steps to avoid losing sensors or corrupting system programming:

  1. Don't power on the new panel. Leave the new panel powered completely down until you are ready to physically replace the old one. Don't perform any programming on the new panel. If you have gotten to this point and you realize you've made the mistake of powering on the new panel and adding PROSIX Sensors, you should factory reset the new panel, then once all PROSIX sensors have received the reset command, power the panel down completely. You can tell a PROSIX sensor has been released if you open or fault the sensor and the LED begins blinking rapidly. If it's going to be hours or days before you can complete the replacement through AN360, remove the batteries from the new PROSIX sensors to conserve power.
  2. If you happen to be replacing your existing panel with a used PROA7 or PROA7PLUS, be sure the "new" panel has the latest firmware. This ensures compatibility with all sensors. After updating, be sure to perform a factory reset before continuing. To do this, the panel will need to be powered on. As long as you complete these steps, then power back down before the swap is initiated in AN360, you're good. You'll need to work with your alarm dealer to arrange the firmware update, if one is needed.

  3. Verify the programming. At this stage, you may want to verify that the "image" of the old panel in AN360 matches the actual programming in the old panel as closely as possible. You'll need to work with your alarm dealer to do this, as end users don't have access to AN360. If the old panel is completely dead, just do your best to complete this step.
  4. Perform the panel replacement in AlarmNet360. Provide the MAC and MAC CRC from the new panel to your alarm dealer. They can now initiate the panel replacement process in AlarmNet360. If you plan to reuse the cellular module, PROWIFIZW*, or any other modules from the existing panel, power it down, remove those modules, and NEVER POWER THAT PANEL ON AGAIN WITHIN RANGE OF THE SENSORS unless your alarm dealer tells you to do so.
  5. *When replacing a PRO Series panel paired with Z-Wave devices, AN360 can bring those devices to the new panel, preventing you from having to exclude and then include them again. However, this is only possible when the PROWIFIZW module from the old panel is moved to the new one.

  6. Allow the replacement process to finish completely. After the replacement has been initiated in AN360, you should:
    • Power up the new PROA7 or PROA7PLUS.
    • Tap the Setup button for WIFI > choose your SSID > enter your password > Save > Connect.
    • Once connected to WIFI, tap Next, then tap Register.
    • Let the new panel fully sync with AlarmNet360. As it goes through the process of adding the existing PROSIX sensors, the panel will chime for each sensor.
    Do not interrupt this process. Depending on signal strength and the number of enrolled sensors, synchronization may take several minutes to complete. Be sure your alarm dealer also knows not to access the account in AN360 until the replacement process has fully finished.
  7. Confirm all existing sensors restored properly. Tap the hamburger menu icon (☰) at the bottom center of the Home screen, then tap Sensors. You should see a list of all enrolled sensors. Verify that the sensor names are correct. To the right of each sensor name, the panel will display the signal strength and battery status of the sensor. Initially, these fields may appear blank. As the panel completes synchronization with the sensors, the signal and battery indicators will gradually populate. The replacement process is not complete until every sensor shows both a valid signal strength and an accurate battery level.
  8. If the old panel was completely dead, or otherwise unable to communicate with the PROSIX sensors for an extended period of time, some sensors may show a low battery condition sooner than expected. PROSIX sensors continuously attempt to check in with the panel. If the panel does not respond, the sensors continue trying repeatedly, which can prematurely drain their batteries. If you suspect that an existing PROSIX sensor may have a dead battery, replace the batteries in the device and make sure it communicates fully with the panel before you enter panel programming.

  9. Add new PROSIX sensors. Only after completing the previous steps should you begin enrolling any newly purchased sensors. Once you have verified that all programming has been synced from AN360 to the new panel, you can add additional sensors and make any other necessary changes.

Final Thoughts

We understand why DIY users try to prepare the new panel ahead of time. It feels like the faster and more organized approach. Unfortunately, with PROA7 and PROA7PLUS systems using PROSIX sensors, doing this can actually create major problems during the replacement process.

The safest approach is simple:

  • Keep the replacement panel powered off.
  • Leave all new PROSIX sensors unopened and unpowered.
  • Work with your alarm dealer to complete the AlarmNet360 replacement first.
  • Verify old sensors restored correctly.
  • Finally, add any new devices and test for proper operation.

Following the proper order prevents lost programming, sensor lockouts, and hours of unnecessary troubleshooting. Alarm Grid customers who need to perform a PROA7, PROA7PLUS, or even VISTAH3 replacement with existing PROSIX sensors should contact support prior to taking any action on the replacement. Our support team is here Monday - Friday from 9:00 AM - 8:00 PM Eastern. You can contact us at 888-818-7728 or by emailing support@alarmgrid.com.

Tags: , , , , , , , , , , , , , , , , , , , , , ,

Comments


Posted By

Qolsys has released IQ Panel 5 firmware version 5.0.2 with performance improvements, bug fixes, and upgrades to PGM rules on the entire IQ Panel 5 family. Unlike IQ4 systems, the IQ5 lineup no longer supports local firmware updates through the panel access point and now relies solely on WIFI.

Firmware Updates on IQ4 vs IQ5 Panels

The IQ4 family of panels allows firmware updates to be installed locally using the panel’s built-in access point feature, commonly called Panel AP. This method allowed a user or installer to download the firmware file to a phone or tablet, connect directly to the panel and transfer the file, then install the update.

While this feature was convenient in certain situations, it was seldom used in real-world installations. Most IQ panel firmware updates are performed using WIFI and the panel’s built-in network update tools. Because of this, Qolsys removed local firmware installation support from the IQ Panel 5 family.

This change affects the following systems:

  • IQ Panel 5
  • IQ5 Hub
  • IQ5 NS

These panels can still receive firmware updates directly from Qolsys or Alarm.com using an internet connection, but downloadable firmware files are no longer provided for local installation. However, you can bookmark our IQ5 Family Firmware Update Page for information about future updates.

How to Update IQ Panel 5 Firmware

Before starting the update process, make sure the panel is connected to WIFI and is powered by AC with a charged backup battery. The panel must be on version 5.0.1 before installing 5.0.2. To find the current version, swipe down from the top of the screen, tap Settings > Advanced Settings > Enter Installer Code (default:1111) > About > Tap Software. Verify your panel is on software 5.0.1.

  1. Swipe down from the top of the screen and touch “Settings.”
  2. Tap “Advanced Settings.”
  3. Enter the Installer Code. The default is 1111.
  4. Tap “Upgrade Software.”
  5. Touch “Patch Tag.”
  6. Enter the patch tag: iqpanel5.0.2
  7. Touch “OK.”
  8. Touch “Upgrade Using Network.”
  9. Allow the panel to download and install the update.
  10. When prompted, touch “OK” to reboot the panel.

The software install and reboot process can take several minutes. Do not interact with the touchscreen while the update is being installed.

Using “Upgrade Using Network” Without a Patch Tag

You can also update the panel without entering a patch tag. In many cases, simply selecting “Upgrade Using Network” will allow the panel to contact Qolsys servers and automatically search for available firmware.

However, when a firmware release is very new, Qolsys may initially restrict the automatic update path while the rollout is being staged. During that time, the firmware may only be available by entering the correct patch tag manually.

Once the rollout becomes fully public, the patch tag is usually no longer necessary.

Update Via Alarm.com

For those who are less into Do It Yourself, and more into Do It Together, you can request that your alarm dealer push the firmware update for you using Alarm.com. The Alarm.com server can tell if there are one or more firmware updates available for your panel based on its current version. The server will advise which updates should be installed, and will recommend the proper order, if multiple updates are available.

What’s New in Firmware Version 5.0.2?

Firmware version 5.0.2 includes several fixes and improvements for the IQ Panel 5 family.

  • Fixed an issue where the siren could continue sounding during a Panel Test.
  • Improved IQ Installer App pairing performance with IQ5 systems.
  • Resolved an issue where the panel could reboot while writing health memory data.
  • Updated touchscreen sensitivity calibration.
  • Added updated supervision support for new PGP Heat Detectors, including the PGP9979 and PGP8979.
  • Fixed certain PGM rule behaviors when using compatible W2W and IOG modules.

As with previous Qolsys firmware releases, version 5.0.2 focuses heavily on stability improvements and better long-term reliability for both installers and end users.

If you're an Alarm Grid customer and you need help updating your IQ Panel 5, IQ5 Hub, or IQ5 NS firmware, our support team is happy to assist. You can email us at support@alarmgrid.com or call us at 888-818-8283. Our support hours are Monday through Friday from 9:00 AM to 8:00 PM ET. Please have your panel connected to WIFI before beginning the update process.

Tags: , , , , , , , , , , , , , ,

Comments


Posted By

Resideo recently released a new firmware version for its PRO Series. Firmware 03.2476.204 is now available for PROA7 and PROA7PLUS panels, improving touchscreen response, clarifying the disarm process, and restoring PROSIX signal strength display. Learn more in the official Resideo notice.

Silent Alarm Button Renamed to Police Alarm (Silent)

This is the most important change in the update and it applies to all PRO Series models. In previous versions, during an active alarm, some users were pressing the Panic icon and then pressing the Silent Alarm button to silence the alarm. In reality, what they were doing was sending a silent panic signal, telling central station dispatchers to send the police immediately.

Doing this did silence the alarm, but without warning, police officers were being sent to the address. To make the function clearer, Resideo has renamed the button to POLICE ALARM (SILENT) and provided the instructions to enter a PIN in bold. The behavior is unchanged. But the new description makes it obvious that pressing this button calls the police, and that entering your user code is the correct way to silence an alarm.


Before (left) and after (right) — the Silent Alarm button is now labeled Police Alarm (Silent)

Touchscreen Sensitivity Fix

The touchscreen fix applies specifically to PROA7-FA and PROA7PLUS-FA panels. A small number of these units have experienced inaccuracy or lag when using the touchscreen, and the new firmware adjusts the sensitivity to resolve it. If your panel has felt sluggish or inconsistent to the touch, this update should take care of it. Standard PROA7 and PROA7PLUS models are not affected by this issue, though they can still receive the update.

RFSIX (PROSIX) Signal Strength Display Fix

PROSIX sensors paired with a PRO Series panel show their signal strength, making it easy to confirm they’re communicating properly and to troubleshoot any supervision issues. The display updates daily at 1:00 AM local time, or within about two minutes after using walk test mode.

The third fix addresses an issue that affected some PROA7-FA panels updated to firmware versions 03.2476.174 or 03.2476.183 in August 2025. On those systems, the RFSIX signal strength bar graph could disappear from the screen after the update. This new firmware brings that display back for affected panels. PROA7PLUS-FA and earlier ProSeries models aren’t impacted and don’t require any action. However, it is always recommended to keep your system updated to the latest firmware.

How to Get the Update

The firmware is now available through the AlarmNet360 portal. Alarm dealers can push it remotely to installed panels, or apply it during a new installation if the panel in the box is on an older version. Before the update can be pushed, the panel should:

  • Be disarmed.
  • Be connected to WIFI.
  • Be free of alarm memory.
  • Not have an AC loss condition.
  • Not be actively reporting.
  • Not be in walk test or programming mode.

New PROA7-FA and PROA7PLUS-FA units are already being shipped with 03.2476.204 pre-installed, though it may take a few weeks for all distributor inventory to cycle through. The firmware revision is printed on a label on the side of the box if you want to verify the version before opening a unit.

For help with your PRO Series system, the Alarm Grid support team is available Monday through Friday from 9:00 AM - 8:00 PM Eastern Time. Email us at support@alarmgrid.com, call us at 888-818-7728, or chat with us on our website. Live chat agents are available from 9:00 AM - 6:00 PM Eastern.

Tags: , , , , , , , , , , , , , ,

Comments