September 2020 Archives

Posted By

Alarm Grid is excited to announce that we are making several new features available for monitored customers with access to Alarm.com for central station service. These include an In-App Panic, Alarm Cancel/Verify buttons, Subscriber ON/OFF Testing, and Zone Syncing with the central station.


The new features will be available to any Alarm Grid monitored customer with central station service whose monitoring plan includes access to the Alarm.com platform. In order to use most of these features, you will need to download the Alarm.com Mobile App, which is available for free from the Google Play Store and the Apple App Store. This app is great for operating your Alarm.com Security System from virtually anywhere.

By making these features available, we are hoping to improve accessibility and make it easier to control your system and communicate with the central station using the Alarm.com Mobile App. These features will be complementary as part of your Alarm Grid monitoring plan, and they will not result in any changes to your current monthly bill. Our team plans to automatically enable the features for all of Alarm.com customers with central station service.

We have been working very closely with our central station partner Criticom Monitoring Services (CMS) in recent weeks to get the features ready for our customers. As always, CMS has been excellent to work with, and we are confident that we will be able to make a seamless transition for the rollout. We expect to have the features implemented and ready for use sometime during the first week of October.


Let's now take a look at the new Alarm.com features and how you can use them to get the very most out of your security system.


In-App Panic Function

The Alarm.com In-App Panic Function will allow you to send a distress signal to the central station in the event of an emergency. By opening up the Alarm.com Mobile App, you will be able to trigger a Panic and let the central station know that you need help right away. The type of Panic(s) functions that are available will depend on the alarm panel you are using. These can include Audible Police, Silent Police, Fire, and Auxiliary Panics.

When using this feature, Panic Functions are classified as either Silent or Audible. This is based on the panel you are using. An Audible Panic will also be sent to the alarm panel so that a warning message can be displayed on the screen and any programmed sounders and sirens can be activated. Conversely, Silent Panic will result in no message being displayed on the panel, and the system will not produce any sounds.

The table below shows the different types of Panic functions and whether they are Silent or Audible for various Alarm.com Systems. Note how some panels will support both Silent and Audible options for a Police Panic. You will be able to choose the type of Panic to trigger within the Alarm.com App. Remember that Panic availability is determined by the panel you are using and is independent of panel programming. Alarm.com Panels without any true Panic button capabilities will only have a Silent Police Panic available.

Alarm Panel
Police Panic
Fire Panic
Auxiliary Panic
Interlogix Simon XT, XTi, XTi-5
Silent Silent Silent
Interlogix Concord
Silent Silent Silent
Interlogix NetworX
Silent Silent Silent
2GIG GC2 & 2GIG GC2e (FW 1.17.0.1+) Silent & Audible Silent Silent
2GIG GC3 & 2GIG GC3e
Silent Silent Silent
Qolsys IQ Panel & DSC Touch (FW 1.6.3+) Silent & Audible Audible Audible
Qolsys IQ Panel 2 & Qolsys IQ Panel 2 Plus
Silent & Audible Audible Audible
DSC Impassa
Silent Silent Silent
DSC PowerSeries NEO (Not in UL-Mode) Silent Silent Silent
DSC Iotega
Silent Silent Silent
DSC PowerSeries (Using SEM) Silent Silent Silent
Honeywell VISTA (Using SEM)
Silent Silent Silent

To use an Alarm.com In-App Panic, open the Alarm.com App, and expand the Panic option found within the Security System card. This option will have orange text and an exclamation mark (!) inside of a triangle icon. You can then press and hold the desired Panic function button for three (3) full seconds to trigger the Panic. Once triggered, you will have a three (3) second countdown during which you can cancel the Panic signal. After this time has elapsed, the notification will be sent to the central station right away so that help can arrive as soon as possible. Keep in mind that help will be sent to the location of the security system when the In-App Panic function is used.

Cancel & Verify Alarm Buttons

The Alarm.com Cancel Alarm and Verify Alarm buttons are designed to promote a more streamlined process when communicating with the central station during an alarm event. Not only can the Cancel/Verify feature help ensure a quicker response during an emergency, it can also help prevent false alarms and unnecessary dispatch in situations where no help is needed. The feature is optional, and a central station operator will still respond to an alarm normally if no input is made. But it can be very helpful when used properly.

In order for the buttons to be appear, two (2) conditions must be met. The first condition is that a programmed zone on the system has indicated an alarm condition. The second condition is that Alarm.com has received the alarm signal from the panel. Once both events have occurred, the green Cancel Alarm and the red Verify Alarm buttons will both appear at the top of the Alarm.com Mobile App. The buttons will only appear if the user is logged into an Alarm.com profile with Master-Level authority. You will know to check the app because of the text, email, and/or push notification you received about the alarm, based on your notification settings.

You have two (2) minutes to activate either the Cancel Alarm or Verify Alarm function after the buttons have appeared. The two minute timer comes from an estimate of how long it normally takes a central station operator to receive an incoming alarm, process it, and request emergency dispatch to the location. Remember that this is only an estimate. In some cases, a fast-acting central station operator might be able to perform pre-dispatch phone calls and request help before this time period has expired.

Activating the Cancel Alarm or Verify Alarm function is very simple. Just press and hold the corresponding button for thee (3) full seconds. The green Cancel Alarm button is on the left, and it informs the central station that the alarm occurred by accident and to not send any help. The red Verify Alarm button is on the right, and it tells that central station that the alarm is legitimate and to request dispatch immediately. Make sure you are very careful when using this feature to avoid making the wrong input.

Keep in mind that the central station and/or the local authorities might still call you to check in, even after receiving a Cancel or Verify message. The feature is simply used to quickly and efficiently transmit a signal to the central station to let the operator know what action they should take. It is also important to note that if multiple users from different logins try to make a selection, then only the first selection to go through successfully will be seen. Any other user who attempts to make a selection will get a message stating that another Master user has already responded.

Note: Alarm Grid's Central Station Partner Criticom Monitoring Services (CMS) will not process Alarm.com In-App Cancel Commands for Fire and Medical Alarms. CMS will follow the usual operating procedure for the account, even if an In-App Cancel Command is sent for a Fire or Medical Alarm Event.


Subscriber ON/OFF Test

The Subscriber ON/OFF Test feature allows a user to conveniently place their system on Test Mode with the central station through the Alarm.com Mobile App. When the system is in Test Mode, a central station operator will know to not request emergency dispatch to the location in the event of any incoming alarms. By using the Subscriber ON/OFF Test feature, your system will be placed on Test Mode for a set duration of time (1, 2, 4, or 8 Hours). Once you are finished, you can manually end the test or just wait for the timer to expire.

This false alarm prevention method serves as an alternative to calling the central station directly or using the MyAlarms.com feature to put your system on Test Mode. It is very important to always put your system on Test Mode prior to performing any action that may trigger any signal on your system that may normally result in an emergency dispatch . This includes testing any life-safety sensor, such as a smoke detector or carbon monoxide sensor, or testing the panic function on a key fob.

When you activate Test Mode using the Alarm.com App, a signal will be logged to the central station that will inform operators that the system is on Test. If an alarm occurs on your system, then an operator will still see the alarm. But they will also see the notification stating that your system is in Test Mode, and they will know not to contact you or request dispatch. Once the time period you have specified expires, or the mode is exited manually, then the Test Mode notification will disappear, and the central station operators will know to respond to any incoming system alarms in the usual manner.

In order to access this feature, open the Alarm.com Mobile App, and login to your account. Click the Menu Icon (three horizontal bars), and then select Monitoring Settings. Choose the option System Test Mode. You will be able to choose a Test Mode duration of 1, 2, 4, or 8 Hours. Your selection will be indicated with a checkmark. You can then press the blue Start Test Mode button to begin. A grey Stop Test Mode button will then appear if you want to exit Test Mode before the duration expires.


Zone Sync Function

Okay, this last feature is more for us than it is for you. But we still wanted to let you know about the Zone Sync function, as it changes the way that we will set up your Alarm.com Security System with the central monitoring station. Basically, it allows the Alarm.com servers to handle the process of transferring the zone description and other information from the security system to the central station during account creation and/or whenever the system's zones are updated. This information includes zone numbers and names that you have provided for zones on your Alarm.com account.

Traditionally, the process of transferring information from a security system to the Alarm.com servers had to be completed manually by a monitoring company. And really, that is still the case. The only difference now is that we can have Alarm.com automatically update the central station with the zones and their respective names, rather than having to type or write them out ourselves. An end user is still encouraged to contact us whenever they update any of the zones on their system so that a Zone Sync can be performed and we can be sure the new or edited zones get the proper dispatch instructions. We advise using the email mentioned at the end of this post for this purpose.
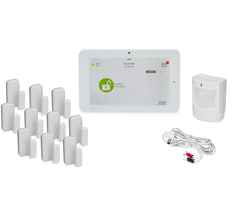

Get Started With Alarm.com

As we mentioned earlier, we plan to enable these features for all our Alarm.com customers with central station service sometime during the first week of October. These features will be enabled automatically, and no action is needed on your part if you are monitored with Alarm Grid for access to Alarm.com. You do have the option to opt out of any of these features if you want, but there is very little reason to do so. Remember, these new features are all complementary, and they will not increase your existing monthly bill.

If you are not yet monitored, and you are looking to start service with Alarm.com, then we are happy to help you get started. Your new service will include access to these new features. Any new customer wanting to start service, as well as any existing customer wanting to opt out of one or more of these features, should email us at support@alarmgrid.com. We will check your email during our regular business hours of 9am to 8pm ET M-F and reply back as soon as we can. We look forward to hearing from you and helping you use Alarm.com!

Tags: , , ,

Comments


Posted By

There will soon be yet another update available for the Alarm.com Mobile App. This time, both the iOS and Android mobile app versions are receiving updates. According to Alarm.com, the new mobile app versions should be made available for free download sometime within the next week.


Alarm.com Mobile App Version 4.16 for iOS will add smart lighting control as a new Siri Shortcut option. This will allow a user to more easily set up their lights so that they can be controlled using Siri Voice Commands. We have found Alarm.com Siri Shortcuts to be very useful for easily controlling one's security system through spoken voice commands. For more info on using Siri Shortcuts with Alarm.com, please check out this prior blog post.

Alarm.com Mobile App Version 4.15 for Android will provide video doorbell support to the Shortcuts feature for the app. This will allow the user to access the live video feed for their Alarm.com Doorbell Camera with a long press of the app launcher icon. This is believed to be similar to the doorbell shortcut for the iOS version that was released in the prior update. In addition, Android users will also gain the ability to set an "Override Do Not Disturb" option to ensure that they do not miss critical alerts from Alarm.com. This option will be available from within the Alarm.com Notifications Page.

As usual, both the new iOS and Android App Versions will also include general stability fixes and improvements to help ensure seamless performance. These new app versions are expected to be made available sometime next week, so keep an eye out for them in the Apple App Store and the Google Play Store.

Alarm Grid will provide further updates if we learn anything else. If you have any questions regarding Alarm.com Mobile App Version 4.16 for iOS or Alarm.com Mobile App Version 4.15 for Android, or if you are interested in starting monitoring service for accessing Alarm.com, please do not hesitate to email us at support@alarmgrid.com. We check our email from 9am to 8pm ET M-F. We look forward to hearing from you!

Tags: , , ,

Comments


Posted By

It was a relatively calm week for our video team, but we still managed to put up a few new videos. Most of these are usual tutorial videos, but we did make one extra movie for fun at the end of the week. We hope you enjoy these videos. Let's check out the recap for September 18th thru 25th.

Programming a SiXFOB to the Lyric Controller

This video was actually uploaded super late last week, and it missed the last recap, so we decided to put it into this one! I show you how to program a Honeywell SiXFOB Key Fob with a Honeywell Lyric Alarm System. The Honeywell SiXFOB is a 4-button key fob that is great for arming, disarming, and triggering emergency panics. As a member of the Honeywell SiX Series, the Honeywell SiXFOB is designed exclusively for use with the Lyric System, and it uses 128-bit AES encryption for enhanced wireless security.


Remove All Devices Button On IQ Panel 2

I show you the Remove All Devices button in the Z-Wave Menu for the Qolsys IQ Panel 2 Plus. This button serves as a reset for the system's internal Z-Wave Plus controller, and it clears all of the programmed Z-Wave devices from the system. Any Z-Wave device you want to continue using with the IQ Panel 2 will need to be re-added to the system. It will be necessary to clear these devices from the network before adding them back in, as they will still have residual Z-Wave data from when they were paired with the system originally.


Honeywell Home Tuxedo Is Not a Standalone Alarm Panel

I explain how the Honeywell Home Tuxedo Keypad is not a standalone alarm panel. Many users mistakenly believe that the touchscreen keypad is the actual alarm system. But in reality, the Tuxedo is just a keypad controller for a Honeywell VISTA System. The actual panel is usually found in a beige metal cabinet. This metal enclosure is often tucked away in a basement, attic, garage, or storage closet. Do not confuse the Honeywell Home Tuxedo with an actual Honeywell VISTA Security System.


Using Console Mode on a Honeywell Home Tuxedo

I show you how to use Console Mode on a Honeywell Home Tuxedo Keypad. Console Mode allows the Tuxedo to be used in the same way as an Alphanumeric Keypad, such as a Honeywell 6160. Putting the Tuxedo into Console Mode is necessary when programming the system. This includes adding, editing, and deleting system zones and making other various changes to the system settings. Remember that the Tuxedo will automatically reboot as soon as you exit system programming.


Connect Tuxedo Keypad to WIFI

I show you how to connect a Honeywell Home Tuxedo Keypad to a local WIFI network. The reason why the Tuxedo connects to WIFI is to send and receive automation commands from Total Connect 2.0. This internet connection also allows the Tuxedo to receive firmware updates from AlarmNet and display a weather forecast on the main screen. The Tuxedo Keypad can connect with both 2.4 GHz and 5 GHz WIFI networks. Wired ethernet connectivity cannot be used with the Tuxedo.


Mike's Birthday Punches

Okay, this isn't a security system video, but we needed to fit Jarrett into some video for the week. Jarrett punches me 28 times, in honor of my 28th birthday. Jarrett sure packed some heat into his punches, but I took it pretty decently if I do say so myself. I then made sure to remind the viewers to contact support@alarmgrid.com for monitoring information. I'll need to remember to pay Jarrett back on his birthday a few months from now!

Tags: , , ,

Comments


Posted By

The parent company of 2GIG is rebranding itself. The company will now simply be known as Nortek Control, rather than its previous name of Nortek Security & Control. Nortek is making this change to place an even greater emphasis on the diverse selection of products that it offers.

Nortek is arguably best-known for 2GIG, which focuses mostly on the security industry. This is, of course, the manufacturer of the popular 2GIG GC2e and 2GIG GC3e Alarm Systems. However, it's clear that Nortek wants people to be aware that they offer more than just security and access control products.

President and CEO of Nortek Control Chris Larocca said of the rebranding, "We address a wide range of markets, and we just believed that shoehorning ourselves by calling out one specific segment that we address in the company name really was not conducive to the other markets that we play in."

Nortek Control has product offerings and subsidiary companies in a wide selection of industries, including security, access control, electrical power, audio/video, health & wellness, and analytics. The company recently announced that it would expand its audio business by continuing to grow its SpeakerCraft and Proficient brands.

Alarm Grid carries many Nortek Control products on its website, most notably those from 2GIG. We also offer products from Linear, which is the smart home automation company of Nortek. Alarm Grid has praised many 2GIG and Linear products in the past for their strong build quality. The rebranding should not affect any existing offerings from 2GIG and Linear.

Nortek Control currently operates design and manufacturing centers in North America, Asia, and Europe. The company has millions of customers and clients worldwide, and they plan to continue providing innovative products across various industries. The rebrand also includes a new logo, which is the letter N designed to appear as an oscilloscope or infinity loop.

If you want to learn more about Nortek Control products, specifically those from 2GIG and Linear, then we recommend reaching out to us by emailing support@alarmgrid.com. We are happy to help you find the perfect additions for your security and smart home automation needs. Our hours for checking email run from 9am to 8pm ET M-F. We look forward to hearing from you!

Tags: ,

Comments


Posted By

As you may know, the fall season began earlier this week. This means that cooler temperatures are on the way. If you want to prepare your home or business, then you will certainly want to consider getting some low-temperature freeze sensors. Nearly every system has good options available!

Freeze sensors alert your system when the temperature in the building drops to a dangerously low level, usually due to the HVAC system being broken. Having one of these sensors in your home or business is crucial for monitoring the building while you are away. The consequences of having below-freezing temperatures in your home or business can be dire. The pipes can freeze, and major damage can occur. Installing a freeze sensor is small price to pay to prevent this from happening.

Most freeze sensors are designed to alert a system before freezing temperatures occur. Usually, a freeze sensor will activate at or around 40°F to alert the system. This a little bit higher than 32°F, which is when water begins to freeze. This function is intentional, as the user will hopefully be alerted to the situation with enough time to take action. Many users will set up notifications on an interactive service platform used with their alarm systems so that they are notified via text and/or email when a freeze sensor activates while they are off-site. This is possible in both Total Connect 2.0 and Alarm.com.

The main thing to consider when choosing a freeze sensor is whether or not it will work with your security system. If you know which sensor lineups are compatible with your system, then you likely already have a good idea which sensors will work. But we'll list out some of the more popular options to get you started. A very versatile 345 MHz freeze sensor that will work with the Honeywell Lyric, the Honeywell LYNX Touch Panels, and any 2GIG Panel is the Honeywell 5821. This sensor can also be used for flood detection if a probe is added.


If you have a PowerG-compatible system, such as any version of the Qolsys IQ Panel 2 Plus, then you might consider the DSC PG9905 Temperature Sensor. Many users prefer PowerG Sensors like the the PG9905 due to their superior wireless range and 128-bit AES encryption. If you have an original, non-Plus IQ Panel 2, then the 319.5 MHz Qolsys IQ Temp-S is a good choice. The Qolsys IQ Temp-S will utilize rolling code encryption when paired with the IQ Panel 2. Users of the 2GIG GC3e and 2GIG GC2e also have a good encrypted freeze sensor option in the 2GIG FT6e-345. There's also the non-encrypted 2GIG FT6-345 for users of the older 2GIG GC3 and 2GIG GC2 Systems.

Alarm Grid wants to help you keep your home or business comfortable this winter, as well as for many more winters to come. If you need help choosing a freeze sensor, then please don't hesitate to reach out to us. We are also happy to discuss monitoring services that you might use to receive alerts regarding a freeze sensor that activates while you are away from your home or office, The best way to reach us is to email support@alarmgrid.com. We check our email during our usual business hours of 9am to 8pm ET M-F. We look forward to hearing from you!

Tags: , , , , , , , ,

Comments


Posted By

Alarm.com has won a 2020 New Product of the Year Award from Security Today for their Wellness Camera, also known as the Alarm.com ADC-V622-WELL. The Alarm.com Wellcam won the award in the Fire & Life-Safety category. We congratulate Alarm.com and their Wellcam for their continued success.


With social distancing guidelines still in effect due to the ongoing COVID-19 pandemic, the Alarm.com Wellcam has proven to be highly effective in helping many doctors, nurses, and other hospital staff communicate with patients, while still maintaining a safe distance. The product was actually first unveiled at ISC 2018 a couple of years ago, but it's good to see it really shine during an era of social distancing.

Alarm.com Vice President of Products Steve Chazin said of the award, "The need to stay connected with family and loved ones is greater now than ever before. Wellcam extends the power of modern security systems to help protect and connect people wherever they live. We're thrilled that Security Today deems Wellcam a New Product of the Year. This recognition underscores just how critical innovations like Wellcam are in helping all of us look after one another, regardless of whether we're feet or miles apart."

The Alarm.com Wellcam is loaded with excellent features that help it to thrive both as a wellness camera and as a security camera in general. The device offers 1080p recording capabilities, a 180° viewing angle, 6 MP zoom, and IR night vision of up to 15 feet. This helps ensure that the camera captures detailed video of any activity that occurs in the room. The camera also has a call-button on top that a patient or monitored individual can use to call for help, if needed. A built-in microphone and Bluetooth speaker allows the individual to engage in a two-way voice call with the monitoring party through Alarm.com. The speaker can also be used for entertainment purpose, including streaming music and podcasts.

Alarm.com originally designed the Wellcam for use with the Alarm.com Wellness Platform. But the capabilities of the device have really been put to the test with the ongoing pandemic. Needless to say, the Alarm.com Wellcam has passed with flying colors. Like all Alarm.com Cameras, the Wellcam is designed exclusively for use with the Alarm.com platform. You can get started using the camera by getting an Alarm Grid Platinum Plan or an Alarm Grid Video Monitoring Plan. More information about our monitoring plans can be found in this post.

If you have any questions about the Alarm.com Wellcam, or any other products or services relating to Alarm.com, please don't hesitate to reach out to us! The best way to contact us is to email support@alarmgrid.com. We check our email from 9am to 8pm ET M-F. We look forward to hearing from you!

Tags: , , , , , , , ,

Comments


Posted By

HomeKit users may notice two (2) new device categories in the platform. Apple iOS 14 has added device categories for both TV Set Top Boxes and Streaming Sticks. These categories will appear when you go to add an accessory and have a compatible TV Set Top Box or Streaming Stick within range.


The two new device categories have appropriate icons to go with them. It's possible that the new categories could have other implications for Apple HomeKit. Some have speculated that Apple may be in the process of providing HomeKit support to various streaming devices, other than their own AppleTV.

It is likely that HomeKit-compatible TV Set Tox Boxes and Streaming Sticks will behave in a similar manner as HomeKit-compatible televisions when used with the platform. The devices appear in the Apple Home App so that you can navigate and control the connected device through the app or by using the Siri Voice Assistant.

You will only find the new device categories when using HomeKit on Apple iOS 14, which was just made available last week. Alarm Grid previously covered how iOS 14 was set to introduce a new look for HomeKit on the iPad and facial recognition for HomeKit-compatible security cameras. Alarm Grid recommends the Honeywell Lyric as a HomeKit-compatible security system.

We are impressed with how Apple continues to update their HomeKit platform. We think it is a great resource for Apple users. If you have any questions about HomeKit, including the compatibility between the Lyric and HomeKit, please email us at support@alarmgrid.com. We check our email from 9am to 8pm ET M-F. We look forward to hearing from you!

Tags: , , ,

Comments


Posted By

Alarm Grid is here with another video recap! This time, we have nine (9) new videos to check out. Jarrett again stepped up this week and did a couple of videos. Our team is thrilled to have him back in the Alarm Grid studio. Let's take a look at the latest tutorial videos from Alarm Grid.

Assigning User Codes to Partitions On the IQ Panel 2 Plus

I show you how to assign user codes to different partitions on the Qolsys IQ Panel 2 Plus. When you have partitions enabled on the IQ2+, you will need to assign partitions to every programmed user code. A user code will only be able to control a partition that it has been assigned. The system's Master Code, also known as the Admin Code, has access to every partition on the system. There are up to four (4) partitions available on the IQ2+.


Getting Into Z-Wave Programming on a Honeywell Home Tuxedo

I show you how to access Z-Wave programming on a Honeywell Home Tuxedo Keypad. In addition to serving as a touchscreen keypad for a Honeywell VISTA System, the Tuxedo is also used as a Z-Wave Plus controller. In order to add, remove, and edit any of the Z-Wave devices used with the Tuxedo, you must access the Z-Wave Programming Menu. This menu is easy to access so that you can begin quickly setting up your home automation network.


Opening the Honeywell SiXCOMBO

I show you how to open up the Honeywell SiXCOMBO Combination Smoke, Heat, and CO Detector. You will normally need to open up the SiXCOMBO to change the batteries and to access the inside sticker with important device information. The SiXCOMBO uses four (4) lithium CR123A batteries, also known as camera batteries, and it has an average battery life of five (5) years. The inner sticker includes information like the device's Serial Number, manufacture date, and more.


The Resideo Tuxedo is Not an Alarm Communicator

I explain how the Resideo Tuxedo is not an AlarmNet Communicator for a security system. Although the Tuxedo connects to a local WIFI network, it does not do so for the purpose of providing IP connectivity for the panel. The Tuxedo merely connects to the internet to relay automation commands from Total Connect 2.0 and for receiving firmware updates. The user must still add a compatible communicator to their VISTA System to set up alarm monitoring.


Using More Than One SkyBell With Total Connect 2.0

Jarrett explains how Total Connect 2.0 allows you to pair up to five (5) SkyBell Video Doorbell devices per account. The account does not need to include true video monitoring service for the SkyBell devices to work. If you want to use more than 5 SkyBell Video Doorbells with Total Connect 2.0, then it is necessary to sign-up for a second account. You can link the multiple accounts so that you can access them using the same login information.


Setting up Total Connect 2.0 Notifications

I explain how to setup text and email notifications in Total Connect 2.0. Text and email notifications help ensure that you are notified regarding any activity on your Honeywell Security System. This is very important for self-monitored users who do not have central station service, as they must receive these notifications and take proper action during emergencies. To set up notifications, you must create user profiles, assign phone numbers and/or email addresses to those profiles, then build notification groups and include the user profiles, and finally assign which notifications go to each group.


Changing the Battery in a Honeywell 5834-4

Jarrett shows you how to change the battery inside of a Honeywell 5834-4 Key Fob. The Honeywell 5834-4 uses a single lithium CR2032 coin battery for power. Expected battery life is roughly three (3) to five (5) years with typical usage. A Phillips screwdriver is needed to remove the back cover for the Honeywell 5834-4 and access the battery compartment. Make sure to observe proper polarity when inserting the new battery. The positive side for the CR2032 battery should be visible, once the battery has been inserted.


Using the Resideo Tuxedo Without an Alarm Panel

I explain how you can technically use the Resideo Tuxedo without an alarm panel. This is not commonly done, as the Tuxedo is primarily a keypad for a Honeywell VISTA System. But you do have the option of providing power to the Tuxedo and using it as a standalone automation controller for Z-Wave smart home devices. Some examples of Z-Wave devices that you can pair with the Tuxedo include smart lights, door locks, programmable thermostats, and more.


Install Honeywell LTE-XA or LTE- XV On a VISTA TURBO

I show you how to install a Honeywell LTE-XA AT&T LTE Communicator or a Honeywell LTE-XV Verizon LTE Communicator on a Honeywell VISTA TURBO Series Panel, such as a Honeywell VISTA-128BPT or a Honeywell VISTA-250BPT. The added communicator will allow the panel to communicate with the AlarmNet servers across a cellular network. This will allow the system to be monitored. The user will need a monitoring plan that includes cellular communication, such as an Alarm Grid Gold or Platinum Plan.

Tags: , , ,

Comments


Posted By

2GIG and Nortek have announced that many of their products have been discontinued, effective immediately. This list is headlined by the 2GIG GC3, which has been replaced by the 2GIG GC3e. These products are no longer being manufactured, and new models will no longer be available.

Most of the products on this list are older products with proper replacements, as well as some unpopular products and products designed for markets outside of the United States. Although the list is quite extensive, there's really nothing too surprising here. Many of these products weren't even available through Alarm Grid, so not much will change in terms of our product offerings. The move simply allows 2GIG to dedicate more resources to manufacturing newer and more robust products.
The list of discontinued items can be seen below:

  • 2GIG 2GIG-ANT1X External In-Wall GSM Antenna
  • 2GIG 2GIG-CAM-101-NET Indoor WiFi Camera, Powered By Securenet
  • 2GIG 2GIG-CAM-HD100 Camera HD100 Indoor W/Night Vision
  • 2GIG 2GIG-CP22-345B GC2 345MHz security, 921 Z-Wave, Brazil
  • 2GIG 2GIG-CP61-345C Control Panel 345 Mhz GoControl Pr
  • 2GIG 2GIG-DW10-120PK Thin Door/Window Contact, 120 bulk pack
  • 2GIG 2GIG-GC3-345 GC3 Panel (North America) 345 MHz
  • 2GIG 2GIG-GC3GA-T GSM 3G AT&T Telular GoControl
  • 2GIG 2GIG-GCKIT30IMG GC2 Image Sensor Kit; 1 GC2 Panel, 3 DW10 Sensors, 1 Image Sensor
  • 2GIG 2GIG-GCKIT311 GC2 Kit 3-1-1
  • 2GIG 2GIG-GCKIT410 GC2 Kit 4-1-0
  • 2GIG 2GIG-GC-POTS GC2 Plain Old Telephone Service (POTS) Module
  • 2GIG 2GIG-KIT311-GC3 GC3 3-1-1 Kit
  • 2GIG 2GIG-KV-T-GC3 GC3 Telus VKit: GC3-345 Panel and GSM/3G Telus cellular radio (2GIG 2GIG-3GTL-A-GC3)
  • 2GIG 2GIG-LAN-GC3 GC3 Ethernet Module
  • 2GIG 2GIG-LTEV-A-GC3 Alarm.com Verizon Cat-3 4G LTE Cell Radio For 2GIG GC3 With 2 LTE Antennas
  • 2GIG 2GIG-MNT-250B 2GIG Camera Mount For Outdoor Mini-Dome, Series 250, Black
  • 2GIG 2GIG-MNT-250B 2GIG Camera Mount For Outdoor Mini-Dome, Series 250, Black
  • 2GIG 2GIG-RELY-KIT3 Rely 3-1-1 Kit for SecureNet Backend with Camera. Note: A KIT3 includes KIT2 (3-1-1 Rely for SecureNet) and the Camera
  • 2GIG 2GIG-SDS1-345 Wireless Smoke Detector Sensor 345MHz (Smoke Ring)
  • 2GIG 2GIG-TS1-SLO 2GIG 2GIG-Ts1-Slo (This is not the 2GIG TS1, which is still available)
  • 2GIG 2GIG-Z-CT100 Ct100 Thermostat
  • GoControl GD00Z-4A Garage Door Controller : GoControl Z-Wave Plus Garage Door Control. Plain white box. Frontpoint.
  • GoControl WD1000Z-1 GoControl Z-Wave White In-Wall Dimmer Switch. 1000 Watt Max
  • GoControl WD1000Z-R4 Retail Replenishment pack of 4 WD1000Z-1. Z-Wave white wall dimmer switch. 1000 Watt max. 300 Series. North American product
  • GoControl WD500Z-1 Z-Wave white wall dimmer switch. 500 Watt max. 300 Series. North American product.
  • GoControl WD500Z-R6 Retail Replenishment pack of 6 WD500Z-1. Z-Wave white wall dimmer switch. 500 Watt max. 300 Series. North American product
  • GoControl WDKIT-AL WD 4 PC Trim Kit Almond, 1ea
  • GoControl WDKIT-AL-R4 Retail Replenishment pacK of 4 WD ALMOND trim kits
  • GoControl WI15VZ-1 Z-Wave 15 Valve Irrigation Controller. US

If you have any questions about these discontinued products, or if you are needing suitable replacements for any discontinued product, please email us at support@alarmgrid.com. We check our email from 9am to 8pm ET M-F. We look forward to hearing from you!

Tags: , , ,

Comments


Posted By

Stolen packages are a concern for many individuals. But you can take a stand and prevent thieves from taking your stuff. All you need is a doorbell camera, a Z-Wave door lock, and a monitored security system with Alarm Grid. We'll help you protect your packages from pesky porch pirates!


It doesn't take a genius to figure out how a package gets stolen. The delivery person rings the doorbell and finds that nobody is home. They leave the package out in the open. Then a no-good package thief comes along, swoops up the goods, and you're then left wondering whether or not the delivery got lost in the mail. Countless packages fall victim to this very setup every single day. And if you don't have any evidence, then it can be next to impossible to catch the guilty party.

But there's an easy method to prevent this from happening to you. First, swap out your regular doorbell with a smart video doorbell camera. We recommend using one of the SkyBell Video Doorbell devices for this job. You can choose between a Total Connect 2.0 model and an Alarm.com model depending on which service you use with your system. Remember, you do not need special video monitoring service to get started with a SkyBell Video Doorbell. Total Connect 2.0 will allow a user to pair up to five (5) SkyBell devices per Alarm.com account, while Alarm.com provides support for one (1) SkyBell without true video monitoring service.


Next, configure your SkyBell device to work with your interactive service platform of either Total Connect 2.0 or Alarm.com. You can get push notifications on your phone whenever someone rings your SkyBell device. With the push of a button, you can pull up a live feed of the person at your door and communicate with them using two-way audio. When you see that it's the delivery person, greet them with a pleasant "Hello", and explain that you aren't home at the moment. Then invite them to step inside to drop off the package.

But how will the delivery person get inside? And how will they avoid setting off your security system? Easy. With a Z-Wave door lock, you can unlock the door, and you can disarm your alarm system using either the TC2 or ADC app on your phone. You might even consider making a smart scene to have your door automatically unlock as soon as your system is disarmed. Alarm Grid offers a wide selection of door locks to choose from. We recommend Z-Wave door locks, as they are super easy to program, and they can interface with nearly every modern wireless security system.


Once everything is in order, instruct the delivery person to go inside and leave the package near the door. If you're feeling extra groovy, you might invite them to grab a bottle of water from the fridge. It's hot out there, and your delivery driver would really appreciate the kind gesture. We'll leave that up to you though. If you don't want them walking through your house, then leaving a small snack or a tip by the front door will also show that you care.

Once the driver is gone, re-lock your door and re-arm your system. And just like that, you know that your package is nice and safe, and the porch pirate's plan has been foiled. It may also be a good idea to track any packages you order and know when you can expect them. Also make sure to take a good look at the delivery person when you let them inside. While fraudulent delivery drivers are very uncommon, they're not unheard of. If you're in doubt, instruct the driver to leave the package behind your house or behind some bushes so that you can retrieve it later. This is better than leaving the package wide open in front of your front door.

Of course, this setup will require monitoring service for accessing Total Connect 2.0 or Alarm.com. If your system isn't monitored, or if you don't have a security system, then Alarm Grid has you covered! We offer a wide selection of DIY security systems, including the Honeywell Lyric, the Qolsys IQ Panel 2 Plus, the 2GIG GC3e, and much more. We also offer monitoring plans for all budgets. This type of setup won't require anything fancy, and it's nothing that will break the bank. In the long run, it's worth it for your peace of mind!

If you want to learn more about Alarm Grid monitoring service, or if you have questions about protecting your deliveries, send an email to support@alarmgrid.com. We'll be happy to answer any questions or concerns you might have. Remember that our hours for checking email are from 9am to 8pm ET M-F. We look forward to hearing from you!

Tags: , , , , , , , , , , , , , , , , , , , , , , ,

Comments