January 2019 Archives

Posted By

Hi DIYers! We know it has been awfully chilly out there lately. We thought it would be a good time to talk about freeze sensors and the benefits they provide. These devices are strongly recommended for anyone who lives in a colder area who wants to make sure their home is kept temperate.

Honeywell 5821 wireless temperature sensor and water sensor exte

Also called temperature sensors, freeze sensors alert a security system when the ambient temperature falls below a certain threshold. Usually, this is around 40 degrees Fahrenheit. That way, the user can take proper action to prevent their pipes from freezing. Remember, water freezes at 32 degrees Fahrenheit, and serious damage can occur if nothing is done in time. There are all sorts of horror stories of this happening while people are away for the day or on vacation.

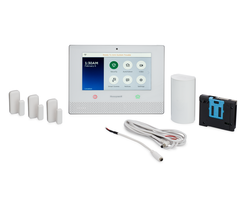
Freeze sensors are particularly useful when used with an interactive service platform, such as Total Connect 2.0. These services will provide you with mobile alerts so that you will know if a situation occurs while you are away. Nearly every panel we sell can connect with one of these services. You just need the right communicator and monitoring plan.

While there are some standalone temperature sensors, freeze detection is often a secondary feature on a device. In fact, you might already have a device with freeze detection capabilities in your home and not even know it! The feature is commonly found on smoke detectors and flood sensors, so it never hurts to find out if your existing devices can also do freeze detection. For multi-function devices, freeze detection will usually operate on a specific Loop Number, and a unique system zone for freeze detection must be programmed.

Qolsys iq temp temperature sensor for low %3c40 and high %3e100 temp

If you're in the market for a new freeze sensor, you have plenty of options to choose from. The main thing to keep in mind is whether or not the device will work with your security system. If you are looking for a wireless sensor, then it must communicate at a compatible frequency. If you go the hardwired route, then your system must be able to support hardwired sensors. You might consider getting a smoke detector or a flood sensor that also includes the freeze detection function.

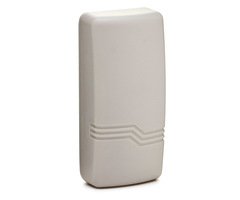
If you have a Honeywell or 2GIG System, then you likely use 345 MHz Sensors. The Honeywell 5821 is a convenient option for reliable freeze detection. You can also add a probe to have the 5821 Sensor double as a flood sensor. If you want a combination smoke and heat detector with freeze detection built-in, you might consider a Honeywell 5808W3.

For Interlogix Systems and the original Qolsys IQ Panel 2, you will want a 319.5 MHz Sensor. The Qolsys IQ Temp is a viable option. There's also the Interlogix TX-E611, which doubles as a flood sensor. For users also looking for a smoke, the Interlogix SDX-135Z also provides freeze detection.

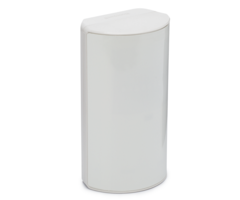
If you have a Qolsys IQ Panel 2 Plus or a DSC PowerSeries Neo, then your system supports PowerG Sensors. In that case, you might go with the DSC PG9905. This sensor will offer the impressive range of PowerG, as well as extremely secure 128-bit AES encryption.

For users who want to go the hardwired route, the best bet is often to go with a smoke detector that includes the feature. We often steer customers towards 2-wire smokes, since they are easier to set up. A good option is the System Sensor 2WTA-B, which also includes a built-in sounder.

Users who are having trouble deciding on a freeze sensor can always reach out to Alarm Grid. We are happy to help you find the perfect device for your needs. You may email us at support@alarmgrid.com, or call us at (888) 818-7728 from 9am to 8pm EST M-F. We look forward to hearing from you!

Tags: , , , , , , , , , , , ,

Comments


Posted By

Hi DIYers! Today, we're taking a look at why one-go-all-go smoke detectors can help ensure that everyone in the building is alerted during a fire. Simply put, a one-go-all-go smoke detector will cause all of the other compatible smoke detectors on the system to activate at the same time.

Dsc fsb 210bt 2 wire addressable photoelectric smoke and heat de

Having all the smokes in your home activate at the same time can be crucial for ensuring that everyone is alerted in the event of a fire. This is especially true for larger homes that need several smoke detectors for complete coverage. Most alarm systems can have some type of interconnected one-go-all-go smoke detector network. However, implementing this feature properly can be difficult, and it requires additional equipment and wiring. Another important thing to remember is that the one-go-all-go feature is best achieved by using the same detector model across the network.

For those with wired alarm control panels, there is often a way to achieve a one-go-all-go setup using hardwired smokes. This is possible with both 2-wire smokes and 4-wire smokes, but both require the proper equipment. Many wired panels offer a way to conveniently reset the zone used for 2-wire smokes after a fire alarm has been cleared. This is needed for getting the smoke detectors to stop sounding and to reset the detector so that it can trip again, if necessary.

For the Honeywell VISTA Panels, all 2-wire smokes must go on zone 1. This zone will automatically reset, and power will be briefly dropped to the smokes after the alarm is cleared. Multiple 2-wire smokes are wired together in parallel, with an end of line resistor (EOLR) for wiring supervision. A good 2-wire smoke detector to use is the System Sensor 2WTA-B, which also includes a built-in sounder.

System sensor 2wta b 2 wire smoke detector with fixed heat and s

Unlike 2-wire smokes, 4-wire smokes have less restriction regarding where they can be wired. In fact, a 4-wire smoke on a Honeywell VISTA System will generally go on any hardwired zone, except for zone 1. Again, the smokes can be configured for a one-go-all-go setup, but this will require additional equipment and wiring. This also allows the smokes to take up fewer systems zones, as they can all use the same zone and programming settings.

One downside to using 4-wire smokes is that they often require additional resources to work properly. In order to get a 4-wire smoke to stop sounding, power to the device must be dropped. But unless the system has a built-in relay, this cannot be done without additional hardware. This can require an external relay, and possibly an additional power supply as well. Proper operation will also require an end-of-line power supervision relay to check whether or not power to the smokes has been interrupted. If you do decide to go the 4-wire route, the System Sensor 4WTA-B is a good option.

System sensor 4wt b 4 wire smoke detector with fixed heat sensor

More recently, certain wireless smoke detectors also offer one-go-all-go functionality. Honeywell really took the initiative here by making their Lyric SiXSMOKE Sensor a one-go-all-go device. This sensor is exclusively compatible with the Honeywell Lyric Alarm System, and provides a very easy way to achieve a robust one-go-all-go setup. One-go-all-go is also compatible with the new Honeywell SiXCOMBO, which also offers heat and CO detection.

Honeywell sixsmoke front wireless smoke slash heat detector for

If you have a different wireless system than the Lyric, then there might still be way to attain a one-go-all-go setup. In most cases, this will require using 4-wire smokes with a compatible wireless transmitter. The transmitter will need to be able to support Normally Open (NO) life-safety devices with an end of line resistor. However, this is not possible for every wired-to-wireless converter.

Additionally the standard equipment for any 4-wire smoke is also required. This includes a relay, power supply and resistor. One transmitter that will work for this application is the Honeywell 5817CBXT. This module is part of the Honeywell 5800 Series, and it will work with nearly any alarm system that accepts the 345 MHz wireless frequency. Remember, the transmitter or converter must communicate at a frequency accepted by the alarm control panel.

Honeywell 5817cb wireless commercial sensor

Additionally, Qolsys recently released the Qolsys IQ Hardwire 16-F for 319.5 MHz systems. This is a 16-zone wired to wireless converter that is great for bringing over hardwired sensors to a newer wireless system. Zone 16 on the module is a Normally Open loop specifically designed for 2-wire smokes. The loop will support up to ten 2-wire smoke devices, which are wired in parallel with an end-of-line resistor. This revolutionary module represents the first way to bring 2-wire smokes over to a wireless all-in-one system. The necessary resistors come included with the module.

Qolsys iq hardwire 16 s qs7131 840

Additionally, if you have an existing network of high-voltage smokes, you can integrate them into a wireless system using a takeover module. These are devices that listen for the unique temporal sound of an activated smoke detector. If the existing smoke detector network is one-go-all-go, a single takeover module can accommodate the entire network. Alarm Grid offers takeover modules that operate at the 319.5 MHz (Interlogix/GE and Qolsys), 345 MHz (Honeywell and 2GIG) and 433 MHz (DSC) wireless frequencies. That way, you can conveniently take an exiting high-voltage smoke network and start using it with your new wireless security system!

If you need help choosing smoke detectors for a one-go-all-go setup, please don't hesitate to reach out to us! We can help you determine the perfect fire-protection devices for your security system. You can send an email to support@alarmgrid.com, or you can call us at (888) 818-7728 during our normal business hours of 9am to 8pm EST M-F. We look forward to hearing from you!

Tags: , , , , , , , , , , , , , , , , ,

Comments


Posted By

Hi DIYers! We have a quick product highlight for your today. We're taking a look at the 2GIG IMAGE3. This is an image sensor module for a 2GIG GC3 that doubles as both a motion detecting sensor and camera. It sends four high-quality images to Alarm.com upon activation for easy viewing.


Motion sensors are great for users who want to easily confirm break-ins, without having to invest in security cameras. Just last week we took a look at the Qolsys Image Sensor. Now we're looking at the 2GIG version. Really, this device is pretty similar, but it works with the 2GIG GC3 instead. Please note that you will need 2GIG XCVR3-GC3 installed in the system to support the module, and the GC3 System needs to be running Firmware Version 3.0.1 or higher. Also keep in mind that any Alarm Grid customer will need a Gold-level Plan or higher.

The 2GIG IMAGE3 knows to produce images when its motion sensor is activated. This is a PIR motion sensor that responds to the changes in infrared energy that occur with movement. The device also includes IR night vision so that it can detect motion and capture images in the dark. It will produce four images when activated, and they can quickly be viewed remotely through Alarm.com. This is possible both through the Alarm.com Website and the Alarm.com Mobile App on Android and iOS Devices. A user can even have Alarm.com send them email and text alerts so that they are sure to be notified.

The images produced by the 2GIG IMAGE3 have a 320 x 240 resolution, and they are full-color. The sensor has a battery life of three years. An LED light on the sensor provides assistance with setup and general troubleshooting. Overall, this is a very convenient sensor for anyone who want to quickly confirm intrusions, without having to worry about false alarms.

You can buy the 2GIG IMAGE3 from Alarm Grid right now. Get one to improve the protection and security and your home!

Tags: , , , , ,

Comments


Posted By

Hi DIYers! Its time for another Alarm Grid video recap. This time, we're covering the videos released from January 15th thru 25th. We have 10 new videos this time from Joe, Jorge and Jarrett. Check out our newest support videos, as we help you learn how to use your security system!

Adding a Siren to My LYNX Touch Panel Using The 5800RL

Joe shows users how to add a hardwired siren to a Honeywell LYNX Touch System by using the Alarm Grid LYNX-EXT Kit. This kit is built around the Honeywell 5800RL Wireless Relay, which allows the hardwired siren to communicate with the panel wirelessly. The kit includes everything a user needs, except for the actual siren and any necessary wiring. The kit is compatible with the LYNX Touch Systems, as well as the Honeywell VISTA Series Panels.


Using the SiX Programming Feature on a Honeywell Lyric

Jorge demonstrates the SiX Programming Feature used with a Honeywell Lyric Security System. This feature allows users to quickly and conveniently batch enroll Honeywell SiX Series Sensors with the Honeywell Lyric. All the user has to do is put the Lyric System into its SiX Programming Mode and power on the sensor to auto-enroll it. From there, the sensor's settings can be configured. If the sensor is new, then you can power it on by releasing the battery tab.


Making a Honeywell Panel Work With Alarm.com

Jorge talks about how some Honeywell Alarm Control Panels can be set up to work with the Alarm.com Platform. The only only Honeywell Panels that can do this are the Honeywell VISTA Series Panel. This is accomplished by adding an Alarm.com System Enhancement Module to the VISTA Panel. This module also doubles as a cellular communicator for the system. A good SEM for a VISTA System is the ADC-SEM110-VT-VZ. This communicator works with the Verizon LTE Network.


Disabling Auto-Stay Arming on a 2GIG GC3

Jarret goes through the process of disabling the Auto-Stay Arming feature on a 2GIG GC3 System. With Auto-Stay Arming enabled, the system will revert Arm Stay Mode when Arming Away if no entry exit zone is activated during the exit delay period. If a user wants to set their GC3 System to Arm Away Mode, they must either activate an entry/exit zone during the exit delay period or disable this option from within system programming.


Disabling Auto-Stay Arming on a 2GIG GC2

Jorge demonstrates how to disable Auto-Stay Arming on a 2GIG GC2 System. There are many cases where a user needs to set their system to Arm Away Mode to test their interior sensors. But a user might experience confusion when their system goes to Arm Stay Mode instead. The reason this is happening is because Auto-Stay Arming is enabled within system programming, and they are not faulting an entry/exit zone during the exit delay period.


Adding a Siren to My Lynx Touch Panel Using the Lynx-WEXT

Joe shows users how to add a hardwired siren to a LYNX Touch using the Alarm Grid LYNX-WEXT Kit. Unlike the LYNX-EXT Kit, which uses a wireless power relay, the LYNX-WEXT Kit provides a hardwired relay that connects with the panel through a physical connection. When an alarm occurs, the relay will direct power to the siren to have it activate. The relay will then cut siren power once the alarm is cleared to get it to stop sounding.


Disabling Auto-Stay Arming on a Honeywell Vista

Jorge demonstrates how a user can disable Auto-Stay Arming on a Honeywell VISTA Security System. This option is found from within panel programming. A user will need to enter programming using the system's Installer Code and provide the appropriate programming field. The default Installer Code is 4112. Once the Auto-Stay Arming option has been disabled, a user will be able to set the system to Arm Away Mode without having to activate an entry/exit zone.


Disabling Auto-Stay Arming on a Honeywell Lyric

Jarrett shows users how to disable Auto-Stay Arming on a Honeywell Lyric Controller. The purpose of the Auto-Stay Arming feature is to prevent false alarms when a user sets their system to Arm Away. If a user arms their system Away, but they don't activate an entry/exit zone, then it can be logically assumed that the user is still inside the building. In that case, it is very likely that user will activate an interior sensor and cause a false alarm. Auto-Stay Arming prevents this from occurring.


Creating an Automation in Apple HomeKit

Jorge shows the process for creating an Automation in Apple HomeKit. This is very important for Honeywell Lyric Security System users who want to have HomeKit Scenes activate when they perform certain functions on their panel. For example, a user might want to have a specific HomeKit device activate whenever they Arm their security system. The only way to do this is to create an action-based Automation in HomeKit and set the Lyric as the trigger.


Disabling Auto-Stay Arming on a Qolsys IQ Panel 2

Jarret walks users through the process of disabling Auto-Stay Arming on a Qolsys IQ Panel 2. Normally, a user would want to keep Auto-Stay Arming enabled so that a user does not accidentally cause a false alarm by setting their system to Arm Away when they meant to choose Arm Stay. But disabling Auto-Stay Arming can be very useful when testing, as the user will not have to open and close an entry/exit zone whenever they go to Arm Away.

Tags: , ,

Comments


Posted By

Hi DIYers! We know that many users take on the task of setting up their own hardwired security system. We think this is great, as it really lets a DIY user get to know their alarm panel. But there are some extra tools we recommend for setting up a wired system. One of which is a voltmeter.

Honeywell vista 20p wired alarm control panel

All alarm systems require electricity for basic operation. But this electricity is used for more than just powering the panel. Various equipment like sensors and keypads will also require power. With hardwired systems, the peripheral equipment will actually draw power from the panel. Not only is the system's plug-in transformer powering the panel, it is also keeping its many devices running as well. If the electricity goes out, the panel should also have a backup battery to ensure that everything remains powered.

The important thing to understand is that plugging in a transformer does not suddenly supply an infinite amount of electricity for an alarm system. There's a limit to how much power a system can provide. Each transformer can only provide a limited amount of current. There are also current limiting devices like fuses and breakers that are built into each of the output circuits on a system. These are used to prevent things like the bell circuit, the battery charging circuit and the auxiliary power circuit from allowing enough current through to damage the system. If you try to add too many devices to a system, you may find that they will not work properly. Worse yet, if you don't use the specified transformer and other manufacturer-specified peripheral devices, you could cause serious damage to the system.

For smaller applications, this is not usually a major concern. But as you add more powered devices to an alarm system, the chance for overload becomes greater. You may need to add a second power supply, along with an additional transformer and battery. However, you shouldn't be working blindly. Using a voltmeter with the ability to read current (technically a multi-meter) is very important for knowing the current load and making sure that the current power supply is adequate.

A voltmeter works by applying a known amount of current and resistance to a circuit. Ohm's Law tells us that if you know any two of three values (voltage, current or resistance), you can then calculate the third value. A hardwired zone on an alarm panel works largely in the same way. Voltage, along with a small amount of current, is fed through a zone circuit. Based on the Ohm's Law principle, if you know the amount of voltage being applied, and you know the amount of current being applied, you can then calculate the amount of resistance that is present on the circuit. This is how a zone with an end-of-line resistor works. When you make a zone Normally Open or Normally Closed, you simplify things even further. If current is flowing, the zone is open. If current is not flowing, the zone is shorted or closed. Without a voltmeter, troubleshooting wired zones becomes much more difficult. The voltmeter doesn't even have to be a big expensive model. It just needs to provide basic function.

Also keep in mind that many system problems occur due to electrical issues. Having a voltmeter on hand can save a user a lot of hassle in troubleshooting. We hear of users all the time who don't know why their system isn't working, only to find that it is because they aren't supplying enough power. Performing a simple check with a voltmeter can help you discover an issue that would otherwise have gone unnoticed. For that reason, everyone with a wired panel really should invest in an inexpensive voltmeter or multi-meter.

If you're just beginning to consider purchasing a panel, and you don't want the hassle of worrying about wired zones, then a wireless system may be a better option. Wireless sensors operate strictly on battery power, and a user won't have to worry about overloading circuits. We generally recommend wireless systems for DIY users in general, as they are much easier to use and install. But if you do decide to go the hardwired route, or you already have a working wired system, we certainly recommend you keep a voltmeter on hand!

If you're an Alarm Grid customer, and you need help using a voltmeter to check your system, don't hesitate to reach out to us! We are happy to help monitored customers get their systems up and running and perform any necessary troubleshooting. We invite you to check out our monitoring page for more information. If you ever need help, you can send an email to support@alarmgrid.com. You may also call us at (888) 818-7728 during our normal business hours of 9am to 8pm EST M-F. We look forward to working with you!

Tags: , , , , , , , , , , , ,

Comments


Posted By

Hi DIYers! Today, we wanted to show you a YouTube video review of one of our Lyric Kits made by Gabe from Security Baron. Gabe checks out each component of our Lyric AT&T-LTE 3-1 Kit. The kit includes a Lyric Panel, LTE communicator, 3 VERSA Contacts, a Honeywell PIR Motion and an LT-Cable.


We think this is a tremendous video, and we would really like to thank Gabe and Security Baron for putting it together. We certainly encourage all our customers to do unboxing videos just like this so that they can share their Alarm Grid experience with others. It makes us very proud to know that many people out there are making great use of our products.

In order to provide better information for our customers, we would like to go through and make some small notes on what was stated in the video. Although the video was super informative, we still can offer some further insight on the equipment that was presented.

First, the wireless door and window contacts featured in the video were actually VERSA-2GIG Door and Window Sensors. VERSA is the same company that manufactures the famous Honeywell 5800MINI Sensors. The VERSA Sensors are exactly the same as the 5800MINI Sensors, but they are available at a much lower cost. Those particular VERSA Contacts will work with the Honeywell Lyric Alarm System, as the 2GIG Go!Control and 2GIG GC3 Systems. Alarm Grid gets these sensors direct from VERSA to provide the lowest possible price for customers.

Versa 2gig honeywell lyric and 2gig compatible sensor pow

The VERSA Sensors are uni-directional devices that only send signals to the alarm system. They are not protected by any wireless encryption, but this is not a major concern for most users. However, Alarm Grid also offers a very similar kit that features encrypted door and window contacts. That kit provides Honeywell SiXMINICT Door and Window Contacts instead of the VERSA-2GIG Contacts. The bi-directional SiXMINICT Sensors use 128-bit AES encryption for added wireless protection.

The motion sensor shown in the video was a Honeywell SiXPIR Motion Sensor. This sensor works by using passive infrared (PIR) technology to detect the changes in infrared energy that occur with movement. Whenever a person or large object comes within the sensor's field of view (FOV), it will detect its energy signature and alert the security system. Just like the SiXMINICT Sensors, the SiXPIR Motion Sensor also uses bi-directional 128-bit AES encrypted communication. For optimal performance, the SiXPIR should be mounted at a height of between 7 and 9 feet.

Honeywell sixpir lyric smart sensor motion

The power cable that is shown is called the Honeywell LT-Cable. This handy accessory comes pre-prepared, and a user will not have to strip any wires to power on their Lyric Panel. By using the LT-Cable, the entire power-up process can be completed with just a simple screwdriver. Alarm Grid includes this cable with many of our system kits to make things easier for DIY users.

Not specifically mentioned in the video is the Honeywell LYRICLTE-A Cellular Communicator. This module is inserted into the side of the Lyric Panel, and it allows the system to communicate with the AlarmNet Servers through the AT&T LTE Network. Cellular communication is perfect for alarm systems because of its fantastic reliability and super fast speeds. By using this communicator, the Lyric System will be immediately capable of using a dual-path setup with both cellular and WIFI.

Honeywell lyric lte a at and t lte cellular communicator for the

In the video, it is noted that the Lyric System works with Apple HomeKit. This is one of the best features of the Lyric, and pairing the system with HomeKit is very easy. By using the platform and a compatible HomeKit Hub, such as an iPad or Apple TV, a user can control their HomeKit devices remotely using their iPhone. We would also like to mention that the Lyric is compatible with Amazon Alexa through Total Connect 2.0.

For clarification, you can only stream live video on the Lyric Panel using a legacy Honeywell IP Camera. You cannot stream video directly from the panel using a newer Honeywell HD Camera, such as the Honeywell IPCAM-WIC2 mentioned in the video. Instead, these cameras can only be streamed through the Total Connect 2.0 service.

For DIY users, we also recommend adding a Honeywell LCP500-DK Desk Mount. This device will allow the user to install the system without having to mount it to the wall. Instead, it can be conveniently rested on any sturdy table or desk. You can also mount the wireless sensors using double-sided foam tape. This will let you complete the entire installation process with nothing more than a screwdriver. You don't need to drill any holes or use any power tools!

Honeywell lcp500 dk lyric controller desk mount

The Honeywell Lyric is not the only alarm control panel offered from Alarm Grid. We also offer many great systems from other companies like Qolsys and 2GIG. Our website also features a wide-selection of pre-packaged wireless system kits to fit a user's unique needs. All of the systems we offer are perfect for pairing with our alarm monitoring services, which start at as little as $10 per month. We can even takeover many existing systems so that users can get started without having to purchase new equipment.

If you want to learn more about Alarm Grid, or if you need help planning a security system, we invite you to reach out to us. The best way to contact us is to send a quick email to support@alarmgrid.com and let us know what you are looking for. If you would prefer to speak with us by phone, you can call us at (888) 818-7728 from 9am to 8pm EST M-F. We look forward to helping you meet your security needs!

Tags: , , , , , , , , ,

Comments


Posted By

Hi DIYers! Today, we're taking a quick look at the Qolsys Image Sensor. This handy device will produce a high-quality image whenever it detects motion while your Qolsys Panel is armed. This is great for confirming a break-in while you are away and for presenting evidence to the authorities.

Qolsys image sensor qz8100 840

The best way to think of an image sensor is to imagine a motion sensor with a built-in picture camera. This is similar to a security camera that responds to motion. The difference is that an image sensor will only produce a still image rather than a video clip. This is perfect for quickly checking to see if a break-in really occurred, or if the motion sensor activated due to some other cause. The still images have a resolution of 320 x 240 pixels, and any abnormal activity can be quickly spotted.

Once the Qolsys Image Sensor activates, the produced image will be visible through Alarm.com. To access the image, the user can check the Alarm.com Mobile App or go to the Alarm.com website. The user can also tell Alarm.com to send them text and email alerts whenever their image sensor takes a picture. They can also receive push notifications from the Alarm.com App. That way, they will immediately know when there is a picture to check.

Keep in mind though that the user will need an alarm monitoring plan that includes access to Alarm.com in order to do this. For Alarm Grid customers, this is the Gold Plan or higher. This is a big reason why many Alarm Grid customers choose to go with image sensors instead of full-video security cameras. Using a conventional security camera will require upgrading to a Platinum Plan. However, the Gold Plan is already standard for accessing Alarm.com and using a Qolsys System anyway.

The motion detector on the Qolsys Image Sensor is quite effective in its own right. It can respond to motion from up to 30 feet away, and it will work from up to 400 feet away from the panel in open air. For best results, the sensor should be mounted at a height of roughly 7.5 to 8 feet. Pet owners will appreciate the fact that the Qolsys Image Sensor offers pet immunity for small animals weighing up to 40 pounds.

For compatibility, the Qolsys Image Sensor will work with any original IQ Panel System, as well as any IQ Panel 2 that has a Qolsys Image Sensor Daughtercard installed. Please note that the Image Sensor Daughtercard uses the same antenna slot as the PowerG Daughtercard used with the Qolsys IQ Panel 2 Plus Systems. As a result, there is no way for the IQ Panel 2 to use both an Alarm.com Image Sensor and PowerG Sensors. If a user has an IQ Panel 2 Plus and they want to use the Qolsys Image Sensor, they will need to remove the PowerG Daughtercard and insert the Image Sensor Daughtercard. Doing this will remove PowerG compatibility for the system.

However, the one advantage to using the IQ2+ and swapping out the PowerG Daughtercard is that the user will have the option of choosing either the 345 MHz or 433 MHz legacy daughtercard versions. If a user obtains a standard IQ Panel 2, they will only have the option of using 319.5 MHz sensors. The only way to use the Qolsys Image Sensor on an IQ2 System with 345 MHz or 433 MHz sensors is to get the IQ2 Plus and swap out the daughtercard.

The Qolsys Image Sensor, Qolsys Image Sensor Daughtercard and all Qolsys Systems are all available for purchase from Alarm Grid right now. Get one now to protect your home! If you need any help deciding on security equipment, please reach out to us by emailing support@alarmgrid.com, or call us at (888) 818-7728 during our normal business hours of 9am to 8pm EST M-F. We look forward to helping you.

Tags: , , , ,

Comments


Posted By

Hi DIYers! Today, we're taking a look at the DSC LC-151. This is a hardwired motion sensor that uses passive infrared (PIR) and microwave technology to detect any intruders in the area. But what really makes this motion sensor special is its ability to be used in outdoor environments.

Dsc lc 151 outdoor dual tech motion detector w slash adjustable

The DSC LC-151 is a Form C hardwired sensor. This means that it supports both Normally Open (NO) and Normally Closed (NC) wiring. Installers appreciate this for the greater flexibility it gives them in setting up the sensor. And as a wired sensor, it will work with a large number of wired systems. This includes those from the Honeywell VISTA Series.

Being a dual-technology motion sensor makes the DSC LC-151 excellent for reducing false alarms. Both the PIR sensor and microwave sensor must activate in order for an alarm to occur. The PIR sensor works by looking for changes in infrared energy that occur when a new person or large object comes within the device's field of view (FOV). Temperature compensation ensures that the PIR sensor will work effectively in ambient temperatures that are close to the human body.

The microwave sensor works by sending out continuous microwave signals. These signals will bounce off of objects and structures in the area and return to the sensor. The detector will constantly check to make sure that these signals return to the panel in a consistent manner. By requiring a dual response, a false alarm is much less likely to occur because of some unrelated factor. Both the microwave and PIR sensors can be adjusted if needed.

One of the biggest reasons to choose the DSC LC-151 is its IP65 weatherproof rating. Its tight, sealed-plastic design keeps dust, rain and snow out so that the sensor functions properly in virtually any environment. Whether you live in a hot and humid climate or an area with freezing temperatures, the LC-151 is perfect for restricted areas and other outdoor locations that require monitoring.

Pet owners can also achieve great results with the DSC LC-151. The motion sensor is equipped with a standard lens that offers pet immunity for small animals weighing up to 33 pounds. An included pet-immunity lens can increase this allowance to a maximum of 80 pounds. Remember, mounting height and location is extremely important for achieving proper pet immunity. The optimal height is between 5.9 feet and 7.8 feet.

Other features include Advanced Signal Processing to actively distinguish between the energy signatures of animals and humans, front and back tamper protection, micro-controller signal processing and high RFI/EMI immunity. The maximum detection range is 49 feet (15 meters).

You can get the DSC LC-151 and many other exceptional security sensors from Alarm Grid. Buy a DSC LC-151 Motion Sensor to protect your outdoor areas!

Tags: , ,

Comments


Posted By

For the past several years, the security industry has experienced a major shift in favor of DIY users. While alarm systems once required professional installation and programming, that is no longer the case today. The DIY route is now the optimal option for nearly any new alarm system user.

Ag indoor security stickers window stickers with adhesive front

In order to understand this concept, it's first good to look at how security systems have changed. Old alarm systems were not user friendly. These were hardwired panels that featured intricate and complex programming options. This was not stuff that a user could figure out on their own. On top of that, sensors has to be wired directly to the panel, and wires had to be run throughout the building. Again, the average user was not able to complete these tasks on their own. This made professional installers a necessity. This was fine at the time, and many companies established thriving businesses around this model.

However, the security industry has been gradually evolving to favor DIY users. Wireless all-in-one panels began featuring touchscreen controls that made it possible for everyday users to perform their own programming. Sensors became wireless so that complex wire runs were no longer needed. The rise of IP and cellular communication allowed users to establish effective and reliable communication paths for their systems with minimal assistance. Smart home automation exploded in popularity, and many users got on board for these features alone. Today in 2019, alarm systems have truly become easier to use and more accessible than ever.

At Alarm Grid, we want you to understand that you can perform your own security system installation. You don't have to be a professional. You don't have to understand electrical theory or wiring. You don't have to be tech savvy. The key is to choose equipment that makes the process as easy as possible. Yes, there are still hardwired systems available that are truly best-suited for professional installations. Those systems are still very popular in their own right, and they are perfect for certain situations. But that doesn't mean they are right for the average home user. If you're a DIY user, a wireless system is almost always the way to go.

There are a few things you should get to accompany a wireless security system. The most obvious is wireless sensors. These are the devices that report to the panel when an event occurs inside the home. What's great about wireless sensors is that they can typically be mounted using a double-sided adhesive that comes often included. There's no need to drill any holes, and they only tool you will need is a screwdriver to install the batteries. You might also want a Honeywell LT-Cable to wire the panel to its plug-in power supply. This wire comes pre-prepared, and a screwdriver can complete the connection. Finally, a table or desk stand can prevent you from having to mount the panel to a wall.

A control panel. Wireless sensors. A desk stand. A screwdriver set. That's really all you need to get started. We have seen users achieve complete installations with those items alone. You don't need to pay for an installer. You can do this yourself. And if you're new to alarms, then what better way to get acquainted than installing your own system? If you're starting from scratch, you may as well design your own security system and build it the way you want it. This is truly the age of the DIYer, and we're here to help you.

The best way for a new user to get started is to reach out to Alarm Grid. Our security system planning team can help make sure that you get all the equipment you need and also that you avoid wasting your money on what you don't need. Then sign-up for an Alarm Grid monitoring plan. We provide top-quality alarm monitoring services, and we are partnered with one of the best alarm monitoring centers in the world. Plus, we offer free online and phone support and assistance for all of our monitored customers. So if you ever need any extra help installing or configuring your own system, our team will be ready to assist.

If you're new to home security, then a DIY installation is right for you. We know that taking the first step can be a little scary, but our team is here to help! The alarm systems of today are easy to work with, and they are perfect for new users. We encourage you to contact us through email at support@alarmgrid.com. You can also call us at (888) 818-7728 during our normal business hours of 9am to 8pm EST M-F. We look forward to working with you and helping you design the perfect security system for your home.

Tags: ,

Comments


Posted By

Hi DIYers! Have you ever thought about using a security system to monitor your boat or camper? It's a little bit out of the ordinary, but it's a great way to ensure that your property is protected. It's almost no different from using a standard security system, you just need to get creative.

Honeywell lyricpk lte a wireless security system w slash at and

If you're ever away from your boat or camper, having alarm monitoring can provide you with peace of mind in knowing that your property is safe. Although people usually think about security systems for homes and businesses, there's no reason why an intruder couldn't break into a boat, yacht, RV or camper to steal property and cause damage. And with the technology available today, it is certainly possible to achieve a great setup. We recently heard about one boat owner who keeps his yacht protected using a 2GIG GC3 Security System. Why not do the same for your boat or camper?

There are just a few things to keep in mind if you decide a alarm system for your boat or camper is right for you. First is the equipment. The alarm panel you use will likely be no different than one used in a conventional setting. You will definitely want to use a wireless system since internal wiring will be difficult or impossible. This is fine since wireless systems are easy to use, and they offer tremendous performance. Most wireless systems can be installed without a professional, and they are rugged enough to withstand continuous travel.

For sensors, you really won't have to add too many. A good door contact sensor can immediately let the system know if someone enters your vessel. If you are afraid that the sensor might be exposed to water, then an outdoor contact might be a good idea. A great sensor for this purpose is the Honeywell 5816OD. Some users may want to add a motion sensor as well, but they should make sure it won't cause false alarms from its mounting location. You might also want to add a smoke detector and a CO detector to monitor for environmental issues as well. The Honeywell 5800COMBO can detect for both fires and carbon monoxide outbreaks.

We strongly recommend that any security system used for a boat or camper to use a cellular connection. Even if your boat or camper is equipped with WIFI, cellular connectivity can't be beat in terms of reliability. Plus, the WIFI service might be inactive or go out when the boat or camper is not in use. Cellular communication will keep your system monitored no matter where you take your vessel, provided that there is adequate cell signal in the area. So if you're out camping, and someone else opens your camper or RV, then you will know about it. This is also perfect for when you leave your boat docked during the off-season.

Most boats and campers with a security system will use a self-monitoring plan. This type of monitoring means that the user will receive a text alert whenever their security system is activated. The user will then need to alert the proper authorities to the situation. While central station monitoring is technically possible for a boat or camper, it can be very tricky if the boat or camper isn't always left in the same location. You would also need to provide a valid address for the vessel so that emergency services can reach it. For those reasons, self-monitoring is usually the way to go here. You can learn more about Alarm Grid's monitoring plans by checking our monitoring page.

One major perk of having an alarm system for your boat or camper is that you can use it for Z-Wave smart home automation. Every boat and camper has lights, and you can use smart home functionality to control them remotely or have them activate automatically with predetermined events. You can also get a smart thermostat for your yacht or RV and integrate it into the network as well. Everything will be controlled right from your phone using Total Connect 2.0 or Alarm.com. With Z-Wave functionality, your boat or camper will be ready to party as soon as your disarm your system!

If you have a boat or camper that you'd like to get protected, we would love to help you out! Our security system experts are happy to help you design a new security system for your boat, camper, RV or yacht. We know exactly what you need to achieve a robust and reliable setup. If you would like to get started, please send an email to support@alarmgrid.com, or call us at (888) 818-7728 from 9am to 8pm EST M-F. We look forward to hearing from you!

Tags: , , , ,

Comments