Door alarm sensors, or contacts, are some of the most important devices used with security systems. These devices alert a user whenever their door is opened. They can be used on virtually any type of door. These might include a front door, a back door, screen doors, a patio door, a shed, cabinets and any door inside the building. We typically find that door alarm sensors are some of the easiest to use devices with an alarm system. But still, it can be helpful to read through a comprehensive guide explaining the full ins and outs of these devices. So it here is - everything you've ever to know about door alarm sensors.
 The Basics of Door Alarm Sensors
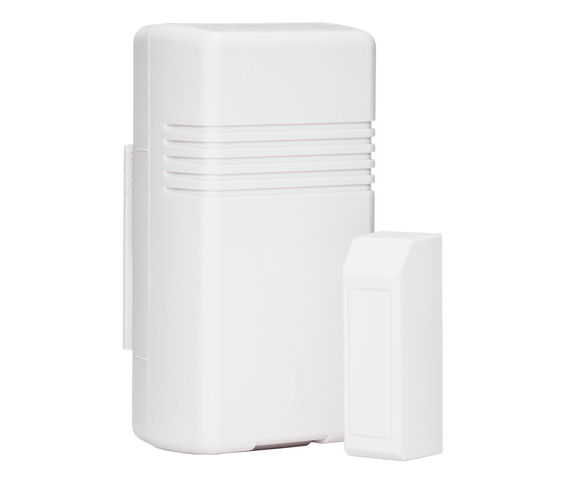
Most traditional door sensors feature a relatively simple design and premise. These devices usually consist of a sensor and a magnet. The sensor is placed on or inside the door frame, and the magnet is placed on or inside the door itself, within a half inch of the sensor. Opening the door will cause the magnet to pull away and separate from the sensor. When this happens, a reed switch inside the sensor will activate. This will cause the sensor to send a signal to the security system, letting it know that the door was opened. The system will then perform the appropriate response based on how the sensor's Response Type was programmed. At the surface, it's all very simple. Some examples of these traditional sensors include the Honeywell 5800MINI, the Honeywell SiXMINICT and the VERSA-2GIG Sensor. Traditional door sensors can be either surface-mounted or recessed.
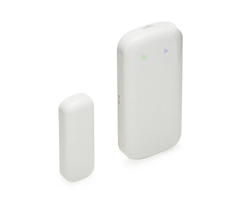
There's also a second variation of door sensors, known as mechanical door sensors. This type of sensor features a physical switch that is pressed down when the door is closed. When the door is opened, the switch will pop up, causing the sensor to activate. From there, the system will perform the Response Type assigned to the zone for that sensor. This type of door alarm sensor is far less common than the other type of sensor. However, the end result is still the same - the system will still perform the programmed Response Type when the sensor is activated. An example of this type of sensor is the Honeywell 5800RPS. While you are less likely to come across this type of door sensor, it's still worth mentioning just in case. Mechanical door sensors are only available in the recessed variety.
 Types of Door Sensors - The Two Distinctions
Now that you know the very basics of door sensors, you can start thinking about the different types. While almost every door sensors operates using one of the two mechanisms mentioned above, there are two other distinctions that are commonly made between door sensors. These are whether the door sensor is wireless or wired and whether the door sensor is surface-mounted or recessed. These considerations will play a big role in determining which door sensor you choose to purchase for your alarm system.
A wireless door sensor will communicate with an alarm system wirelessly. This will prevent the need for running a wire from the system to the door sensor. This can make wireless door sensors significantly easier to install. Another great aspect of wireless door sensors is that they can usually be auto-enrolled with the security system. That said, a wireless sensor will need to have its battery replaced every three to five years. On the other hand, a wired door sensor will need to be physically connected with the alarm system. This can make the installation considerably more difficult in certain cases. However, a wired sensor will never require any battery replacements.
If you are using a wireless door sensor with a wired alarm system, such as a Honeywell VISTA Panel, then you will need to use a wireless receiver. This will allow the wireless signal to be received by the system. When choosing a wireless door sensor, make sure that the wireless frequencies it uses are compatible with your alarm system. For example, Honeywell Panels look for wireless signals that operate at a frequency of 345 MHz, while Qolsys Panels use signals that operate at a frequency of 319.5 MHz. If you try to use a wireless door sensor that does not communicate at the correct wireless frequency, then it will not function with the alarm system.
 The other major distinction between door sensors is surface-mount sensors versus recessed sensors. Simply put, surface-mount sensors are installed on the outside of the door and its frame, while recessed sensors are installed in the inside. Surface-mount sensors require no drilling. In the easiest scenario, it is possible to mount them using a double-sided adhesive (foam tape). They can also be mounted using screws. With their easier installation, this is generally the preferred type of door sensor. Most users do not mind the fact that a small sensor will be visible on the outside of the door.
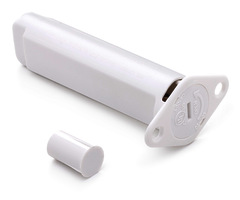
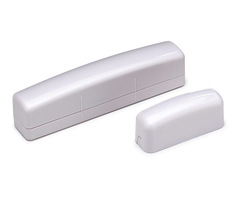 However, for users who do want a more discrete installation, there are recessed door sensors. These sensors and their magnets need to be inserted into holes that are drilled into both the door and the frame. The exact size of the holes will depend on the specific model of the recessed door sensor that is being installed. Once the sensor and magnet have been installed, they will not be visible from the outside. That said, most users opt for surface-mount door sensors due to the easier installation.
Some Notes on Response Types
The primary function of any security sensor is determined by its Response Type. This refers to what action the system will take when the zone is faulted (e.g. the door is opened). Below are the Response Types that are most commonly used with door sensors:
- Entry / Exit: If the door is opened while the system is armed stay or armed away, then the system will need to be disarmed within its entry delay period. If the system is not disarmed within this time period, then an alarm event will occur. Most alarms will feature two different Entry / Exit settings. This allows two different entry delay periods to be used on the same system for different zones.
- Perimeter: If the door is opened while the system is armed stay or armed away, then an alarm event will occur immediately.
- Interior Follower: If the system is set to armed away, an alarm event will immediately occur if the door is opened, assuming that an entry / exit zone is not faulted first. If an entry / exit zone is faulted first, then the system must be disarmed within its entry delay period, otherwise an alarm event will occur.
- Interior With Delay: If the system is set to armed away and the door is opened, then the system must be disarmed within its entry delay period. If the system is not disarmed within this time period, then an alarm event will occur.
- Day / Night: If the system is disarmed and the door is opened, a trouble event will occur on the system. If the system is armed away or armed stay and the door is opened, an alarm event will immediately occur on the system.
- 24 Hour Audible: Opening the door will immediately cause a full system siren and an alarm to be set off, regardless of what state the system is currently in. This Response Type should not be used unless the door should never be opened for any reason.
- 24 Hour Auxiliary: Same as 24 Hour Audible, but only the panel itself will produce a siren. Any external sirens or noisemakers will not activate. This zone type is ideal for emergency medical cabinets that would only be opened in a serious medical emergency.
- 24 Hour Silent: Same as 24 Hour Audible, but no siren or sound will be produced.
- Fire No Verification: Opening the door will immediately cause a fire alarm to be set off, regardless of what state the system is currently in. This is the ideal Response Type for fire doors.
Certain Response Types are only available for certain Device Types. Depending upon the panel you are using, not all of these Response Types will be made available for the Device Type of "Door". A way to work around this is to set the Device Type to "Other". This will allow you to set any possible Response Type for the door sensor.
 Other Programming Settings
Programming a door sensor has to do with more than just the Response Type and the Device Type. Below are some of the other programming settings available for a door sensor. Please note that these settings are specific for a Honeywell Lyric Controller, and different settings may be available on another type of panel.
- Serial Number: This is how the system will specifically identify the exact door sensor that is being used.
- Loop Number: This tells the door sensor what function it should perform. Each door sensor usually has a specific loop number that should be set for the device to function as a door sensor. Some door sensors have multiple possible functions that can be used with the device. One example is the Honeywell 5816, which can be used as both a door sensor and as a wireless transmitter depending upon the loop number that is set.
- Zone Descriptors: These serve as the name of the door sensor. The panel will announce the zone descriptors whenever the zone for that sensor is affected.
- Alarm Report: This tells the system whether or not it should send an outbound signal to the central monitoring station. If you turn this off, then all the sounds and sirens will still be made, but a distress signal will never be sent to the central station. An example for turning this off might be if you are monitoring a liquor cabinet to make sure your teenage doesn't get into it. You might want a very loud siren to go off so that you know if this happens. However, you obviously wouldn't want the police to show up at your house in this situation!
- Chime: This will have the panel produce a simple chime whenever the door is opened. Many panels will allow you to toggle between different chime options for the panel. Remember, you will still need to have the local chime for the system enabled from the main settings menu.
- Supervision: This will have the system monitor the door sensor for low battery or loss of signal. Keep this enabled to make sure that the door sensor is always in proper working order. This setting is only used with wireless door sensors.
For any programming questions related to a specific panel, please consult the programming guide for that panel. This information is readily available on the Alarm Grid website in the form of FAQs.
Common Door Sensor Questions
Below are some questions that are commonly asked about door sensors:
1. How do I program my door sensor?
If it is a wireless door sensor, it can most likely be auto-enrolled.This is accomplished by accessing zone programming on the system and then faulting and restoring the door sensor three times to learn it in. You can fault and restore the door sensor by separating the sensor and the magnet and then clicking them back together. From there, make any necessary programming configurations on the panel. See the above information on Response Types and other programming settings.
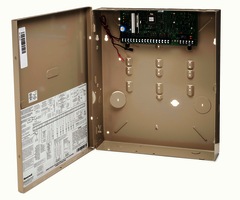
If it is a wired door sensor with a hardwired VISTA Panel, then we recommend consulting this FAQ. You may also need to consult the VISTA 15P and 20P Programming Guide.
2. How long do door sensor batteries last?
A wireless door sensor will typically require a battery replacement every three to five years. Wired door sensors do not use batteries, and they will never require a battery replacement.

3. How close should the door sensor be to its magnet?
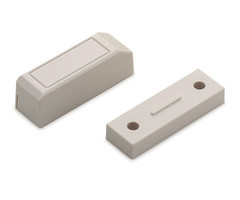
We usually recommend placing the door sensor magnet within a half inch of the sensor. Some sensors may allow for a greater separation distance than others before a faulted zone will occur. The closer the magnet is to the sensor, the less likely an unwanted fault or a false alarm is to occur.
4. Are there any encrypted wireless door sensors?
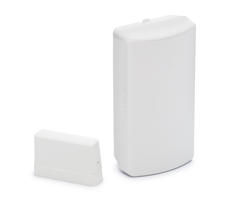
Yes, there are encrypted wireless door sensors. The Honeywell SiXCT, the Honeywell SiXMINICT, the Qolsys IQ DW MINI-S and the Qolsys IQ Recessed Door-S are all encrypted wireless door sensors.
5. What is the best door sensor?
Please see the following FAQs:


 The Basics of Door Alarm Sensors
 Types of Door Sensors - The Two Distinctions
 The other major distinction between door sensors is surface-mount sensors versus recessed sensors. Simply put, surface-mount sensors are installed on the outside of the door and its frame, while recessed sensors are installed in the inside. Surface-mount sensors require no drilling. In the easiest scenario, it is possible to mount them using a double-sided adhesive (foam tape). They can also be mounted using screws. With their easier installation, this is generally the preferred type of door sensor. Most users do not mind the fact that a small sensor will be visible on the outside of the door.
 However, for users who do want a more discrete installation, there are recessed door sensors. These sensors and their magnets need to be inserted into holes that are drilled into both the door and the frame. The exact size of the holes will depend on the specific model of the recessed door sensor that is being installed. Once the sensor and magnet have been installed, they will not be visible from the outside. That said, most users opt for surface-mount door sensors due to the easier installation.
 Other Programming Settings


