VERSA-2GIG Posts

Posted By

The VERSA-2GIG sensors operate at 345 MHz and were created to work with all 2GIG panels, and with any Resideo panel that supports 2GIG Sensors. This includes the Lyric System and the PROA7 or PROA7PLUS with a PROTAKEOVER. Since its release, it has gone through a few changes to its programming.

The VERSA-2GIG Sensor with the cover removed:


To our knowledge, there have been three (3) iterations of the sensor. We'll discuss each iteration below. The VERSA-2GIG is an inexpensive alternative to other 2GIG or Honeywell/Resideo door/window sensors. It operates as a single alarm input, meaning that each VERSA-2GIG can monitor a single opening. It is almost the exact same sensor as the Resideo 5800MINI.

The 5800MINI Sensor with the cover removed:


First Iteration:

When the VERSA-2GIG Sensor was first released, it was programmed using Loop 2. During this time, the sensor had a pop-off cover that usually required some type of tool to remove it. It had five (5) notches on one side to indicate where the magnet should be placed to line up properly with the internal reed switch.

It may seem odd for a single input sensor to use Loop 2 instead of Loop 1, but this follows the programming of the 5816. This is the ubiquitous Ademco/Honeywell/Resideo wireless door/window contact. It has been around since modern wireless systems were first introduced.

The 5816 has two (2) available inputs. There are two screw terminals that you can wire a Normally Closed conventional wired door/window contact into. This input uses Loop 1. It also has a built-in reed switch that you can use with a magnet to monitor an opening. This input uses Loop 2. By using both inputs, the 5816 can take up two (2) separate panel zones and monitor two (2) separate openings, or monitor two (2) separate items on a single opening. The VERSA-2GIG is similar to a 5816, but without the terminals for a wired input.


If I were to venture a guess, I'd say there are millions of the 5816 wireless door contacts either still in use or having recently been replaced. They were so easy to install using only the magnet and the reed switch there are probably still installers out there who don't know the 5816 can support a Loop 1. Its use was so prevalent that when 2GIG made their own door/window sensor, the 2GIG-DW10-345, they mirrored the operation of the 5816. For all these reasons, the VERSA-2GIG programming on Loop 2 made sense to professional installers. For DIYers, it was a different story. There was a learning curve. Eventually, we all got on the same page.

Second Iteration:

Although using Loop 2 makes sense, the second iteration of the VERSA-2GIG required programming using Loop 1. Aside from the change to the way it programs, there were also some physical changes with this version.

The pop-off cover was replaced with a slide-off cover so that it can be opened without using any tools (and without damage to the plastic). In addition, on the side of the plastic cover over the reed switch, instead of five (5) lines indicating where the magnet should go, this second version has a single line showing where you should line up the magnet.

Below is a third iteration VERSA-2GIG. It has a slide-on cover and a single magnet placement notch, and it programs using Loop 2:


So, at this point, if you had a VERSA-2GIG with a pop-off cover and multiple lines on the side where the magnet goes, you used Loop 2, and if you had a slide-off cover with a single line showing where the magnet goes, you programmed using Loop 1 (usually).

In support, we've encountered VERSA-2GIG sensors that didn't program as we expected based on their physical characteristics. In those cases, we learned the sensor into the panel so that we could determine what Loop Number it was transmitting on.

Third Iteration:

The newest change to the VERSA-2GIG involves programming only. The newest VERSA-2GIG devices program using Loop 2 again. They still have the slide-off cover, and the single line on the side indicating where the magnet should be placed.

The problem is that the third iteration and the second iteration are physically the same. So, how can you tell which Loop Number to program? The easiest thing to do is to learn the sensor into the panel. When you do this, you need to be sure that you learn it while the VERSA-2GIG's cover is securely in place, and by having the magnet next to the sensor, then pulling it away, and then putting it back next to the sensor mimicking the opening and closing of the door or window. You may need to do this more than once before the serial number and loop number pop up, depending on your panel.

If the sensor is already mounted, then just be sure the cover is securely in place, then open and close the door or window as many times as it takes for your panel to learn the serial number and loop number. This will vary depending on which panel you're using.

And speaking of panels, I want to briefly discuss panel compatibility. As mentioned above, any 2GIG panel should support the use of the VERSA-2GIG. The Resideo (formerly Honeywell) panels that support it are the Lyric (as long as it has firmware version MR3 or higher) and the PROSeries.

This includes the PROA7 and PROA7PLUS, which are marketed under the Honeywell Home brand, as well as the PROA7C and PROA7PLUSC, which are marketed under the Resideo brand. The Resideo brand concentrates on commercial customers while the Honeywell Home brand focuses on residential ones. Like their Honeywell Home counterparts, the PROA7C and PROA7PLUSC require that the PROTAKEOVER be installed before they can support the VERSA-2GIG.

One more note about the PROSeries panels. A Lyric panel can support both Honeywell 345 MHz sensors and 2GIG ones. However, the PROTAKEOVER can only support one or the other. So, if you have a Lyric with both Honeywell and 2GIG sensors, and you want to upgrade to a PROSeries panel, you'll need to pick which legacy sensors you want to keep, and which you want to replace.

There is one more product line that supports the VERSA-2GIG sensors and that's the Qolsys IQ4 panels that support 345 MHz sensors:

Tags: , , , , , , , , , , ,

Comments


Posted By

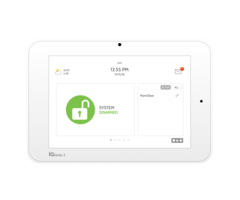
Last week, we took a look at three of the best alarm panels in the industry. These were the Honeywell Lyric, the Qolsys IQ Panel 2 Plus, and the 2GIG GC3e. Today, we are checking out the sensors that you can add to support these systems. Here is our 2020 Security Sensor Buying Guide!

Sensors are accessories that are added to alarm systems to report specific activity. Each sensor has its own job of looking for a certain type of activity in its designated location. All of the sensors on a system communicate with a single centralized panel or hub. This panel is actively listening for any sensor that is triggered due to a potentially important system event. Adding new sensors is perhaps the best way to expand upon an existing system, and they make awesome gifts and stocking stuffers for the security enthusiast in your life.

Broadly speaking, sensors can be split into two main categories, which are security and life safety/environmental. Security sensors look for activity that suggests potentially unauthorized entry into a monitored and protected location, such as a door being opened, movement in a room where nobody is supposed to be present, or a window being broken. Life safety/environmental sensors look for activity associated with unwanted or potentially harmful conditions that affect the well-being of those in the area, such as a flood, an extreme temperature, a fire, or the presence of CO gas. We'll be taking a look at life safety/environmental sensors another time. Today, our focus is on security sensors.

Wireless Sensor Basics


Before we dive into specific security sensors for our top panel picks, we're going to start by giving you some general, generic information that can be applied to any sensor out there. First, understand that this post is focusing only on wireless sensors. These are almost always the sensors chosen for use with wireless alarm systems. Wired sensors can also technically be used with wireless panels but a converter module is almost always needed. Not to mention the fact that wireless sensors are significantly easier to install, especially for DIY users. The only time you will realistically see wired sensors used with a wireless panel is if a user is upgrading from an older wired system and bringing over their old wired sensors, or in new construction where a user wants to integrate the sensors in with the building. But if you're expanding upon a wireless system by getting new sensors, then the new sensors will almost certainly be wireless.

The important thing to remember when choosing wireless sensors for a wireless alarm panel is making sure the sensor is compatible with the system. It doesn't matter if a sensor has all the specs and features if it doesn't work with your panel! The way to determine compatibility is to look at the lineup that the sensor is from. Petty much every wireless sensor out there is part of a larger grouping of sensors that will all have the same compatibility.

To make it easier for you, we have the three panels we mentioned before (well, make that five, as the Qolsys IQ Panel 2 Plus actually comes in three versions), and all their compatible sensor lineups conveniently listed. We hope that this sheds some light on your options. The only caveat is that for any panel listed here that supports the Honeywell 5800 Sensors, we must be clear that this is only for the uni-directional sensors with one-way communication in the lineup. Any bi-directional Honeywell 5800 Sensors with two-way communication will not work with any of the aforementioned systems. The bi-directional Honeywell 5800 Sensors are only compatible with the Honeywell LYNX Touch and VISTA Systems, which were not included in our buying guides.

With that out of the way, here are compatible sensor lineups by system:

You will notice that some of the sensor groups listed above are italicized and underlined. That is done to identify the lineups of encrypted sensors. These encrypted sensors have special protection measures put in place to make them more secure and less prone to being hacked or defeated by malicious attacks. Encrypted sensors tend to have more restricted compatibility. They may follow a special enrollment process. Encrypted sensors often use bi-directional communication so that the sensor knows that it is actively paired with the system. Many encrypted sensors may only be paired with a single system at any given time, and the sensor will need to be deleted from its existing system before it will work with a new one.

It's okay to use non-encrypted sensors with your system, especially in zones that are less likely to trigger an alarm, like a second story window. Many users will opt to use a mixture of both encrypted and non-encrypted sensors. Other users feel comfortable using entirely non-encrypted sensors. It really comes down to your level of comfort. Non-encrypted sensors are secure in most situations, and they are still tricky to defeat. But going fully encrypted is recommended for anyone seeking maximum security. One tip if you do decide to go with some non-encrypted sensors is to avoid letting others know what wireless frequency your sensors use or what type of system you have installed. Knowing the frequency and the system being used makes it much easier for a savvy intruder to defeat a sensor.

Door & Window Alarm Sensors


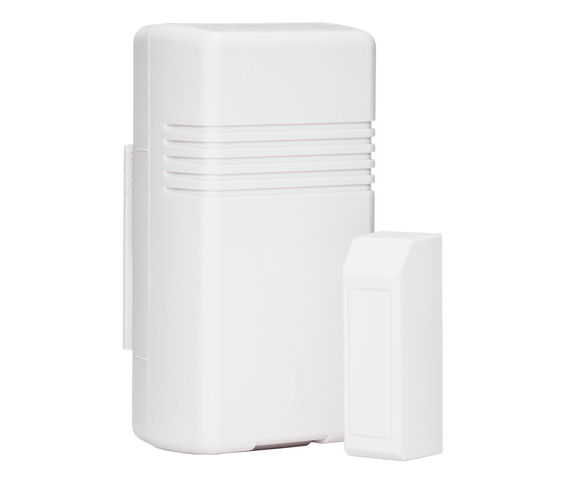
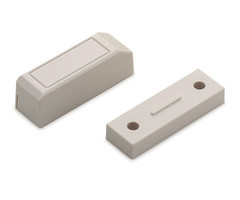
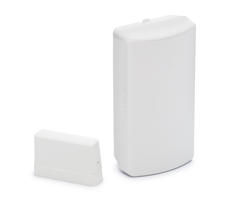
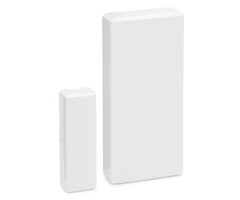
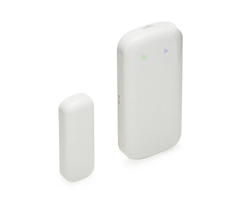
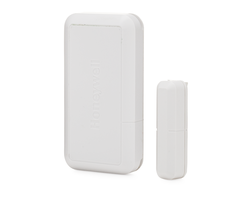
Now that you know some basics that apply to almost all wireless sensors, let's start talking about specific types and models. Door and window sensors will let a system know when a door or window has been opened or closed. These are some of the most basic and easy to use sensors on a security system. These devices work by using a larger sensor portion and a smaller magnet portion. The sensor is placed on or inside the door or window frame, and the magnet is placed on or inside the moving portion of the door or window. When the door or window is opened, the magnet will move away from the sensor. This will trip a metal reed switch inside the sensor, which will tell the sensor to alert the system to the opened door or window. All of the sensors we've listed here follow that same method of operation.

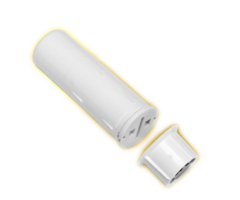
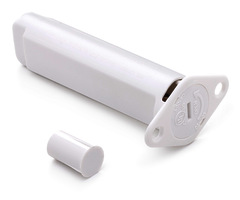
Door and window sensors can be split into two (2) main categories. Surface-mount door and window sensors are mounted outside the door or window and its accompanying frame on the surface. The advantage to surface-mount door and window sensors is that they are very easy to install, and they can usually be mounted using double sided foam tape. But some users may not like how they are visible on the outside of the door or window. If you don't like the appearance of visible surface-mount door and window sensors, then you might instead consider recessed door and window sensors. A recessed door or window sensor is installed inside a door or window and its frame, so that it is hidden and cannot be seen from the outside. Recessed door and window sensors are more difficult and time-consuming to install, because you must drill holes in both the door or window and its accompanying frame. Whether you decide to use surface-mount door and window sensors, or recessed door and window sensors is up to you. Most DIY users and Alarm Grid customers in general will use surface-mount door and window sensors.

Now let's look at some door and window sensors.:

Sensor Name
Product Lineup
Compatibility Range
Encryption Installation
Notes
Honeywell SiXMINICT

Honeywell SiX Series Lyric 200 Nominal Feet 128-bit AES Surface-Mount Premier mini encrypted door/window Sensor for Lyric.
DSC PG9303

PowerG All IQ Panel 2 Plus 2,000 Feet Open Air 128-bit AES Surface-Mount PowerG encrypted surface mount door/window sensor.
DSC PG9307

PowerG All IQ Panel 2 Plus
2,000 Feet Open Air 128-bit AES Recessed PowerG encrypted recessed door/window sensor.
2GIG DW10e

2GIG eSeries 2GIG GC3e 350 Nominal Feet 2GIG eSeries Encryption Surface-Mount Encrypted surface-mount sensor for 2GIG
2GIG DW20e

2GIG eSeries
2GIG GC3e
350 Nominal Feet 2GIG eSeries Encryption
Recessed Encrypted recessed sensor for 2GIG
Qolsys IQ DW Mini-S

Qolsys S-Line 319.5 MHz IQ2+ 600 Feet Open Air Qolsys S-Line Encryption Surface-Mount Encrypted surface-mount sensor for 319.5 MHz systems.
Qolsys IQ Recessed Door-S

Qolsys S-Line 319.5 MHz IQ 2+ 600 Feet Open Air Qolsys S-Line Encryption Recessed Encrypted recessed sensor for 319.5 MHz systems.
Honeywell 5818MNL

Honeywell
5800 Series
Lyric, GC3e, 345 MHz IQ2+ 200 Nominal Feet None Recessed Non-Encrypted recessed door/window sensor for 345 MHz systems.
VERSA-2GIG

2GIG 345 MHz Lyric, GC3e, 345 MHz IQ2+ 200 Nominal Feet None Surface-Mount Non-encrypted surface-mount sensor for 345 MHz systems.
VERSA-GE

Legacy GE 319.5 MHz IQ2+ 200 Nominal Feet None Surface-Mount Non-encrypted surface-mount sensor for 319.5 MHz systems.
VERSA-DSC

Legacy DSC 433 MHz IQ2+ 200 Nominal Feet None Surface-Mount Non-encrypted surface-mount sensor for 433 MHz systems.

We also want to share a selection of outdoor door and window sensors with you. These surface-mount contact sensors are specifically designed to withstand the conditions of an outdoor environment, including intense rain, wind, dust, and sunlight. You can see them listed below.

Sensor Name
Product Lineup
Compatibility
Range
Encryption
Installation Notes
Honeywell 5816OD

Honeywell 5800 Series Lyric, GC3e, 345 MHz IQ2+ 200 Nominal Feet None Surface-Mount Outdoor contact sensor from 5800 Series.
DSC PG9312

PowerG All IQ Panel 2 Plus 2,000 Feet Open Air 128-bit AES Surface-Mount PowerG Outdoor Contact Sensor.
2GIG DW30-345

2GIG 345 MHz Lyric, GC3e, 345 MHz IQ2+ 350 Nominal Feet None Surface-Mount Outdoor contact sensor from 2GIG 345 MHz series.

Motion Sensors


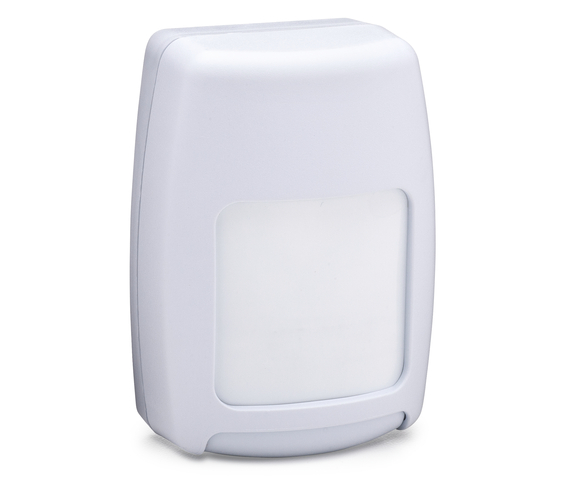
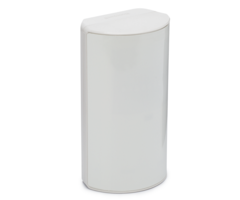
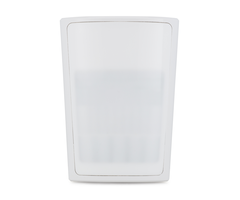
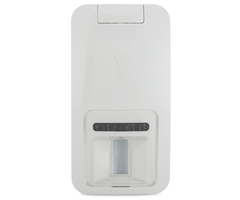
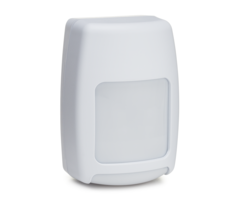
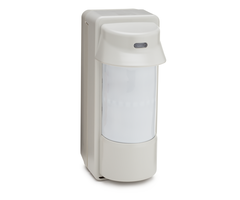
Motion sensors use passive infrared (PIR) technology to detect movement within the sensor's coverage area. This is done by looking for the changes in infrared (IR) energy that occur when a person, animal, or object comes within the sensor's field of view. Standard motion sensors are typically PIR only. These are appropriately called PIR motion sensors.

Some motion sensors will also use microwave technology in addition to PIR technology. This involves having the sensor send out microwave signals and seeing how the signals bounce off of objects in the area. Movement will change the pattern of these microwave signals, and the sensor will be able to detect this. These motion sensors that use both microwave and PIR are called Dual-Tech motion sensors. The purpose of using both PIR and microwave together is to prevent false alarms. A Dual-Tech motion sensor will only activate and alert the system if both its PIR sensor and its microwave sensor are triggered. A microwave sensor is not vulnerable to the same environmental issues that may cause a false activation on a PIR. You will not find a motion sensor that uses microwave technology without PIR detection, as microwave alone would result in too many false alarms without having PIR to confirm movement.

One feature that you will often see listed on a motion sensor is pet-immunity. A motion sensor that has been set up for pet immunity can be configured to not "look" in the areas close to the ground where pets and small animals walk. Instead, the motion sensor only looks in the areas higher up, where humans move while walking upright. A pet immune motion sensor is not impervious to small animals, and you must position it carefully so that it works as intended. Pet immune motion sensors normally have a weight limit, where animals under that weight limit should avoid triggering the sensor, assuming that the sensor is installed properly. Please note that most pet friendly motion sensors will require you to set the sensitivity for the sensor to the lowest possible setting.

When it comes to motion sensors, mounting them carefully is very important. A motion sensor may cause false alarms on the system if it is not installed properly. These sensors should not be facing any vents, air ducts, ceiling fans, or curtains that may cause the sensor to activate without any movement. If you are using the motion sensor for pet immunity, then it should also not be facing any furniture or stairwells that your pet could use to get within the sensor's field of view. You will likely want to perform a Walk Test of your motion sensor to make sure that it responds properly when movement is present, and does not respond due to other external factors when there is no movement. You should also have any pets participate in the Walk Test to ensure that pet immunity is working properly.

We recommend reading the following FAQs to learn more about motion sensors:

Below are some of the most popular motion sensors for our recommended systems:

Sensor Name Product Lineup
Compatibility Range
Encryption Coverage Area
Detection Type
Pet Immunity Notes
Honeywell SiXPIR

Honeywell SiX Series Lyric 300 Nominal Feet 128-bit AES 40 by 56 Feet
PIR Up to 80 lbs Encrypted PIR Motion for Lyric.
DSC PG9914

PowerG All IQ Panel 2 Plus 2,000 Feet Open Air 128-bit AES Up to 39 Feet PIR Up to 85 lbs PowerG Encrypted PIR Motion.
DSC PG9984P

PowerG All IQ Panel 2 Plus 2,000 Feet Open Air 128-bit AES Up to 50 Feet Dual-Tech Up to 40 lbs PowerG Encrypted Dual-Tech Motion.
2GIG PIR1e

2GIG eSeries 2GIG GC3e 350 Nominal Feet 2GIG eSeries Encryption
30 by 50 Feet PIR Up to 55 lbs Encrypted PIR Motion for 2GIG.
Honeywell 5800PIR-RES

Honeywell 5800 Series Lyric, GC3e, 345 MHz IQ2+ 200 Nominal Feet None 35 by 40 Feet PIR Up to 80 lbs Non-encrypted residential PIR motion for 345 MHz systems.
Honeywell 5800PIR-COM

Honeywell 5800 Series Lyric, GC3e, 345 MHz, IQ2+ 200 Nominal Feet None 60 by 80 Feet PIR None Non-encrypted commercial PIR motion for 345 MHz systems.
Honeywell 5898

Honeywell 5800 Series Lyric, GC3e, 345 MHz IQ2+ 200 Nominal Feet None 35 by 40 Feet for Pet Immunity Dual-Tech Up to 100 lbs Non-encrypted Dual-Tech motion for 345 MHz systems.
Qolsys IQ Motion-S

Qolsys S-Line 319.5 MHz IQ2+ 600 Feet Open Air Qolsys S-Line Encryption 30 by 40 Feet PIR Up to 40 lbs Non-encrypted PIR motion for 319.5 MHz systems.

There are also certain outdoor motion detection sensors that are better-suited for use in an outdoor environment. These outdoor motion sensor models are typically more expensive than indoor variants. You can see some of our most popular ones listed below:

Sensor Name
Product Lineup
Compatibility Range
Encryption Coverage Area
Detection Type
Pet Immunity Notes
DSC PG9994

PowerG All IQ Panel 2 Plus 2,000 Feet Open Air 128-bit AES Up to 30 Feet PIR Up to 40 lbs PowerG Outdoor PIR Motion Sensor
Honeywell 5800PIR-OD

Honeywell 5800 Series Lyric, GC3e, 345 MHz IQ2+ 200 Nominal Feet None 40 by 30 Feet PIR None Honeywell 5800 Series Outdoor Motion, 1st ed.
Honeywell 5800PIR-OD2

Honeywell 5800 Series Lyric, GC3e, 345 MHz IQ2+ 200 Nominal Feet None 40 by 30 Feet PIR None Honeywell 5800 Series Outdoor Motion, 2nd ed.
Optex FTN-RRIX

Legacy Interlogix 319.5 MHz IQ2+ 200 Nominal Feet None Up to 16.5 Feet PIR None Optex Fitlink Outdoor Motion Sensor for 319.5 MHz Systems
Optex FTN-RR2G

2GIG 345 MHz Lyric, GC3e, 345 MHz IQ2+ 200 Nominal Feet None Up to 16.5 Feet PIR None Optex Fitlink Outdoor Motion Sensor for 345 MHz Systems.
Optex FTN-RRDS

Legacy DSC 433 MHz IQ2+ 200 Nominal Feet None Up to 16.5 Feet PIR None Optex Fitlink Outdoor Motion Sensor for 433 MHz Systems.

Glass Break Sensors

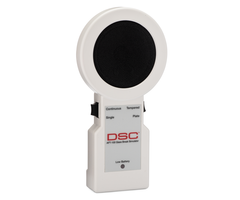
The last type of security sensors we will be discussing are glass break sensors. These sensors include built-in microphones, and they actively listen for the unique sound of glass breaking. Most of these sensors will need to hear both the high-pitched shattering sound of the glass breaking, as well as the low-pitched sound of an object striking against the glass in order to activate. This design choice is to prevent false alarms caused by similar sounds. Most users will use glass break sensors to monitor windows, but they have also been known to work effectively on protective glass display cases that store valuables, such as what you might find in jewelry stores or gun shops. Most types of glass will work with glass break sensors, though there are some exceptions. For example double and triple pane glass windows won't work reliably. The same is true for coated or "safety" glass. Refer to the manual for the exact glass break detector you are using to determine compatibility.

A single glass break detector can monitor multiple windows or display cases, as long as the glass it is monitoring is within its detection range, which is typically 15 to 25 feet. Any glass that is being monitored must have a direct line of sight with the sensor, with no obstacles blocking the path that sound will travel through. When testing your glass break sensors, it is strongly recommended that you us a glass break simulator. These devices will mimic the sound of the glass breaking and activate your glass break sensors without actually breaking any glass. Remember to refer the instructions of your glass break simulator for more information. When choosing a glass break simulator, it is best to use a simulator from the same manufacturer, if possible. We have a Honeywell Glass Break Simulator and a DSC Glass Break Simulator available on our website. If you get one of the 2GIG Glass Break Sensors mentioned in this buying guide, then the Honeywell Glass Break Simulator is best for testing. Otherwise, just match the manufacturer.

Below are some of our most popular glass break sensors:

Sensor Name
Product Lineup
Compatibility
Range
Encryption
Notes
Honeywell SiXGB

Honeywell SiX Series Lyric 300 Nominal Feet 128-bit AES SiX Series Glass Break Sensor for Lyric
DSC PG922

PowerG All IQ Panel 2 Plus 2,000 Feet Open Air 128-bit AES PowerG Glass Break Sensor
2GIG GB1e

2GIG eSeries 2GIG GC3e 350 Nominal Feet 2GIG eSeries Encryption Encrypted glass break sensor for 2GIG.
Honeywell 5853

Honeywell 5800 Series Lyric, GC3e, 345 MHz IQ2+ 200 Nominal Feet None Non-encrypted glass break sensor for 345 MHz systems.
Qolsys IQ Glass-S

Qolsys S-Line 319.5 MHz IQ2+ 600 Feet Open Air Qolsys S-Line Encryption Encrypted glass break sensor for 319.5 MHz systems.

Reach Out to Us!


Remember that you can reach out to us with any questions you might have about planning your system and determining sensor compatibility. The best way to contact us is to email support@alarmgrid.com. This is also a good email to use if you are interested in starting new alarm monitoring service with Alarm Grid. Our team checks for new email from 9am to 8pm ET M-F. We look forward to hearing from you!

Tags: , , , , , , , , , , , , , , , , , , , , , , , , , , , , , , , , , , , , , , , , , , , , , , , , , , , , , , , , , , , , , , , , , , , , , , ,

Comments


Posted By

If you're setting up a new security system for use with Alarm.com, then you might be wondering which door and window sensors to use. The answer really comes down to which system you are using and how you intend on using your sensors. Plenty of contact sensor options are usually available!


Alarm sensors do not communicate directly with Alarm.com. Instead, sensors communicate with alarm panels. From there, the panel will use an alarm monitoring communicator to send signals to Alarm.com. This communicator must be activated and registered for Alarm.com service. Per Alarm.com requirements, cellular connectivity is required. This means that your system must use a cellular communicator or a dual-path communicator that is built for use with Alarm.com.

As far as choosing specific sensors, it comes down to determining whether or not they will work with the system you are intending to use with Alarm.com. Today, we're going to break down some of the most popular Alarm.com Security Systems and help you determine the best sensors to use. Remember that our security system kits already come with some compatible sensors to get started. It may only be that you just need to add a few more door and window sensors, or you might not need to add any extra ones at all!

We will give you three (3) scenarios for each system. These are:

  1. Surface-Mounted Door/Window Sensors
  2. Recessed Door/Window Sensors
  3. Outdoor Door/Window Sensors

In most situations, surface-mounted sensors are what you want to go with. These are the standard regular sensors that you would use with virtually any door or window. They are super easy to install, and they are some of the most basic security devices you will encounter.

If appearance is important to you, and you want the sensor to remain hidden while the door or window is closed, then you may consider getting recessed sensors instead. Just remember that recessed sensors will require you rolling up your sleeves and drilling holes into your door/window and its frame. In addition to the added work, this may also have warranty ramifications with regard to the door or window.

And of course, if you plan on using the door/window sensor in an outdoor environment, then you will want to make sure the sensor is approved for outdoor use. Trying to use an indoor-only sensor in an outdoor environment will likely result in damage to the device due to exposure to rain, dust, etc. This also typically applies if you plan on using the sensor in an area that is not insulated, such as a shed, a gate or a barn.

Note: If you are totally new to door and window sensors and want to know more about how they operate, please check out this FAQ.


Qolsys IQ Panel 2 Plus (PowerG)


Arguably the most popular system to use with Alarm.com right now in 2020 is the Qolsys IQ Panel 2 Plus. There are three (3) versions of the system, with each one supporting a different legacy sensor frequency (319.5 MHz, 345 MHz, 433 MHz). We will discuss the legacy sensor options in a minute. But one of the biggest reasons to purchase an IQ Panel 2 Plus is to use PowerG Sensors. All three versions of the Qolsys IQ Panel 2 Plus support the PowerG Sensors. These sensors can communicate with the IQ Panel 2 Plus System from up to 2,000 feet away in open air, and they utilize 128-bit AES encryption and frequency hopping spread spectrum (FHSS) for enhanced wireless security. For anyone with an IQ Panel 2 Plus, these are the sensors we would point to first.


2GIG GC3e & 2GIG GC2e (eSeries)

2gig gc3e wireless encrypted alarm panel

2gig gc2e wireless encrypted alarm panel

Right now, we view the 2GIG GC3e and the 2GIG GC2e as the best alternatives for users who want to get started with Alarm.com, but don't want to use a Qolsys IQ Panel 2 Plus. The most popular sensors to use with these systems are the encrypted 2GIG eSeries Sensors. They are built for the GC3e and GC2e Systems, and they utilize encryption for protection against wireless hacking or takeover attempts. Remember that these systems are both backwards compatible with 345 MHz sensors (more on those later). But if you're running a GC3e or a GC2e, then we're going to recommend the eSeries products.


Original Qolsys IQ Panel 2, IQ Panel, Interlogix Simon Systems (Legacy 319.5 MHz)

Interlogix simon xti 5 80 632 3n xt5 front image
Qolsys iq panel 2 verizon 7 security panel w slash z wave ready
Qolsys iq panel rogers 7 security panel w slash z wave rogers ce

Things become a little tricky when we get into the legacy sensor frequencies. There is usually a lot of inter-compatibility across manufacturers, so often the choice comes down to preference. We will list our favorites based on value and functionality. But understand that you have a lot of options available when it comes to 319.5 MHz sensors. This frequency is used with the original Qolsys IQ Panel 2, the original Qolsys IQ Panel, and all of the legacy Interlogix Simon Series Panels. Keep in mind that you can also use these sensors with the 319.5 MHz version of the IQ Panel 2 Plus as an alternative to PowerG. The 319.5 MHz frequency is also typically used with any wired Interlogix NetworX Panel that has a wireless receiver added.


2GIG GC3 & 2GIG GC2 (Legacy 345 MHz)

2gig gc3 diy wireless security system w slash 7 screen

2gig cp21 345 front

If you are working with a 2GIG GC3 or a 2GIG Go!Control GC2, then you will be enrolling legacy 345 MHz sensors with your system. This frequency was popularized by the Honeywell 5800 Sensors, and later the 2GIG 345 MHz Sensors. The GC2 and GC3 support both of these lineups, so you really have a lot of options to choose from. We're just going to list our particular favorites. Remember that you can also use these sensors with a 345 MHz IQ Panel 2 Plus as an alternative to PowerG.


DSC Impassa & DSC PowerSeries (Legacy 433 MHz)


DSC popularized their own wireless frequency of 433 MHz. If you have a DSC Impassa, then these will be the sensors you are using. The 433 MHz sensors can also be used with a DSC PowerSeries Panel that has a wireless receiver added. Although we do not sell the original DSC PowerSeries Systems, we do offer the DSC RF5132-433 Wireless Receiver that will allow support for these sensors. And of course, you can also use these 433 MHz sensors with the 433 MHz version of the IQ Panel 2 Plus as an alternative to PowerG. Unfortunately, we don't have a good recommendation for a 433 MHz outdoor door and window sensor. so we'll just list the other two types instead.


Honeywell VISTA, DSC PowerSeries, DSC PowerSeries NEO, Interlogix/GE NetworX (Wired Sensors)

Honeywell vista 20p wired alarm control panel

Many hardwired security systems can connect with Alarm.com using what is known as an Alarm.com System Enhancement Module (SEM). And since hardwired panels often use wired sensors, this makes hardwired door and window contacts technically compatible with Alarm.com as well! Honeywell VISTA Systems, DSC PowerSeries Systems, DSC PowerSeries NEO Systems, and Interlogix/GE NetworX Systems all have compatible SEM communicators available.

The great thing about hardwired contacts is that they are pretty much universal across all wired systems, provided that the system is not using polling loop sensors. We'll focus on standard non-polling loop sensors here, but these are all good options for most hardwired alarm panels. Also keep in mind that there are MANY options when it comes to wired contacts. Don't feel like you are restricted to the ones we happened to pick!


Get Started with Alarm Grid & Alarm.com


If you are interested in signing-up for Alarm.com service through Alarm Grid, make sure to check out our monitoring page. We support Alarm.com with our Gold and Platinum Level Plans (Self & Full) and our Cell-Only Plan. If you have any questions about our products or monitoring services, be sure to shoot us an email at support@alarmgrid.com. We operate support hours from 9am to 8pm ET M-F. We look forward to hearing from you!

Tags: , , , , , , , , , , , , , , , , , ,

Comments


Posted By

With the holiday season quickly approaching us, we thought it was a good time to present some holiday buying guides for various security systems. Today, we are focusing on the Honeywell Lyric. This guide will help whether you are considering a new Lyric or adding upon an existing one.

Honeywell lyric controller encrypted wireless security system

The Honeywell Lyric is currently the flagship all-in-one wireless security system from Resideo. It has been one of the most highly regarded alarm systems for the past few years for several reasons. The system supports up to 128 wireless zones, making it suitable for applications big and small. It has a built-in Z-Wave controller, and you can pair up to 72 Z-Wave devices for home automation purposes. The Lyric is also one of the very few alarm panels that can support Apple HomeKit, making it perfect for iOS users looking to expand upon their HomeKit Network. In fact, we believe that the Lyric is the top HomeKit Security System on the market at this time.

The other major appeal of the Lyric is the fact that it can technically be monitored using an IP only communication path. This is because it connects with AlarmNet360 and the Total Connect 2.0 platform. Unlike most other monitoring platforms like Alarm.com which require cellular connectivity, Resideo allows IP only monitoring for panels connected with TC2. The Lyric has a built-in WIFI card, so you can connect with a local network right out of the box. Although we always recommend cellular communication for optimal reliability, we do understand that many users will want to use IP only service as a cost-cutting measure. Additionally, you can always add a cellular communicator to the Lyric System if you decide that you want to go cellular later on. Both the Honeywell LYRICLTE-A (AT&T LTE) and the Honeywell LYRICLTE-V (Verizon LTE) are great options.

Building a Lyric System from Scratch

Honeywell lyricpk lte enc encrypted at and t lte alarm system w 
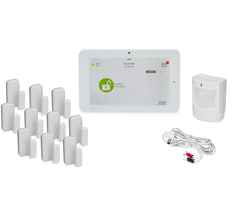
For new users starting from scratch, the best option is typically to buy a complete Honeywell Lyric Security System Kit. This will include everything you need to get started with alarm monitoring. Whether you plan to use IP only monitoring service, or you intend on setting up cellular service, there is a perfect kit for you. For those planning to go IP only, no cellular communicator is needed, and you should choose a kit labeled "WIFI Only". If you intend to use the system for cellular monitoring, then both AT&T and Verizon system kits are available. Whether you go with a 3-1 kit (3 contacts and 1 motion) or a 10-1 kit (10 contacts and 1 motion) should depend on the size of the building you are monitoring. You will need more contacts to cover more doors and windows.

We recommend going through the Lyric System Kit Page linked above and finding the perfect Lyric Kit for your needs. In addition to the system, sensors, and optional communicator, you will also get a Honeywell LT-Cable with every kit. This makes it super easy to get the system up and running without having to prepare any standard alarm wiring.

Sensors for New and Existing Lyric Systems

Honeywell sixgb wireless glass break detector

One of the best aspects of the Lyric is that it has one of the most diverse and complete lineup of supported sensors in the entire security industry. Resideo created a sensor lineup designed exclusively for their Lyric System in the Honeywell SiX Series Sensors. These powerful sensors offer an impressive communication range of up to 300 feet indoors and 128-bit AES encryption for enhanced wireless protection. The lineup includes the following products:

With this great lineup, you can achieve a total and complete Lyric Security System by only using SiX Series devices. And for most Lyric users, that is the best option. But these are not the only sensors you can use with the Lyric System. The Lyric is also compatible with nearly any uni-directional 345 MHz sensor, which includes most devices from the Honeywell 5800 Series and the 2GIG 345 MHz lineup. Additionally, these lineups are both a little more fleshed out than the SiX lineup. There are certain sensor types (e.g. outdoor sensors) where you will need to turn to one of these product lineups.

Many users will also supplement their SiX Series devices with Honeywell 5800 Sensors and 2GIG 345 MHz Sensors as a cost-saving measure. These 345 MHz sensors will work just as well as the SiX Series devices on the Lyric. The only difference is that the 345 MHz sensors will not utilize any encryption, making them more susceptible to wireless attacks. The Lyric does have protection against 345 MHz RF jamming, but it can offer some users better peace of mind to know that their wireless sensors are encrypted. But if you are comfortable using non-encrypted wireless devices, then 345 MHz sensors can save you a lot of money when designing your Lyric System.

Some of our favorite Honeywell and 2GIG 345 MHz Sensors for use with the Lyric include:

Other Accessories for Your Lyric

Yale yrd216 brass front z wave push button deadbolt lock

We have already covered the sensors you will use with your Lyric System. However, there are still other devices you may want to add to your setup. The biggest attraction are Z-Wave devices like lights, door locks, and smart thermostats. One admitted weakness of the Lyric is that its automation controller is only a standard Z-Wave controller. The Lyric does not offer a Z-Wave Plus controller, and Lyric users cannot take advantage of the extended range and increased battery life of Z-Wave Plus. You can still use Z-Wave Plus devices with the Lyric System, but they will only offer the functionality of classic Z-Wave peripherals.

With that limitation in mind, you can still use the Lyric as a perfectly capable smart home automation hub. You can even pair the system as a secondary controller to other automation hubs (e.g. Samsung SmartThings) for added flexibility in your smart home. Nearly any Z-Wave automation device can be used with the system, so feel free to explore your options. We have plenty of devices on our website. Just remember that the Lyric System cannot support Z-Wave security devices. The Lyric Z-Wave controller is for automation purposes only. Alarm Grid does not sell Z-Wave security sensors on its website.

If you want to use your Lyric to control your garage door, then you will want to invest in a Honeywell 5877GDPK. This kit includes everything you need to get started with garage door operation for your Lyric System. Inside the kit there is a Honeywell 5877 Z-Wave Garage Door Relay, a Honeywell 5822T Garage Door Tilt Sensor, and a FortrezZ Z-Wave Siren/Strobe. You can purchase these items separately, but this convenient kit makes things easier.

The Lyric has only one compatible wireless keypad option, which is the Honeywell LKP500. This is a fairly standard push-button keypad with an LCD screen. You might also consider getting a cheap tablet and mounting it to the wall and using that as a keypad. You can download the Honeywell My Home Controller App to the tablet and essentially make the device a permanently mounted touchscreen keypad for your Lyric.

Lastly, you might want to get a desk mount for your Lyric System. This will eliminate the need for mounting the panel to the wall. Desk mounts are great for people living in apartments or rental homes, as well as users who simply do not want to drill holes. Using a desk mount sure beats laying the system flat on a counter! The Lyric Desk Mount is called the Honeywell LCP500-DK. There is also a desk mount for the Honeywell LKP500 Lyric Keypad called the Honeywell LKP500-DK.

Ask Us Questions!


Don't be afraid to reach out to us at Alarm Grid if you have any questions about the Lyric, or if you need any help choosing a system and accessories. The best way to reach us is to email support@alarmgrid.com. You may also reach us over the phone at (888) 818-7728. Remember that our support hours run from 9am to 8pm ET M-F. We look forward to hearing from you!

Tags: , , , , , , , , , , , , , , , , , , , , ,

Comments


Posted By

Hi DIYers! We would like to inform you that the VERSA-2GIG Door and Window Contacts have received an update. These changes should not affect device compatibility or performance. However, they will effect the way these devices are enrolled with a panel and how maintenance is performed.

Versa 2gig honeywell lyric and 2gig compatible sensor pow

The VERSA-2GIG Contacts operate at 345 MHz. They are designed for use with 2GIG Systems (GC2 and GC3) and the Resideo Lyric Controller (Version MR3 or higher). These surface-mounted devices operate like any standard door and window contact sensor. Each unit includes a sensor and an accompanying magnet. The sensor is mounted on the door or window frame, while the magnet is mounted on the door or window itself. When the door or window is opened, the magnet will separate from the sensor and cause it to activate. The sensor will then alert the panel to let the system know that the door or window has been opened.

Alarm Grid recently learned that the VERSA-2GIG Door and Window Sensors have been updated. The new model enrolls using Loop 1 and has a convenient slide-off cover. Additionally, a tab on the side of the device indicates which side should be facing the accompanying magnet. This is a change from the older style. The old model of the VERSA-2GIG is enrolled using Loop 2 and has a pop-off cover. Both devices have a yellow inner board that allows you to differentiate them from the VERSA-GE Sensors (blue board) and the Honeywell 5800MINI Sensors (red board).

This change should not affect the performance of the VERSA-2GIG or its compatibility. At this time, we are only aware of changes to the VERSA-2GIG Sensors. We have not received any news of changes for the VERSA-GE Sensors or the Honeywell 5800MINI Sensors. Alarm Grid will produce an update post if we learn of any changes to these sensors.

At this time, we cannot control which version of the VERSA-2GIG Sensors you will receive when placing an order. Some old-style sensors are still being sent out, while other customers are reporting that they have received the new style. It is even possible that you may receive a mix of old and new VERSA-2GIG Sensors with a system kit. Please be aware that these sensors operate exactly the same, and you should not notice any difference in device performance. The new-style VERSA-2GIG Sensors work just as well as the old-style ones. The only functional difference is the cover.

Remember, if you have a new-style VERSA-2GIG Sensor with a slide-off cover, it will enroll to your system using Loop 1. If you have an old-style VERSA-2GIG Sensor with a pop-off cover, it will enroll to your system using Loop 2. You can always auto-enroll your sensor, and the Loop Number should populate automatically. We recommend auto-enrolling whenever possible to check device communication and to avoid making a mistake when manually entering the Serial Number.

If you have any questions about this change, please reach out to us at support@alarmgrid.com, or call us at (888) 818-7728 during our regular business hours of 9am to 8pm EST M-F. We look forward to hearing from you.

Tags: , , ,

Comments


Posted By

Hi DIYers! We're here with another Alarm Grid Tip. We're going to cover the proper technique for mounting your door alarm sensors. Many people have trouble getting a faulted zone to disappear when their sensors are not aligned properly. Mounting your sensors correctly will fix this issue.

Honeywell 5800mini interior wireless door and window sensor

First, It's important to understand how door and window contacts work. There are two (2) parts. These are a sensor and a magnet. The sensor is the larger component and usually represents the listed product dimensions. The magnet is the smaller component. In a proper installation, the sensor (larger) should be mounted on the door frame. The magnet (smaller) should be mounted on the actual door. Ideally, the magnet and the sensor should be in direct contact when the door is closed. The magnet should also be aligned with the metal reed switch inside the sensor. The sensor will most likely have indentations to indicate the location of the reed switch.

The idea is that when the door is closed, the magnet will be in contact with the sensor. This is why these sensors are often called "contacts". When the door is opened, the magnet will become separated from the sensor. This will release its internal metal reed switch. When this happens, the sensor will transmit a signal to the alarm control panel. The system will respond based on the programming settings for the corresponding zone.

When you mount your door contacts, you should make sure that the magnet and the sensor are in proper alignment when the door is closed. If not, then the reed switch inside the sensor will stay open. As a result, the zone will still be shown as faulted on the panel. You want proper alignment so that the zone functions consistently. Whenever the door is opened, the zone should appear as faulted. If it's closed, then you should not see any faults.

Walk testing your contacts is extremely important! This is the best way to make sure that the sensor and magnet are in proper alignment. Sure, it might pass the eyeball test, but does it pass the system test? Always, always, always test your equipment! We don't care if you are a novice DIYer or a seasoned professional installer - your job is not finished until you have completed the walk test.

Again, the ideal door sensor and magnet will be IN DIRECT CONTACT when the door is closed. This will provide the best possible results. We have seen customers stack multiple pieces of double-sided foam tape to make this happen. This is pretty unusual, but it works! It might look funny if you have to do that, but it will get the job done! As long as the sensor and magnet are in correct alignment, then the sensor will work.

If you absolutely must leave the contact and magnet separated, do not do so from more than one-half (0.5) of an inch, unless the manual specifically says that the sensor-magnet gap can be further. And make sure to test extra thoroughly if you decide to try and get these sensors to work with a wider magnet spacing.

Also remember to check sensor for indentations that indicate which side to place the magnet. If you are unsure, then check the device manual. Many answers can be found in the installation instructions. Unfortunately, many end users choose to ignore them. Read the manual!

Keep in mind that some door sensors may be equipped with LED lights that help the installer make sure that the sensor and magnet are indeed in proper alignment. If your sensor has this feature, then definitely use it! This is an easy and convenient way to make sure they are aligned correctly. Check your device manual for more information. An example of a door sensor that is equipped with this feature is the Honeywell 5800MINI.

Below is an example of what a properly installed contact looks like. In this case, it is the 2GIG DW10. Note how the sensor and the magnet are in direct contact and properly aligned. Normally, the battery tab at the bottom of the sensor would be removed, but for this example, it's okay.


We hope this tip has been helpful for anyone setting up their first alarm system. Please email us at support@alarmgrid.com if you have any questions. We look forward to hearing from you!

Tags: , , , , , , , , , , ,

Comments


Posted By

Hi DIYers! Today, we're taking a look at the VERSA-2GIG and VERSA-GE Door and Window Contacts. These are actually both Honeywell 5800MINI Sensors that have been reconfigured to communicate at different frequencies. They offer an affordable solution for monitoring doors and windows.

Versa 2gig honeywell lyric and 2gig compatible sensor powThe VERSA-2GIG, VERSA-GE and 5800MINI all provide the same operation that a user would expect out of any standard door and window contact. The device functions using a sensor and an included magnet. The sensor should be mounted on the stationary portion of the door or window frame. The magnet should be mounted on the moving part of the door or window, within a half-inch of the sensor. Both can be mounted using screws or with double-sided foam tape. When the door or window is opened, the magnet will separate from the sensor. This will result in an internal reed switch inside the sensor being activated. The sensor will then know that the door or window has been opened, and it will send an alert to the security system.

The main difference between the VERSA-2GIG, VERSA-GE and the 5800MINI is the frequency at which each sensor communicates. The 5800MINI communicates at the 345 MHz frequency that is used with all Honeywell 5800 Series Devices. This makes it compatible with all Honeywell Systems (with compatible wireless receivers) and 2GIG Systems. The VERSA-2GIG operates at a similar frequency, but it is more like the 2GIG Sensors. The device will work with 2GIG Systems and the Honeywell Lyric Controller after receiving firmware update MR3. Both the 5800MINI and the VERSA-2GIG will work with the Qolsys IQ Panel 2 Plus with 345 MHz Daughterboard. As for the VERSA-GE, it operates at 319.5 MHz. This makes it compatible with the Interlogix/GE Systems and any Qolsys System with a 319.5 MHz Daughterboard. This includes the Qolsys IQ Panel 2 and IQ Panel 2 Plus with 319.5 MHz Daughterboard.

The only other difference between the two VERSA Sensors and the Honeywell 5800MINI is that the VERSA Sensors program in as Loop 2, while the Honeywell 5800MINI programs with Loop 1 when used as a contact. Also, the VERSA Sensors cost significantly less than the 5800MINI. This makes the VERSA Sensors the preferred option if both sensors are compatible with their system. Other than that they are the same sensor. Both devices measure in at 2.2"L X 1.0"W X 0.25"H. This makes them extremely discreet and unobtrusive once installed. And of course, the VERSA Sensors are extremely easy to program in with any compatible panel.

Versa 2gig honeywell lyric and 2gig compatible sensor powBoth versions of the VERSA Sensors - the VERSA-2GIG and VERSA-GE - are available for purchase right now. And for users of a Honeywell LYNX Touch or Honeywell VISTA, the 5800MINI is still available as well. You can get all of these excellent sensors from Alarm Grid. Protect the doors and windows your home with these versatile and reliable sensors!

Tags: , , , ,

Comments


Posted By

Door alarm sensors, or contacts, are some of the most important devices used with security systems. These devices alert a user whenever their door is opened. They can be used on virtually any type of door. These might include a front door, a back door, screen doors, a patio door, a shed, cabinets and any door inside the building. We typically find that door alarm sensors are some of the easiest to use devices with an alarm system. But still, it can be helpful to read through a comprehensive guide explaining the full ins and outs of these devices. So it here is - everything you've ever to know about door alarm sensors.

Qolsys iq dw mini s encrypted wireless sensors for iq panel 2 qsThe Basics of Door Alarm Sensors

Most traditional door sensors feature a relatively simple design and premise. These devices usually consist of a sensor and a magnet. The sensor is placed on or inside the door frame, and the magnet is placed on or inside the door itself, within a half inch of the sensor. Opening the door will cause the magnet to pull away and separate from the sensor. When this happens, a reed switch inside the sensor will activate. This will cause the sensor to send a signal to the security system, letting it know that the door was opened. The system will then perform the appropriate response based on how the sensor's Response Type was programmed. At the surface, it's all very simple. Some examples of these traditional sensors include the Honeywell 5800MINI, the Honeywell SiXMINICT and the VERSA-2GIG Sensor. Traditional door sensors can be either surface-mounted or recessed.

Honeywell 5800mini interior wireless door and window sensor

There's also a second variation of door sensors, known as mechanical door sensors. This type of sensor features a physical switch that is pressed down when the door is closed. When the door is opened, the switch will pop up, causing the sensor to activate. From there, the system will perform the Response Type assigned to the zone for that sensor. This type of door alarm sensor is far less common than the other type of sensor. However, the end result is still the same - the system will still perform the programmed Response Type when the sensor is activated. An example of this type of sensor is the Honeywell 5800RPS. While you are less likely to come across this type of door sensor, it's still worth mentioning just in case. Mechanical door sensors are only available in the recessed variety.

Honeywell 5800rps wireless recessed door and window plunger sensTypes of Door Sensors - The Two Distinctions

Now that you know the very basics of door sensors, you can start thinking about the different types. While almost every door sensors operates using one of the two mechanisms mentioned above, there are two other distinctions that are commonly made between door sensors. These are whether the door sensor is wireless or wired and whether the door sensor is surface-mounted or recessed. These considerations will play a big role in determining which door sensor you choose to purchase for your alarm system.

A wireless door sensor will communicate with an alarm system wirelessly. This will prevent the need for running a wire from the system to the door sensor. This can make wireless door sensors significantly easier to install. Another great aspect of wireless door sensors is that they can usually be auto-enrolled with the security system. That said, a wireless sensor will need to have its battery replaced every three to five years. On the other hand, a wired door sensor will need to be physically connected with the alarm system. This can make the installation considerably more difficult in certain cases. However, a wired sensor will never require any battery replacements.

If you are using a wireless door sensor with a wired alarm system, such as a Honeywell VISTA Panel, then you will need to use a wireless receiver. This will allow the wireless signal to be received by the system. When choosing a wireless door sensor, make sure that the wireless frequencies it uses are compatible with your alarm system. For example, Honeywell Panels look for wireless signals that operate at a frequency of 345 MHz, while Qolsys Panels use signals that operate at a frequency of 319.5 MHz. If you try to use a wireless door sensor that does not communicate at the correct wireless frequency, then it will not function with the alarm system.

Honeywell 5800rp wireless repeaterThe other major distinction between door sensors is surface-mount sensors versus recessed sensors. Simply put, surface-mount sensors are installed on the outside of the door and its frame, while recessed sensors are installed in the inside. Surface-mount sensors require no drilling. In the easiest scenario, it is possible to mount them using a double-sided adhesive (foam tape). They can also be mounted using screws. With their easier installation, this is generally the preferred type of door sensor. Most users do not mind the fact that a small sensor will be visible on the outside of the door.

Honeywell 5820l super slim wireless door and window sensor
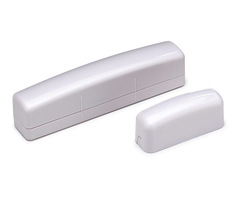
However, for users who do want a more discrete installation, there are recessed door sensors. These sensors and their magnets need to be inserted into holes that are drilled into both the door and the frame. The exact size of the holes will depend on the specific model of the recessed door sensor that is being installed. Once the sensor and magnet have been installed, they will not be visible from the outside. That said, most users opt for surface-mount door sensors due to the easier installation.

Honeywell 5818mnl wireless recessed door sensor and window senso

Some Notes on Response Types

The primary function of any security sensor is determined by its Response Type. This refers to what action the system will take when the zone is faulted (e.g. the door is opened). Below are the Response Types that are most commonly used with door sensors:

  • Entry / Exit: If the door is opened while the system is armed stay or armed away, then the system will need to be disarmed within its entry delay period. If the system is not disarmed within this time period, then an alarm event will occur. Most alarms will feature two different Entry / Exit settings. This allows two different entry delay periods to be used on the same system for different zones.
  • Perimeter: If the door is opened while the system is armed stay or armed away, then an alarm event will occur immediately.
  • Interior Follower: If the system is set to armed away, an alarm event will immediately occur if the door is opened, assuming that an entry / exit zone is not faulted first. If an entry / exit zone is faulted first, then the system must be disarmed within its entry delay period, otherwise an alarm event will occur.
  • Interior With Delay: If the system is set to armed away and the door is opened, then the system must be disarmed within its entry delay period. If the system is not disarmed within this time period, then an alarm event will occur.
  • Day / Night: If the system is disarmed and the door is opened, a trouble event will occur on the system. If the system is armed away or armed stay and the door is opened, an alarm event will immediately occur on the system.
  • 24 Hour Audible: Opening the door will immediately cause a full system siren and an alarm to be set off, regardless of what state the system is currently in. This Response Type should not be used unless the door should never be opened for any reason.
  • 24 Hour Auxiliary: Same as 24 Hour Audible, but only the panel itself will produce a siren. Any external sirens or noisemakers will not activate. This zone type is ideal for emergency medical cabinets that would only be opened in a serious medical emergency.
  • 24 Hour Silent: Same as 24 Hour Audible, but no siren or sound will be produced.
  • Fire No Verification: Opening the door will immediately cause a fire alarm to be set off, regardless of what state the system is currently in. This is the ideal Response Type for fire doors.

Certain Response Types are only available for certain Device Types. Depending upon the panel you are using, not all of these Response Types will be made available for the Device Type of "Door". A way to work around this is to set the Device Type to "Other". This will allow you to set any possible Response Type for the door sensor.

2gig dw10 wireless slim door slash window contactOther Programming Settings

Programming a door sensor has to do with more than just the Response Type and the Device Type. Below are some of the other programming settings available for a door sensor. Please note that these settings are specific for a Honeywell Lyric Controller, and different settings may be available on another type of panel.

  • Serial Number: This is how the system will specifically identify the exact door sensor that is being used.
  • Loop Number: This tells the door sensor what function it should perform. Each door sensor usually has a specific loop number that should be set for the device to function as a door sensor. Some door sensors have multiple possible functions that can be used with the device. One example is the Honeywell 5816, which can be used as both a door sensor and as a wireless transmitter depending upon the loop number that is set.
  • Zone Descriptors: These serve as the name of the door sensor. The panel will announce the zone descriptors whenever the zone for that sensor is affected.
  • Alarm Report: This tells the system whether or not it should send an outbound signal to the central monitoring station. If you turn this off, then all the sounds and sirens will still be made, but a distress signal will never be sent to the central station. An example for turning this off might be if you are monitoring a liquor cabinet to make sure your teenage doesn't get into it. You might want a very loud siren to go off so that you know if this happens. However, you obviously wouldn't want the police to show up at your house in this situation!
  • Chime: This will have the panel produce a simple chime whenever the door is opened. Many panels will allow you to toggle between different chime options for the panel. Remember, you will still need to have the local chime for the system enabled from the main settings menu.
  • Supervision: This will have the system monitor the door sensor for low battery or loss of signal. Keep this enabled to make sure that the door sensor is always in proper working order. This setting is only used with wireless door sensors.

For any programming questions related to a specific panel, please consult the programming guide for that panel. This information is readily available on the Alarm Grid website in the form of FAQs.

Honeywell 5816 wireless door window sensor

Common Door Sensor Questions

Below are some questions that are commonly asked about door sensors:

1. How do I program my door sensor?

If it is a wireless door sensor, it can most likely be auto-enrolled.This is accomplished by accessing zone programming on the system and then faulting and restoring the door sensor three times to learn it in. You can fault and restore the door sensor by separating the sensor and the magnet and then clicking them back together. From there, make any necessary programming configurations on the panel. See the above information on Response Types and other programming settings.

If it is a wired door sensor with a hardwired VISTA Panel, then we recommend consulting this FAQ. You may also need to consult the VISTA 15P and 20P Programming Guide.

Honeywell vista 15p alarm control panel

2. How long do door sensor batteries last?

A wireless door sensor will typically require a battery replacement every three to five years. Wired door sensors do not use batteries, and they will never require a battery replacement.

Panasonic cr123a 3v battery

3. How close should the door sensor be to its magnet?

We usually recommend placing the door sensor magnet within a half inch of the sensor. Some sensors may allow for a greater separation distance than others before a faulted zone will occur. The closer the magnet is to the sensor, the less likely an unwanted fault or a false alarm is to occur.

Honeywell 5899 magnet for 5816 wireless door sensor and window s

4. Are there any encrypted wireless door sensors?

Yes, there are encrypted wireless door sensors. The Honeywell SiXCT, the Honeywell SiXMINICT, the Qolsys IQ DW MINI-S and the Qolsys IQ Recessed Door-S are all encrypted wireless door sensors.

Honeywell sixct wireless door slash window contact for lyric con

5. What is the best door sensor?

Please see the following FAQs:

Tags: , , , , , , , , , , , , , , , , , , , , , , , , ,

Comments