Service Announcements Posts

Posted By

Update 07/21/25: The Apple CarPlay integration is now available! You can see how to set it up in this helpful FAQ!

Apple CarPlay is designed to shift your attention from your phone to your car's built-in touchscreen, helping you keep your eyes where they should be – safely on the road ahead. Later this month, you can add the Alarm.com app to the growing list of apps available for use with Apple CarPlay.

The bad news is, far too many people are killed in traffic accidents caused by distracted driving. But, there's good news, too. According to the National Highway Traffic Safety Administration (NHTSA) that number has decreased steadily over the past few years. This decrease is likely due to options like Apple CarPlay, Android Auto, and other initiatives.

According to Alarm.com:

"We’re excited to announce that support for Apple CarPlay is on the way, empowering iPhone customers to effortlessly access their favorite smart security controls right from their vehicle’s display. With a simple, driving-friendly interface, they can stay focused on the road and connected to home, no matter where they go."

The addition of Alarm.com to Apple CarPlay is coming later this month, though an exact date has not yet been provided. In order to use Alarm.com with CarPlay, you'll need the latest app version, a compatible iPhone, and a vehicle or after-market stereo system that supports the feature.

What you can expect from the Alarm.com App in Apple CarPlay:

  • Receive critical alerts from your system straight to your vehicle's display.
  • Open and close compatible garage doors, simplifying your departure and arrival at home or work.
  • Activate custom scenes for Alarm.com-compatible automation devices.
  • Run Home and Away scenes for complete control of your system in one convenient location.

In conclusion, as technology like Apple CarPlay continues to evolve, it plays a vital role in reducing the dangers of distracted driving, contributing to safer roads for everyone. The upcoming integration of the Alarm.com app with Apple CarPlay is a prime example of this progress, bringing the convenience and control of your smart home security system directly to your vehicle's display.

This means you'll soon be able to manage alerts, control access, and activate scenes with simple, driver-focused interactions, keeping your attention on the journey ahead while staying connected to what matters most at home. Get ready for a safer and more connected driving experience when Alarm.com arrives on Apple CarPlay later this month.

Tags: , , , , , , , ,

Comments


Posted By

Up to now, Alarm Grid has never enabled Pro Video with Analytics on Alarm.com video accounts unless specifically requested by the customer. This feature comes with additional costs that we have always covered. Now that Video Motion Detection is no longer an option, we've changed our policy.

Although Alarm.com ended support for enabling Video Motion Detection on new accounts in February 2023, its effect on our video customers only became clear to us recently. One of our customers alerted us to an issue that highlighted the impact of this change, prompting us to institute this new policy.

Please note that this policy change does not affect the monthly monitoring price for Platinum (Self or Full) Monitoring or Standalone Video Monitoring. This adjustment is simply to ensure our customers receive the full monitoring experience they expect. Below, we'll discuss the differences between Video Motion Detection and Video Analytics.

Video Motion Detection (VMD)

Method of Detection: VMD detects motion by analyzing brightness and color changes in user-defined pixel areas within camera images, eliminating the need for a separate motion detector.

Configuration: VMD settings are configured using VMD windows, which are drawn by the user on a live video preview. Users can adjust the sensitivity (how much change is needed to trigger an event) and target size (the percentage of the VMD window that needs to be filled by movement) for each window.

Recording Rules: VMD recording rules can be created to trigger recordings when motion is detected in specified VMD windows. However, for some camera series, the option to choose specific VMD windows to trigger a recording is not available; any motion in any window will trigger a recording.

Best Practices: For effective detection, it's recommended to draw longer and narrower boxes, similar to tripwires, in areas where motion should trigger a recording. Avoid placing windows in areas with constant or insignificant motion like moving trees or reflective surfaces. VMD windows should not overlap, as this can lead to false activations. For outdoor cameras, creating lines or barriers with the available windows is suggested instead of one large box.

Limitations:

  • VMD may not always function properly due to environmental factors like flying insects, falling leaves, or precipitation.
  • Certain older camera models do not show the VMD window turning orange upon motion detection during configuration.
  • The VMD windows for certain cameras are not visible to your alarm dealer (for troubleshooting purposes) in the Partner Portal, even after they've been configured.
  • Sensitivity settings may affect all VMD windows for some camera models.

New accounts created after February 2023 will no longer have the option to create VMD recording rules, as Alarm.com is moving forward with Video Analytics as their primary motion-activated recording solution. However, accounts created before this date, and older cameras that only support VMD will continue to be able to use VMD, and support for it will continue.

Video Analytics

Method of Detection: Video Analytics continuously scans a property and identifies and classifies objects such as people, vehicles, or animals. It can understand traffic patterns and detect specific behaviors like loitering, or objects crossing virtual lines.

Configuration: Video Analytics rules are configured using virtual tripwires (to capture movement through an area) or ground zones (to capture objects lingering in an area). Users can define the area of interest and specify the duration an object needs to be in a ground zone to trigger a recording.

Recording Rules: Video Analytics rules offer more advanced options, including the ability to trigger recordings based on the type of object (person, vehicle, animal) detected. Existing VMD recording rules must be deleted before setting up a Video Analytics rule. Users can create up to three Video Analytics rules per camera, and ground zones and tripwires can overlap.

Best Practices:

  • For accuracy, avoid drawing tripwires or ground zones over objects that move on their own (like trees or shrubs) and only draw the rule where the feet or wheels of the object should cross.
  • It's recommended to observe the rule's detections and then adjust the Minimum Object Detection Size or recalibrate the camera if needed.
  • Proper camera placement (height, angle, distance) is crucial for Video Analytics to function effectively.

Additional Features: Video Analytics enables enhanced notifications with thumbnail images of the detected objects. It can also be used to control lights based on detected events. Features like Perimeter Guard™ (alert sounds and flashing LED) and Package Alerts for specific doorbells rely on Video Analytics.

Additional Content on Video Analytics:

Summary of Key Differences:

Detection Method: VMD detects motion based on pixel changes within a specified area of the camera's field of view, while Video Analytics constantly scans the camera's view, identifying and classifying objects using cutting-edge technology and machine learning.

Precision: Video Analytics offers more precise detection and reduces false triggers by accurately identifying specific types of objects.

Rule Capabilities: Video Analytics allows for more sophisticated rules based on object type and behavior (e.g., loitering, crossing a line), unlike VMD which primarily reacts to general motion within a defined area.

Notifications: Video Analytics provides more comprehensive notifications with thumbnail images and object classification.

Summary:

In essence, Video Analytics is a more advanced and intelligent method of motion detection when compared to VMD. While VMD can be effective for basic motion detection on older systems, Video Analytics offers greater accuracy, more options, and better control over what triggers recordings and notifications.

Compatible Cameras:

Cameras That Support VMD Only:

If you are moving into a home or business with existing cameras and plan to activate new Alarm.com service after February 2023, please note that the following cameras support only Video Motion Detection (VMD), not Video Analytics. With these specific models and possibly other older cameras not shown here, you will only be able to view live video remotely; creating recording rules is not possible.

Camera Name Image
ADC-VS1
Analog to IP Converter
1-Channel
ADC-VS420
Analog to IP Converter
4-Channel
ADC-V510
Fixed Lens
Indoor Camera
ADC-VS520IR
Fixed Lens
Indoor Camera w/IR
ADC-V610PT
Indoor Pan/Tilt Camera
ADC-V620PT
Indoor Pan-Tilt
Camera
ADC-V700X
Weatherproof
Day/Night IP Camera
ADC-V720
Outdoor PoE
Night Vision
Bullet Camera


ADC-V820
Indoor PoE
Dome Camera
ADC-V521IR
Indoor Fixed
IR Camera
ADC-V721W
Wireless Outdoor
IP Night Vision Camera
ADC-V821
Outdoor PoE
Night Vision
Dome Camera
2GIG HD100
Indoor 720P
Camera w/ Night Vision

Cameras That Support Video Analytics:

See the table below for cameras compatible with Alarm.com's advanced Video Analytics. Given its superior accuracy for detecting threats and gathering information about your property compared to Video Motion Detection, we strongly recommend upgrading if your cameras currently only support VMD. Start planning your upgrade today, you'll be glad you did!

Camera Name Image
ADC-V515
Indoor 1080P
Camera
ADC-V522IR
Indoor 1080P
Night Vision Camera
ADC-V523/ADC-V523X
Indoor 1080P Camera
with IR Night Vision
ADC-V622
Indoor 1080P Camera
with IR Night Vision and
2-Way Audio
ADC-V722W
Outdoor 1080P
WIFI Camera with
Night Vision
ADC-V723/ADC-V723X
Outdoor 1080P Camera
with IR Night Vision and
High Dynamic Range (HDR)
ADC-V724/ADC-V724X
Outdoor 1080P WIFI Camera
with 2-Way Audio
ADC-VC726
Outdoor 1080P
PoE-Capable
Mini Bullet Camera
with Night Vision
ADC-VC727P
Indoor/Outdoor 1080P
PoE-Capable Mini Bullet
Camera
ADC-VC728PF
Indoor/Outdoor 1080P
Varifocal Bullet Camera
ADC-V729 / ADC-V729AC / ADC-VC729P
Outdoor 4MP Floodlight Camera
ADC-V729 - Powered by 24V DC
ADC-V729AC - Powered by 100V - 240V AC
ADC-VC729P - PoE-Capable or 24V DC Powered
ADC-VC736
Outdoor 1080P Large Bullet
PoE-Capable Camera
with Night Vision
ADC-VC826
ADC-VC827P
Indoor/Outdoor 1080P
Dome Camera
ADC-VC836
Outdoor 1080P
Turret Camera with
Night Vision
ADC-VC838PF
Indoor/Outdoor 1080P
Varifocal PoE-Capable
Turret Camera
ADC-VC847PF
Indoor/Outdoor 1080P
Varifocal PoE-Capable
Dome Camera
ADC-VDB750
Full HD Wired
Video Doorbell Camera
ADC-VDB755P
Full HD PoE-Capable
Video Doorbell Camera
ADC-VDB770
Full HD Wired
Video Doorbell Camera
with High Dynamic Range (HDR)
ADC-VDB780B
Full HD 2MP Battery-Powered
(Rechargeable)
Video Doorbell Camera
Also available in a bundle with the
ADC-W115C Wireless Chime Module.
Some installations will require
the ADC-W115C to use this
video doorbell camera.
If a cameras in the above list has no link it's because it is discontinued and no longer offered by Alarm Grid.
Tags: , , , , , , , , , , , , , , , , , , , , , , , , , , , , , , , ,

Comments


Posted By

Time for the CellBounce to, well, bounce. This device, which served as a temporary bridge for AT&T customers clinging to their 3G communicators, is now being discontinued. For those who rely on CellBounce to convert 3G signals for use on the LTE network, it's time to consider the next steps.


Mark your calendars: as of May 1, 2025, AT&T will officially cease support for CellBounce devices on its network. This means if you're currently relying on a CellBounce to bridge the gap between your old AT&T 3G/4G communicator and the AT&T LTE network, it's time to upgrade.

Failure to upgrade to a new LTE communicator, or a new system before the deadline will likely result in a complete loss of communication, compromising alarm signals. This includes critical life-safety signals like fire and carbon monoxide alerts.

You may be wondering which communicator to choose. Below, we'll give you some suggestions for how best to move past the Resideo CellBounce and that old 3G/4G communicator:

Alarm Panel LTE Communicator Recommended
Replacement
Panel
New Panel
LTE Communicator
L3000 LTE-L3A (AT&T)
LTE-L3V (Verizon)
PROA7PLUSC PROLTE-A (AT&T)
PROLTE-V2 (Verizon)
Lynx Touch
(L7000
L5210
L5000
Panel Firmware
9.00.209+
required)
LTE-L57A (AT&T)
LTE-L57V (Verizon)
PROA7PLUSC PROLTE-A (AT&T)
PROLTE-V2 (Verizon)
VISTA-20P
VISTA-15P
VISTA-10P
LTEM-XA (AT&T)
LTEM-XV (Verizon)
LTEM-PA (IP & AT&T)
LTEM-PV (IP & Verizon)
LTEM-PXA (IP* & AT&T)
LTEM-PXV (IP & Verizon)
LTEM-PIA
(IP & AT&T UL Residential Fire Rated)
LTEM-PIV
(IP & Verizon UL Residential Fire Rated)
VISTAH3 PROLTE-A (AT&T)
PROLTE-V2 (Verizon)
VISTA-21iP LTEM-XA (AT&T)
LTEM-XV (Verizon)
LTEM-PA (IP & AT&T)
LTEM-PV (IP & Verizon)
LTEM-PXA (IP & AT&T)
LTEM-PXV (IP & Verizon)
LTEM-PIA
(IP & AT&T UL Residential Fire Rated)
LTEM-PIV
(IP & Verizon UL Residential Fire Rated)
Must Disable Internal Comm.
VISTAH3

VISTA-21IPLTE
PROLTE-A (AT&T)
PROLTE-V2 (Verizon)

LTE-21V (Verizon)
No AT&T Option Available
for the VISTA-21IPLTE


*The LTEM-PXA and LTEM-PXV are unique in that they can support either a wired Ethernet connection or WIFI. To use WIFI, either the PROWIFI (WIFI Only) or the PROWIFIZW (WIFI and Z-Wave) module must be added.

We realize upgrading to a new panel may be a big undertaking for a DIYer. We've got content on upgrading from a VISTA-20P to a VISTAH3 and on upgrading from several older panels to the PROA7PLUS:

If you fail to replace the Resideo CellBounce before the deadline, here's what you may experience:

  • Communication Failures: "Comm fail," or communication failure, means your alarm system's regular check-in with AlarmNet didn't happen and they sent a message to the monitoring station. These supervision check-ins usually occur daily or monthly. If a comm fail happens, the monitoring station will normally contact the alarm dealer, who will then contact you, though exact procedures may vary. For Alarm Grid customers with cellular communicators, these check-ins are typically set for every day. It is possible that your system is set as "unsupervised". If that is the case, your system might be incapable of communicating and neither you nor the monitoring station would know.
  • Trouble message on display. This issue can vary widely, depending on your panel type and supervision settings. When a cellular communicator is in use, there is a "cell fault time" setting within communicator programming. By default, this is usually set to 60 minutes. With this setting, if the communicator loses contact with the cellular network for 60 consecutive minutes, a trouble message is displayed by the panel. This means you'll likely see that there is a problem before your alarm dealer. This may be displayed as a bF or Check 103 depending on the panel and keypad used. If a CellBounce is the issue, the most effective way to clear this message permanently is to disable the cellular communicator in panel programming. This will effectively disable cellular reporting. A better option is to upgrade the communicator or the system.

If you happen to have an IP and GSM communicator, it is usually possible, depending on your communicator version, to disable only the cellular path for the communicator. This will leave the IP communicator working. This might be a temporary solution, until you can upgrade to a new LTE communicator, or a new system.

The CellBounce was always intended as a short-term fix for a long-term problem. Let's face it, some people just don't like being told they have to upgrade their stuff. I remember when the old 2G network shut down, I had family members who clung to their old phones right up until the bitter end! But eventually, we all have to move with the times. Funny thing is, those same family members wouldn't give up their smartphones without a fight today.

Tags: , , , , , , , , , , , , , , ,

Comments


Posted By

Give Back/Get Back is a program sponsored by electric utility companies in the US. During the summer, when electricity usage is at its peak, these companies offer an incentive for customers with smart thermostats to allow the adjustment of their thermostats during peak usage, lowering demand.

Our first blog about Give Back/Get Back (Demand Response) was in May of 2020. Now, over twenty electric utility providers participate in the program, with thousands of customers taking advantage of these incentives.

Here's how the Give Back/Get Back program typically works: On extremely hot or cold days, when energy demand surges, your utility company partners with Alarm.com to make small, temporary temperature adjustments in participating homes. These adjustments, usually no more than four (4) degrees Fahrenheit, may last up to four (4) hours.

The adjustment lowers the demand on the power grid and also saves you money by causing your electric air conditioning or heating usage to be reduced. Those who heat their homes using gas, wood burning stoves, or other non-electric means can still participate if they cool their homes using electricity and have a qualified, internet-connected thermostat.

The two newest areas participating in Give Back/Get Back are PJM Utility and the Tennessee Valley Authority (TVA). PJM Utility calls its program "Power Savers MidAtlantic" and the TVA calls its program "EnergyRight Smart Thermostat Rewards".

PJM Utility:

To participate under the PJM Utility program you must:

  • Be a resident of Ohio or Illinois and a customer of ComEd, Duke Energy Ohio, or AEP Ohio.
  • Have a qualifying, internet-connected smart thermostat.
  • Agree to allow the utility to adjust your thermostat setting during peak energy usage times.
  • Connect your utility account through the PJM Utility partners Voltus or Arcadia.

In exchange for their participation in the program, PJM Utility customers who sign up will receive an entry in a sweepstakes for $10,000. Each event that you participate in will give you another entry into the sweepstakes. You always have the option to choose not to participate in a temperature offset event in either program. For full details on the PJM Utility Power Savers Mid-Atlantic program, click here.

Tennessee Valley Authority:

  • If you live in the seven-state Tennessee Valley region you can check whether your utility is participating here. If it is, enroll your qualifying thermostat here.
  • Have an internet-connected, qualifying smart thermostat.
  • If your primary heat source uses electricity and you have electric cooling, you're eligible for the year-round program.
  • If you use natural gas, wood-burning, or any other non-electric powered heat, and electricity for cooling you can still participate in the summer-only program.

In exchange for your participation, you will receive a $65 enrollment rebate for both the year-round and the summer-only program. Year-round participants will then receive a yearly $65 rebate as long as they continue to participate or until the program ends. Summer-only participants will receive a $20 rebate per participation year for the life of the program. You can read the full details of the TVA program here.

Alarm.com calls this Give Back/Get Back, but each utility company has their own program name. If you haven't seen us write about your utility provider, you can check to see if they participate in partnership with Alarm.com by going to thermostatrewards.com and looking for your electric utility's name. If it is listed, click the link and find out about your potential rewards for participation and what's required to sign up.

If you don't have a smart thermostat yet, your utility's program page likely lists compatible models, and often provides discounted purchase links. Once you install and connect your thermostat through Alarm.com, you can easily enroll in the program. Remember, incentives vary by utility, so review your company's specific program details. Investing in a smart thermostat is a wise choice, often paying for itself quickly through energy savings and program incentives.

Supported Alarm.com Thermostats:

The list of supported thermostats can vary by utility company, but in this case, both PJM and TVA support the same list of Alarm.com compatible thermostats.

Tags: , , , , , , , , , , , , , , , ,

Comments


Posted By

If you must replace a PROA7 or PROA7PLUS* panel, it is important to perform not only the proper steps but in the proper order. Failure to do so may cause some PROSIX sensors to become unresponsive, forcing a replacement of those sensors. In this blog, we'll outline the proper procedure.

As we've often noted, Resideo's SiX Series and PROSIX sensors are uniquely paired to the alarm panel during initial panel and sensor configuration. Once paired, they cannot be used with any other panel until they are properly unpaired from the original. Without this unpairing, a failed original panel can potentially render a sensor unusable.

AlarmNet360 (AN360) acts as an important safeguard. When a PRO Series panel is registered with AN360, it begins near-constant two-way communication. Any programming change at the panel triggers an upload of the panel's configuration to AN360. This creates a backup of the panel's current programming, including the essential configuration information for all PROSIX sensors.

In the event of a PRO Series panel failure, a replacement panel can be configured with the exact same zone and system programming parameters as the original. The sensor information, including wireless channel data and encryption keys, is transferred to the new panel, ensuring it matches the existing sensor programming. By following the proper replacement process, the existing PROSIX sensors function seamlessly, unaware of the panel change.

However, a significant problem arises when DIY users add new PROSIX sensors to the replacement panel before a proper AN360-based panel replacement is performed. We've observed this issue on several occasions. Customers, awaiting a scheduled panel replacement, decide to add new PROSIX sensors in the interim.

Because the panel replacement requires dealer involvement, and in the case of Alarm Grid customers, a scheduled appointment with an Alarm Grid activator, customers often utilize their wait time by tinkering with their system. This can include adding new PROSIX devices.

When the scheduled replacement occurs, customers often overlook the newly added sensors, failing to mention them to the activator. This oversight, due to the unique way PROSIX sensors function, can create a serious conflict.

PROSIX sensors communicate using 2.4 GHz, similar to some WIFI networks. Like WIFI, PROSIX sensors utilize channels within the 2.4 GHz band. If a PRO Series panel detects interference on its current channel, it can instruct all PROSIX sensors to switch to a less congested one. This ensures the most consistent ongoing communication.

During pairing, encryption keys and the designated communication channel are established. All PROSIX devices on a PROA7 or PROA7PLUS panel operate on the same channel. This channel information is regularly backed up to AN360 and transferred to the replacement panel during the swap.

Consequently, AN360 holds a complete backup of the original panel's configuration. However, the new panel now contains configuration information for the recently added sensors, including new encryption keys and a potentially different 2.4 GHz channel.

During the replacement process, the new panel's configuration is overwritten with the backup from the original panel. The information for the newly added PROSIX sensors is lost. Effectively, the new panel becomes the original panel. Unfortunately, the new sensors were paired with the actual new panel, not the restored version.

Consequently, from this point there is no mechanism to instruct the newly added sensors to release or unpair, allowing them to be paired with the restored panel. There is a narrow 24 hour window from the time of enrollment where most PROSIX sensors can be defaulted. If the window for default is missed, and the replacement through AlarmNet360 is completed, the newly added PROSIX sensors become unusable. For that reason, we recommend anyone replacing a PRO Series panel follow these steps.

Recommended Steps, In Order, For Replacing a PROA7 or PROA7PLUS:

  1. Make sure the replacement panel is the same revision, or higher, as the original panel. Work with your alarm dealer to verify the panel versions. It is possible to replace a PROA7 with a PROA7PLUS. It is NOT possible to replace a PROA7PLUS with a PROA7.
    NOTE: Firmware updates require WIFI. If your location doesn't have WIFI you can use a phone as a hotspot. This will be seen as a WIFI connection by the panel and AN360, and should allow you to perform the update. Obviously, this means the panel will need a PROWIFI or PROWIFIZW.
  2. Make sure both panels are powered down.
  3. Your alarm dealer will begin the replacement process in AN360. They will instruct you when to move to the next step.
  4. With both panels still powered down, remove any modules such as PROLTE-A/PROLTE-V2, PROTAKEOVER, PROWIFI/PROWIFIZW from the original panel and install them into the new panel. If you have a PROTAKEOVER, be sure you move the backplate from the old panel to the new panel as well. It contains the antennas for the PROTAKEOVER.
  5. Power up the NEW panel. You can immediately join the WIFI network when prompted, if applicable, or wait for the cellular module to initialize then press NEXT.
  6. Press REGISTER, when prompted. The panel will register then pull all available programming from AN360. When this process is finished, the panel will display the Home screen.
  7. If any PROWLTOUCH or PROWLTOUCHC WIFI keypads are associated with the panel, each will prompt you to "Pair to Panel". Do this at each keypad.
  8. If the original panel was a Version 01 or 02 and there were PROINDMV Motion Viewers associated with it, these will have to be repaired with the new system. Your alarm dealer will give you specific instructions on what to do. The alarm dealer will need to go to each PROINDMV zone within AN360, select EDIT, then select LEARN. At that point they will tell you to activate the Motion Viewer. You can either remove the cover, or remove and replace the batteries. The PROINDMV will then be repaired.
  9. Thoroughly test each component including zones, keypads, keyfobs, communicators, etc. Use the system test mode.
  10. It is now safe to add new PROSIX devices to the panel.
  11. If you're using BlueTooth Disarming, all cell phones will have to be manually paired with the new panel.
  12. If you used Alexa with the original panel, you'll need to set that up manually with the new panel.
  13. All Z-Wave devices that were paired with the original panel will need to be excluded then included with the new panel.
  14. All Total Connect 2.0 scenes will need to be recreated.

Resideo recently announced they would discontinue the Honeywell Home PROA7PLUS and would continue to produce the Resideo PROA7PLUSC. We now use PROA7PLUS and PROA7PLUSC interchangeably.

Tags: , , , , , , , , , , , , , , , ,

Comments


Posted By

We've all been there: you step out the door, and your phone instantly buzzes with camera notifications. If you're using Alarm.com's recording rules, you'll love this update! Now, you can set a delay of from 1 to 30 minutes before those recordings start, cutting down on nuisance notifications.

Alarm.com continues to enhance its user experience with a new recording rule setting that minimizes unnecessary notifications and maximizes video storage. By allowing users to delay recordings during exit, nuisance clips are reduced, freeing up valuable upload capacity within monthly video plan limits and ultimately saving users money.

This new delay feature is compatible with all Alarm.com cameras that support modern video analytics. Older, first-generation analytics cameras, while still functional on some accounts, do not support this feature.

Configuring the recording rule delay is...unique. We've outlined the steps below in an effort to provide clarity. You can apply this setting to both new and existing recording rules. Refer to the screenshots provided for a visual guide on enabling the delay within the rule settings.
To navigate to this section via the customer website:
  1. Log into your Alarm.com account.
  2. Click Video.
  3. Click on Recording Rules (at the top, in the blue bar).
  4. Click +Add New Rule, or find the rule you want to edit in the list, then click the pencil icon.
  5. In the section titled "Recording Rule" fill in the appropriate information. In the section for "Except when.." select "Disarmed", "Armed Stay" or both.
  6. Select the Exit Delay Time from the dropdown.
  7. Be sure to Save before exiting.

Programming the Video Rules Exit Delay via the customer website:


To navigate to this section via the customer app:
  1. Open the Alarm.com app and log in.
  2. Tap Video at the bottom of the screen.
  3. Tap the gear icon at the top right.
  4. Tap Recording Rules.
  5. Tap Add at the upper right, or scroll through the list of recording rules, find the one you want to edit and tap the pencil icon.
  6. Tap Next in the upper right once the first screen is properly configured, then scroll down to the Recording Rule section.
  7. In the "Except when.." section, select "Disarmed", "Armed Stay", or both.
  8. From the dropdown, select the Exit Delay time.
  9. Be sure to click Save before exiting.

Programming the Video Rules Exit Delay via the Alarm.com app:


Actually, the setup itself is not the tricky part. It's understanding what will happen, and when, that's a little confusing. So, here's the logic. This information was provided by Alarm.com Core Technical Support:

  • If you select "Except when Disarmed" and choose a delay from the dropdown, the recording rule will start after the delay time whenever the system is Armed Away or Stay.
  • If you select "Except when Armed Stay" and choose a delay from the dropdown, the recording rule will begin after the delay time when the panel is Disarmed or Armed Away.
  • If both "Except when Disarmed and Armed Stay" boxes are checked and a delay is selected, the recording rule will begin after the delay when the panel is Armed Away.

I'll confess, I haven't quite wrapped my head around this logic. I've found it's best if I don't overthink it! Hopefully, they'll tweak the wording and make it a little more clear somewhere down the road. Regardless, even with a slightly confusing setup, this is a fantastic addition, and I can't wait to try it out on my own system!

Tags: , , , , , , , , , , , , , , , , , , , , , , , , , , ,

Comments


Posted By

Resideo has released several MyWebTech Technical Notifications this week. Technical Notification #119 announces a firmware update for PROSeries panels and PROWLTOUCH touchscreen keypads. Notification #121 addresses a firmware update for some legacy AT&T communicators. No action is required.

Technical Notification #119:

Technical Notification #119 announces a recommended firmware update for all PROA7, PROA7C, PROA7PLUS, PROA7PLUSC, PROWLTOUCH, and PROWLTOUCHC products. The panel firmware will be updated to version 03.2306.55, and the touchscreen keypads will be updated to version 3.424.34. This update improves WIFI connectivity between the panel and keypad.

It's important to remember that these panels cannot perform firmware updates using only an LTE cellular connection. A WIFI connection is required to download and install new firmware. This is why we strongly recommend installing a PROWIFI or PROWIFIZW module and connecting the panel to WIFI. If the panel won't use WIFI and you don't have touchscreen keypads, this update is not necessary.

Resideo is shipping updated units to their distributors. In the meantime, new panels will automatically receive any necessary firmware updates during activation and registration, provided a WIFI communication path is available.

If you have a PROSeries panel or touchscreen keypad, no action is needed. Resideo will automatically push the new firmware to all connected panels with a WIFI connection. The panel or keypad will reboot to install the update, so please be aware of this brief interruption.

In order to receive the firmware update, the product must meet this criteria:
  • Have a WIFI connection.
  • Be in a Disarmed state.
  • AC must be present.
  • Must not be in the process of reporting a signal.
  • Must not be in Walk Test Mode or Programming Mode.

Technical Notification #121:

The products affected by this notification are a little more obscure. The models affected are the LTE-IA, LTE-IC (Canada), LTE-XA, LTE-XC (Canada), LTE-CFA (Commercial Fire), and HWF2A-COM (Commercial Fire, Dialer Capture). Alarm Grid currently does not sell any of these products.

The affected AT&T communicators will receive firmware update 20.00.549.1 and AppZone firmware HW.00.1-25. These updates improve cellular connectivity with the AT&T network.

This firmware addresses minor connectivity issues reported with these units. Resideo will begin pushing the update en masse on the week of February 24, 2025. You can also manually request the update by triggering a test. For the LTE-IA and LTE-XA, briefly pressing and releasing the tamper switch initiates a test. Commercial fire products have a test button near the center of the communicator board.

During and after the update, the communicator may report the following signals:

Contact ID Code Description
E365 Cell Software Update Start
R365 Cell Software Update Finished
E366 Cell Software Update Failed
Tags: , , , , , , , , , , , , ,

Comments


Posted By

Multiple sources have recently distributed notices regarding the Rogers 3G network. Rogers plans to sunset the 3G network on July 31, 2025. This differs from the original planned sunset on March 31, 2025. Once the network has been shut down, Rogers 3G communicators will soon begin to fail.

AT&T and Verizon ended their 3G service in 2022, but Canadian customers have had a few extra years to upgrade their devices. Now, Rogers is focusing on improving its faster LTE and 5G networks and needs to shut down the older 3G equipment.

If your system uses a Rogers 3G cellular communicator, you'll need to update it soon. Without an upgrade, eventually your system will not send alarm signals, including life-safety signals like fire and carbon monoxide alarms. This will also cause the system to display error messages.

Alarm Grid is here to help our Canadian customers upgrade their alarm systems before the Rogers 3G network shutdown. We'll be contacting you to discuss your upgrade options. Depending on your system, you may need a full upgrade or just a communicator upgrade. We'll work with you to find the best solution.

If you're not an Alarm Grid customer, we still offer a wide variety of FAQs geared toward upgrading systems and communicators. if you go to alarmgrid.com you'll find a list of these FAQs. You can also use the search bar at the top of the page to perform your own search with more specific criteria.

If you have an alarm system that is currently not monitored, or if you're not satisfied with your current service, Alarm Grid offers low-cost, no-contract monitoring plans for most systems. If you're interested in signing up for monitoring, but you're unsure whether we can monitor your system, reach out to support@alarmgrid.com.

Let us know what system you have, and if you're not sure, send us a picture of the system. From there, we may ask for more information. Once we know your system type, and whether we can access the required programming, we'll let you know if we can monitor your system. From there, you can sign up for monitoring.

If you sign up for a Self-Monitoring Plan, once the system or communicator has been upgraded and the required information has been provided, we'll create your account and email you with the login information.

If you sign up for a Full-Monitoring Plan you'll set an appointment for activation. You'll need to install the new communicator or system prior to your activation appointment. If you need support during that time, you can call us at 888-818-7728 (M - F, 9:00 am - 8:00 pm EDT). You can also email us for support, or use our chat support feature during regular business hours.

We'll give you the knowledge you need to replace any equipment necessary. You can purchase that equipment from Alarm Grid or, if you prefer, from other suppliers. Once your system is registered, we'll perform any required testing, discuss any monitoring details for Full-Monitoring Plans, then wrap things up.

Tags: , , , , , , , , , , , , , ,

Comments


Posted By

As we close out 2024, our offices will be closed on Tuesday, December 31, 2024, and Wednesday, January 1, 2025. I'll be practicing writing and typing 2025 instead of 2024, how about you? Although tech support will be closed, our central station partners will be on the job, ready to respond.

The year 2024 was pretty low-key in our industry. There were a few notable things, and we'll recap those here:

January:

In January, Alarm.com announced that because of changes T-Mobile made within their network, customers who formerly received MMS notifications for video events with a thumbnail, would begin receiving SMS messages with a link instead. You can read the full post here.

February:

The big news in February was a nationwide AT&T carrier outage that affected cell phone users and alarm communicators alike. As a carrier outage, both AlarmNet and Alarm.com customers were affected. According to the FCC, AT&T implemented "a network change with an equipment configuration error" that caused the issue. You can read the original blog post here.

March:

Among other things, in March we told customers how they can request new products for Alarm Grid to offer. You can click this link to request a product. For a full rundown on the required information, check out the post.

2024 seemed to be the year of the squatter, and we discussed ways to use an alarm system, particularly one with video support, to thwart this unique threat. Check out that post.

April:

April is ISC West month. As you may know, ISC West is the largest US trade show for the security and survaillance industry. It takes place in spring each year in sunny Las Vegas. Each manufacturer comes to the show with their best new offerings. We recapped some of those offerings here.

May:

In May, I set out to educate myself, and hopefully you, about Matter, the official Internet of Things (IoT) protocol. A new version of Matter was released in May, that drew quite a bit of attention. You can read about that, and matter in general, here.

June:

In June, I attempted to educate our readers on the joys of using B-connectors, sometimes referred to as beanies or "Dolphins". Since Dolphin is a brand name, we choose to refer to them as beanies. You can read our post on using B-connectors here.

I also posted about the potential danger of the "Shutdown System" menu option in the Resideo PROA7PLUS series panels. In short, it's best not to select that option. You can read the full post here.

July:

In July, Alarm.com rolled out their "Alarm Triggered Warning Sounds" feature. This is a configuration option that causes compatible cameras to emit an audible warning sound when a burglary alarm occurs. You can read all about this feature in this post.

Another global IT outage affected customers in July. On July 19, the now infamous "Crowdstrike Outage" for Windows systems occurred. This affected not the communicators that send signals, but the servers that receive and process them. You can read about the outage and what caused it in this post.

July was a big month! Rogers announced their plans to sunset the 2G/3G networks in Canada. The sunset is coming March 31, 2025, so if you're a Canadian customer with a Rogers communicator, prepare yourself! You can read more here.

August:

In August, Alarm.com released the "Alarm Mode" feature. Meant to make responding to an alarm as quick and easy as possible, Alarm Mode groups all alarm activity together on a single card that shows up on the customer dashboard when logging into the Alarm.com app. Read the full post for details.

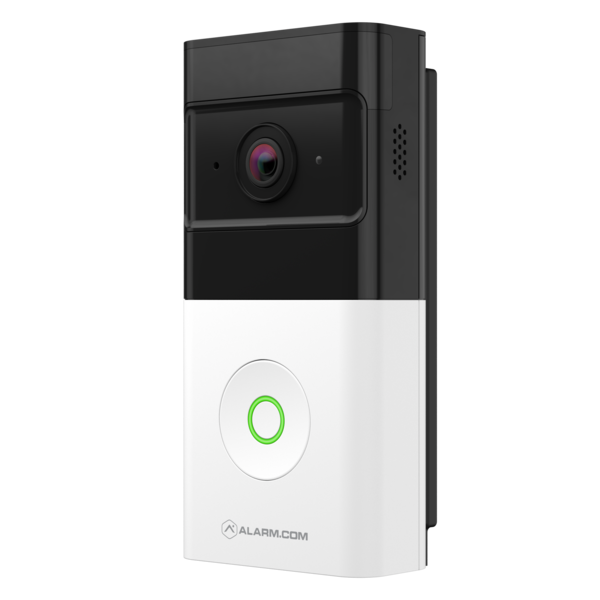
On August 13, Resideo/First Alert put a quality hold on all VX1 video doorbells due to a problem with battery charging. A firmware update resolved the issue and the doorbell is again available. You can read that post, with updates, here.

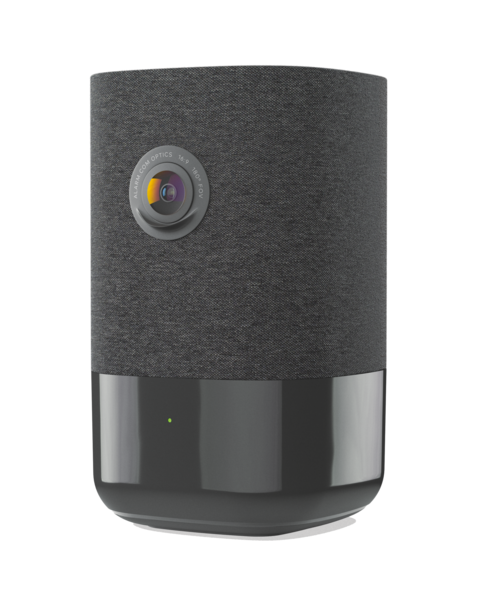
Alarm.com released an all-new floodlight/camera combination unit called the ADC-V729. This product fills a previously underserved niche in the market. It comes in an AC, a 24 VDC, and a PoE version. Read all about it here.

Resideo announced in August that they were transitioning all SkyBell Video Doorbell users to a new backend via a firmware update. This occurred because of changes with the underlying SkyBell platform. You can read about that update here.

September:

In September, we wrote about a mandatory firmware update for older Total Connect 2.0 cameras. Any affected camera that failed to receive this update would no longer work with Total Connect 2.0. Cameras had until October 31, 2024 to properly update cameras. Read the full post for details.

On a more personal note, Alarm Grid rolled out our new CRM (Customer Relationship Management) platform in September. It has definitely been an adjustment, and we had a bit of a backlog of support tickets at first, but we're hitting our stride with it now. You can read about that here.

On September 27, we began preparing for Hurricane Helene. Some of our employees are located in Florida, so hurricanes often affect us both personally and professionally. You can read that notice here. We also discussed the effects hurricanes have on alarm system efficacy here.

October:

Alarm.com introduced some new Apple Widgets in response to Apple retiring the Alarm.com Today widget earlier in the year. There were two available widget options and you can read about those here.

Alarm Grid announced the new Alarm.com ADC-SVR210. Since this is not a rack mounted SVR (Stream Video Recorder) it's more of a residential than a commercial offering, though it can certainly also be used in a small business. An SVR works in conjunction with Alarm.com cameras to allow a user to record video 24/7. You can read about the launch here.

November:

In November, CMS, our central station partner for US-based customers, reported an uptick in their calls being blocked. If you have an alarm, and the monitoring station's call to you is blocked, you can't verify if the alarm is false or not. That will almost always result in a dispatch of authorities, unless you have some other specific instructions on file. Read about the issue in this post.

December:

December seems to be the month when everyone jumped on the two-factor authentication (2FA) bandwagon. Alarm.com jumped too, and now all Alarm.com customers are asked to set up 2FA. Interestingly, not only does Total Connect 2.0 not require 2FA, they don't even offer it. I've emailed them for information on why, and I'm waiting for a response. Here's our blog on Alarm.com requiring 2FA.

That's 2024 in a nutshell. It may not have been a monumental year, but it was also nothing to sneeze at. I hope you've enjoyed reading along with me throughout the year, and that you enjoyed this little trip down memory lane. As I always say, stick with me and I'll get you through this troubled world!

If you need to contact either central station while we're out, the information to do so is below. Alarm Grid fully-monitored customers in the United States should contact CMS, while Canadian-based customers should contact Rapid Response.

Alarm Grid Central Station Monitored Customers in the US Contact CMS

  1. Call 888-818-7728, choose Option 9 to contact the monitoring station.
  2. Provide your name and address.
  3. Provide your False Alarm Password. This is the password you chose when you set up monitoring. This is the word that means "Everything is OK." If you provide the wrong word or phrase, or if you provide the Duress Password (the one that means "I'm pretending everything is ok, but I really want help!" then the operator will dispatch authorities.
  4. Let the operator know the reason for your call. Provide any additional helpful information and answer any questions they may have.


Alarm Grid Canadian Central Station Monitored Customers Contact Rapid Response

  1. Call (800) 932-3822 and follow any prompts provided. Depending on availability, you may reach a person immediately, or you may be provided with menu prompts.
  2. Provide your name and address.
  3. Provide your False Alarm Password. This is the password you set up during your activation appointment. It means "Everything is OK." If you provide the wrong information, or if you provide the Duress Password, the one that means "I'm saying everything is OK, but I really want you to send help." the operator will dispatch authorities.
  4. Discuss the reason for your call with the operator.

If you're attempting to make changes to your call list, zone list, or other account related information, the monitoring station can't help you with those items. You'll need to contact us when we're back in the office. The best way to do that is to email us.

Our email address is support@alarmgrid.com. If you're emailing to make account changes, please provide your False Alarm Password, or the last four (4) digits of the credit or debit card we have on file. This will speed up our response and prevent unnecessary back-and-forth emails.

Tags: , , , , , , , , , , , , , ,

Comments


Posted By

Beginning on October 8, 2024, Two-Factor Authentication (2FA) is mandatory for all new Alarm.com accounts. Existing accounts are being moved to the new standard, with 100% of accounts using 2FA by December 19, 2024. If you're an existing Alarm.com customer, you may have already been updated.

Two-Factor Authentication, also known as Multi-Factor Authentication (MFA) works like this. You log into an app or a website with your customary username and password. You're then prompted for further authentication via a text message, email, or third-party authenticator app. During the initial 2FA setup, you can choose one or more of these authentication methods.

Via the path of your choice, you'll receive a code. You'll input the code at the prompt, and then you're logged into the app or website. For Alarm.com users, you will be prompted to make the browser or device a "Trusted Device". If you say yes to this prompt, then you may not be prompted for 2FA the next time you log in using that browser or device.

To quote The Dude, there are, "a lotta ins, a lotta outs, a lotta what-have-yous" here. For instance, if you trust your browser but clear your cache later, you'll need to go through 2FA again next time. If you choose "Skip" at the prompt about trusting the browser, then you will have to go through additional authentication every time you log in until you choose to trust the browser.

This may seem like a real hassle, but let me share a story about someone who skipped enabling 2FA because they thought it was too much trouble. A friend of mine did not secure their account with a large retailer. When offered the option to set up 2FA, they always skipped it.

Their account was hacked and the hacker set up 2FA. They entered a phone number to receive verification codes. My friend was eventually able to change the password for the account with the retailer's help. But because 2FA had been set up with a phone number inaccessible to them, my friend was unable to regain full access. The fraud department for the retailer was unable or unwilling to do anything, so my friend lost years of purchase history. Had they set up 2FA to begin with, this could not have happened.

Fortunately, the scenario I described above can't happen to Alarm.com customers. If you're an Alarm Grid customer and you need help with 2FA for one of your logins, contact us. We'll verify that it's you with either your password or the last four (4) digits of the card we have on fie for billing, then we'll help you reset your 2FA credentials.

After we Reset 2FA for the login through the Alarm.com Partner Portal, the user will be prompted to set up 2FA again the next time they log in. This might be necessary because the user's phone number changed, or the phone carrier changed, or because the user no longer has access to the email used to set up 2FA to begin with. If you're not an Alarm Grid customer, contact your alarm dealer for assistance with Two-Factor Authentication.

Alarm Grid technical support is available Monday-Friday from 9:00 am to 8:00 pm EST at 888-818-7728 Option 2. If it's outside business hours you can send us an email at support@alarmgrid.com. For 2FA assistance, let us know and provide either your false alarm password, or the last four (4) digits of the credit or debit card we have on file for billing. Then, let us know which login you need help with, if your account has more than one. This will expedite our response.

Tags: , , , , , , , , , ,

Comments