If you're in the market for a new home security system, you are likely faced with the decision to go hardwired or wireless. Both options have their merits, but it really comes down to the needs of the user. But we will say that in most cases, a homeowner will want to go the wireless route.
That's not to say that hardwired home security systems aren't right in certain situations. It's just that they offer greater challenges than wireless systems. Most users will want the convenience and ease-of-use that hardwired systems simply cannot offer. Perhaps the most obvious factor is that wireless systems are much easier to install and get started with than hardwired systems. This can be very important for DIY users who don't want to hire a professional installer.
Many wireless alarm systems can be installed without even drilling any holes. Although they can certainly be mounted, most wireless systems support desk stands that allow them to be conveniently rested on any desk or table. Wireless systems can also be readily used with wireless sensors. These sensors can often be mounted using double-sided foam tape, thereby eliminating the need to drill holes.
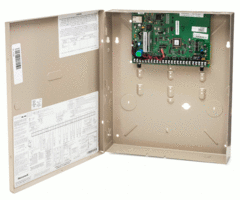
On the other hand, a hardwired system will almost certainly need to be mounted. These systems provide ready support for hardwired sensors. Any hardwired sensor will need to have a wire that is connected directly with the system. This can mean running wires across the entire premises for a complete hardwired setup. Although most wired systems can be configured to use wireless sensors, they will usually require a separately purchased wireless receiver to make this possible.
 The next consideration that a user should make is the ease of use for the system. Most users find that wireless panels are much easier to use and program. These systems often feature built-in touchscreen controls and menus that are easy to navigate. With some minor instructions, an end user will be able to set up their wireless system in its entirety. Additionally, the touchscreen navigation will make it easier for the user to perform basic system functions like arming and disarming. This can be very important for users who aren't always the most tech-savvy.
Hardwired systems function differently. These panels typically use external hardwired keypads that are wired-in directly to the panel. Although there are some wired touchscreen keypads, most wired keypads are of the push-button variety. This means that a user will have to enter-in various codes to perform basic system functions. The menus will not be as easy to navigate, and deep-level programming will often require the use of an intricate and sophisticated programming guide. In fact, many users of hardwired systems do not even attempt programming, and they leave the task to a professional installer.
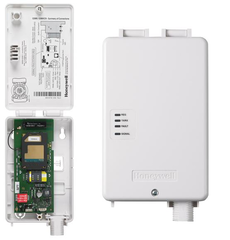
Another advantage that wireless systems offer is that they usually come more "ready" than hardwired systems. That is, wireless systems typically require fewer add-ons than hardwired systems. Many wireless systems come ready-to-go right out of the box. As mentioned earlier, these systems come with integrated touchscreen controls so that no external keypad is needed. Wireless panels also come with built-in wireless receivers so that they can support wireless sensors. If a user wants to use wireless sensors with a hardwired system, they will almost certainly need to add a wireless receiver. Modern wireless panels will also usually come with some type of communicator so that they can readily connect with a central monitoring station. But please note that many wireless systems will still need to have a cellular communicator added for cellular monitoring services.
Hardwired systems don't come nearly as ready. Virtually every system function for a hardwired panel will require some type of add-on. Even basic functionality will require an external keypad. And hardwired systems almost never come with a built-in communicator. Instead, a separate communicator will need to be added and installed if a user wants reliable connectivity with a central station or an interactive service platform like Total Connect 2.0 or Alarm.com.
One area where wired systems do reign supreme is adding value to the property. A hardwired system with wired sensors will essentially integrate in with the building itself. This is something you can actually list when selling the building, and it can certainly increase the property's resell value. But a wireless system is not necessarily considered a fixture in the home, and it will not add to the home's value.
However, the upside is that wireless systems can be taken to a new property much more easily than wired systems. The user will just need to unplug the panel, dismount their sensors, put them in a box, and bring them to their new house. But for hardwired systems that have wires running throughout the building, the process is much more challenging. Many wires and sensors may be inaccessible, and a professional might need to remove them. For that reason, it's not much of a surprise that a user will often leave their hardwired system behind when moving to a new property. As mentioned earlier, this can provide the added benefit of increasing the home's resell value.
One final consideration is that wired systems usually require less maintenance than wireless systems. Wired sensors use power provided from the panel, and they will almost never require any type of maintenance. In other words, once a hardwired system has been installed and programmed, a user will almost never need to make any adjustments. The only thing they will need to worry about is replacing the panel's backup battery every few years.
But the wireless sensors that are used with wireless systems cannot receive power directly from the panel. Instead, these sensors rely on internal batteries that must be replaced every few years. If a user has many wireless sensors, they can expect that they will need to replace many sensor batteries at some point in the years to come. Fortunately, the wireless panel will let the user know when the sensor batteries are low and in need of replacing. It's also important to remember that most wireless sensors offer fairly impressive battery lifespans, and batteries will not need to be replaced very often. But this is still more maintenance than what is required with wired systems.
Consideration
|
Winner
|
| Ease of Installation
|
Wireless Systems
|
Ease of Use
|
Wireless Systems
|
| Readiness
|
Wireless Systems
|
| Adding Property Value
|
Wired Systems
|
| Bringing to New Location
|
Wireless Systems
|
| Required Maintenance
|
Wired Systems
|
In conclusion, most users find that wireless alarm systems are the superior option for home security. They are easier to set up and use, require fewer add-ons and are easier to bring to a new location. But a user might prefer a wired system in situations where they want to add to the property's value or if they want a system that requires as little maintenance as possible.
If you still can't decide between a wired or wireless system, feel free to reach out to us for help! You may email us at any time at support@alarmgrid.com. Or if you prefer to call us, you can reach us at 888-818-7728 from 9am to 8pm Monday thru Friday. We look forward to hearing from you!


 In addition to being more convenient and easier to install, there is one other major advantage that wireless systems offer over wired systems. That is, wireless systems cannot be as easily tampered with. A hardwired sensor can have its line to the panel cut by a potential intruder so that it no longer functions properly. Of course, when this happens, the hardwired system will recognize this and trigger an immediate trouble situation. This makes this a relatively minor security concern. But it would still be very inconvenient to have to rewire the sensor and make sure that its working order has been restored.


 If you aren't familiar with