Total Connect 2.0 Posts

Posted By

Update 02/06/24:

Per Resideo, they first began seeing this issue back in April 2023. They were able to determine that the Total Connect 2.0 server was creating and sending the notifications properly. They checked with the receiving carrier, in this case, Telus, and found that Telus had blacklisted TotalConnect2.0@alarmnet.com as SPAM. Therefore Telus was not delivering these notifications. This will affect SMS and Email notifications only.

For those Canadian customers who have complained of this issue, contacting Telus and asking them to whitelist totalconnect2.0@alarmnet.com has resolved the issue. This will also affect Canadian users of the Rogers service. Both Telus and Rogers appear to use the same intermediate SMS provider.

Original Post:

Alarm Grid has had reports from our Canadian customers that they are not receiving notifications from Total Connect 2.0. After checking with Resideo, we have confirmed there is an issue, and they are currently working with Telus to resolve it. We don't have an ETR. Check back for updates.

This is a recent development, though we haven't received any details from Resideo yet as to when the issue began. It seems to affect text, email, and push notifications to recipients in Canada. When we have more details, we will provide updates here. Rest assured this does not affect your system's ability to send alarm signals. Any signals generated by your system will be processed normally.

Tags: , , , , , , ,

Comments


Posted By

Resideo recently applied an update to the wording of Total Connect 2.0 notification messages. Where, originally they referred to the alarm system by name, they added the word "Installation" to the message. After complaints, they have returned the messages to their original wording.


These updates exclusively affected SMS, email, and SMS-to-email notifications. Consequently, if you rely solely on push notifications through your iOS® or Android® device, you might not have noticed any difference. However, for those who receive SMS, email, or SMS-to-email notifications, you may have noticed these changes in recent days.

The primary concern that most users seemed to have revolves around the term "Installation." This led to some confusion, and coupled with other modifications, such as displaying the user number instead of the user name when a system is armed and disarmed, the update garnered a negative reception. I believe there's an opportunity to combine elements from each of these formats to craft a more well-received message that users would find favorable.

It is undeniable that the updated format offers a concise, but complete message, whereas the original format, to me, seems a bit jumbled. As an alarm professional, I can parse the jumble pretty easily, but I imagine an end-user took a little time to become accustomed to this messaging format. Having acclimated, when users were provided with a somewhat improved, more complete, message they balked.

I would like to see a format similar to the example shown below. Remember that the location name provided in these notifications comes from the name you've given your system in the Locations section of the Total Connect 2.0 website. Particularly, if you have multiple locations, it's important to name each one so that it's easily distinguishable when you receive notifications. Not to mention, when you log in to control your systems or check their status.


If you need to edit the name of your system, you can easily do so by logging into Total Connect 2.0 from a browser. In the Menu list to the left, click on Locations, then click the down arrow to the right (ours is shown as an up arrow because we've already clicked on it in the screenshot below) of the current location name to expand the selection, then click on Edit and enter the name you want to use. Be sure to "Save" when you've finished.


If you're a Total Connect 2.0 user, did you notice any difference in your recent notification message format? If so, did you notice when they were switched back to the original format? Which format do you prefer? If you have a format idea that you think is better than the one we proposed above, share it with us. We'll be happy to pass it along to Resideo.

Tags: , , , , , , , , ,

Comments


Posted By

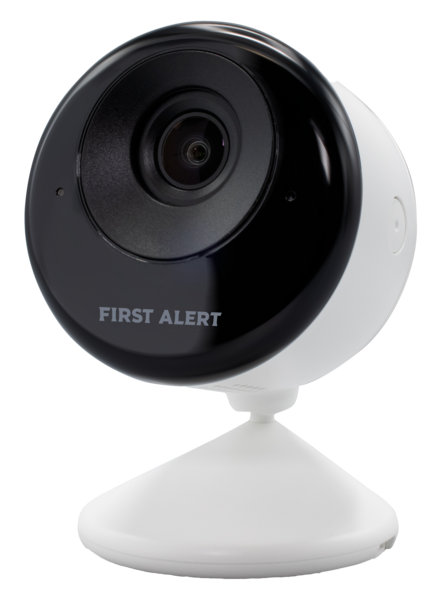
The First Alert VX3 HD (CAMWE-WO) is the newest camera offering from Resideo and Honeywell Home using the First Alert brand name. It offers full HD viewing and recording and supports Wide Dynamic Range (WDR). Its built-in speaker and microphone support 2-way audio through the TC2 app.

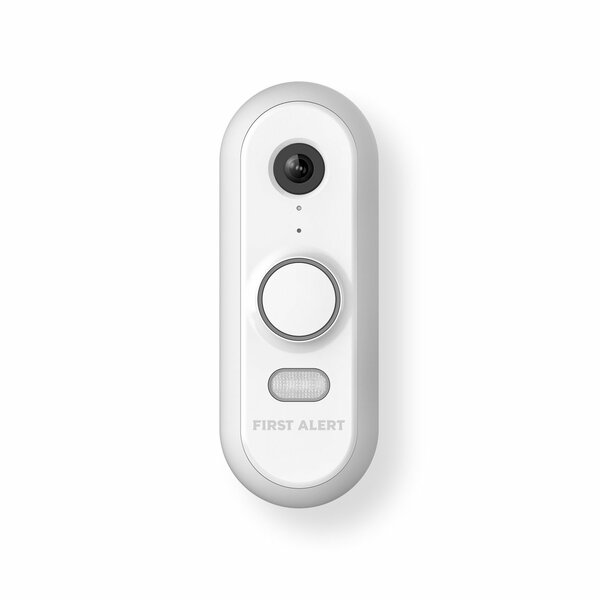
Resideo completed the purchase of First Alert in 2022 and is now beginning to roll out products using the First Alert name. So far, we've seen the First Alert VX1 HD (CAMW-WDB) HD doorbell camera, and now the VX3 HD. First Alert brings with it end-user brand recognition, as well as manufacturing capabilities for life safety and other devices.

The newly introduced VX3 HD boasts a sleek, modern design and a compact form factor. A notable advancement in this camera, compared to earlier TC2-compatible models, is its intelligent event detection capability. This sophisticated AI-driven feature distinguishes between people, vehicles, animals, and packages effectively reducing unnecessary alerts. This functionality is present in both the VX3 HD camera and its counterpart, the VX1 HD video doorbell.

Another exciting feature of this new outdoor camera is the ability to use Power over Ethernet (PoE). Because the VX3 HD also supports WIFI, it can be powered by a 12VDC, 1A power supply. But, if you plan to use an ethernet connection for networking, you may as well take advantage of its PoE capabilities. The VX3 HD is an 802.3 af PoE class 3 PD. The maximum cable length when using PoE is 300' (100m).

The First Alert VX3 HD offers many impressive specifications. You can read the full spec sheet here. One thing we haven't discussed yet is Wide Dynamic Range (WDR). You may be wondering what the difference between High Dynamic Range (HDR) and Wide Dynamic Range (WDR) is.

Both HDR and WDR have to do with the contrast and resolution in images that have both very dark and very light areas. HDR uses processing power and software to take these images and perfect them, as much as possible, so that the viewer can get the most detail possible from the image. With HDR, it's all software-based.

WDR uses both hardware and software to achieve the same goal. One example of how this occurs is that shutter speed is controlled by the camera, so that in areas where there is an abundance of light, shutter speed is faster, allowing less light into the camera, and in darker areas, shutter speed is slower, to take in more light. In many cases, multiple images are taken with different exposure levels and then combined to provide you with the best possible image.

A custom back box is available for installations where in-wall wiring is not possible, or for anyone who needs additional space to protect cables. The CAMWE-WOBB replaces the standard mounting bracket and is installed behind or beneath the camera. It can support up to three (3) 1/2" (1.27cm) conduits. It has rubber grommets that can be used to protect any conduit space that is not being used. With an IP66 rating, the back box is dust-proof and water-resistant.


Alarm Grid customers who want to take advantage of all the advanced features of the VX3 HD will need to sign up for either a Platinum Plan (Self or Full) or a Stand-alone Video Plan. This camera is compatible with Total Connect 2.0, and can also be viewed through the Honeywell Home PROA7PLUS or Resideo PROA7PLUSC touchscreen. As long as the panel is on version 03 or higher. It can also be viewed on the PROWLTOUCH or PROWLTOUCHC secondary keypad when used with one of these panels.

Up to eight (8) cameras can be added to each monitoring plan that supports cameras, and each First Alert VX3 HD counts as one (1) camera. Full access to the camera, including the 2-way audio feature, is accessible through the TC2 app. The website does not support 2-way audio, and will only allow you to view the camera's live feed and captured video.

The 2-way audio feature allows the user to listen in to ambient sound in the vicinity of the camera, and to speak through the camera to anyone within view. This feature can be used to deter potential burglaries, scare away stray animals, or play tricks on your friends. There is also an LED spotlight and siren feature that can be deployed manually by the end-user to deter intruders in the vicinity of the camera.

Tags: , , , , , , , , , , , , , ,

Comments


Posted By

Total Connect 2.0 now offers a server-to-server integration with Genie® and Overhead Door™ garage door openers. This allows you to control your alarm system, automation devices, and garage doors from a single app. No more fumbling between apps to control both your alarm system and garage door.


The new Genie® and Overhead Door™ server-to-server integrations join Chamberlain and LiftMaster as well as several others. Between these server-to-server options and the Z-Wave options for garage door control, you can now operate nearly any garage door from the TC2 app. This makes it much more convenient when attempting to control multiple systems at once, such as when you are arming your system to leave, or disarming your system to return home, and you also need to control the garage door.

This integration doesn't allow for the automation of the garage door, sadly. It provides manual control only, but it is still a worthwhile integration because it simplifies the process of leaving and returning, which most of us do each day, multiple times per day. To set up the integration you simply need a compatible Genie® or Overhead Door™ product, a WIFI connection for that product, and a Total Connect 2.0 account with the Smart Home plan. For Alarm Grid customers, that is a Silver Plan (Self or Full) or higher.

Step-by-Step FAQ for Overhead Door® Integration
Step-by-Step FAQ for Genie Aladdin Connect® Integration

Setting up the integration is easy. Once you log into your Total Connect 2.0 account, click on Devices. Click the three (3) vertical dots in the upper right corner then tap Add/Remove Devices:


From there, choose Genie or Overhead Door™ from the list of available integrations. You will have two (2) options. You can either "Link to Existing Account" or "Add New Account". If you've already been using the garage door opener manufacturer's app, choose the former, if not, choose the latter.

If you choose "Link to Existing Account," you'll be prompted to enter your login credentials for the existing Genie (Aladdin Connect®) or Overhead Door™ (OHD Anywhere®) app, and then click "Login." Once the credentials are verified, you'll see a list of garage doors to select which ones you want to enable.

On the other hand, if you choose "Add New Account," you'll be redirected to the app store to download either Aladdin Connect® or OHD Anywhere®. Follow the provided instructions to set up your garage doors for remote access. Once completed, return to TC2 and follow the steps to complete enrollment. Once again, you'll need to enter the credentials you created for the garage door manufacturer's app and click "Login." Select the garage doors you want to enroll, and you're all set!

We're thrilled to see Resideo adding new third-party integrations to its Total Connect 2.0 offering. While Alarm.com has been more proactive in supporting this type of integration in the past, Resideo is starting to close the gap. We can't wait to see what they offer next!

Tags: , , , , , , , , , , , ,

Comments


Posted By

Google is ending support for conversational actions via their Google Home and Google Assistant platforms as of June 13, 2023. This will end Alarm.com users' ability to control their Alarm.com home automation devices using voice through the Google Assistant feature and Google Home devices.

It seems like yesterday, but it's been a couple of years since we brought you instructions on how to set up Alarm.com automation to be controlled using your voice via Google Home. Now that Google is deprecating its conversational actions feature, this integration is going away. This is a shame because we had many customers, and employees, who enjoyed this capability.

This is not something that is within Alarm.com's control. Google giveth, and Google taketh away. As of this writing, it doesn't appear that any new functionality will be replacing what is being removed. If you enjoy controlling devices using voice commands, and assuming you have an Android phone, your best bet for voice control moving forward is to use Amazon Alexa. Apple users also have the option to use Siri Shortcuts to achieve voice control.

We've had no word from Resideo as to how this change may affect the Total Connect 2.0 integration with Google Assistant and Google Home, so we reached out to technical support to ask them. According to their development team, "The sunset of Conversational Actions has no impact to our integration".

What do you think of this latest Smart Home functionality being deprecated by Google? Are you planning to move to Amazon Alexa or Apple Siri for voice-activated home automation? Leave a comment below and let us know what you think. We're always happy to hear from our readers.

Tags: , , , , , , , , , , ,

Comments


Posted By

"That's Brilliant!" You will soon be hearing that a lot in automation circles. Brilliant Smart Home System has managed to gain a lot of ground in a short time. This is due to their many company relationships. Alarm Grid is pleased to offer the complete line of Brilliant Smart Home System products.

Brilliant Smart Home has designed an in-wall Smart Home Controller or Hub, an in-wall Smart Dimmer, and a Smart Plug. The smart home controller incorporates voice control with Alexa built-in. It can also be used with Google Assistant and Apple HomeKit, which offers voice control using Siri. At least one (1) Brilliant Smart Home Controller must be installed in a location in order to use their services.

The convenient thing about Brilliant's Smart Home Hubs is that they replace an existing in-wall switch. A Brilliant hub or dimmer can replace a toggle, paddle, Decora, rocker, or an existing dimmer. These modules are eye-catching and go with just about any decor. Since the Brilliant Control is installed in the wall it eliminates messy, exposed wires, which you usually have with traditional smart hub setups.

Brilliant's line of smart Home Controllers or Hubs includes four (4) options. Each adds a different level of switch control. There is the 1-switch panel, 2-switch panel, 3-switch panel, and 4-switch panel. The hubs each contain a 5" LCD Touchscreen. The 1-switch panel has on/off and dimming for a single light via the touchscreen. The 2-switch panel has on/off and dimming for 2 separate lights. The 3-switch for 3 lights and the 4-switch for 4 lights. These 2, 3, and 4 switch panels, all have separate touch sliders for on/off and dimming capabilities. Each Smart Hub will install in a standard electrical switch box. This should already be in place for retrofit installs.

These smart hubs can do so much more than just operate the lights or outlets they are wired to. They have a built-in camera, a motion detector, and ambient light sensors. They can also integrate with a compatible video doorbell, and allow viewing of the doorbell, and interaction with your visitor, right on the Brilliant 5" touchscreen display. They can connect and control your smart locks, compatible garage door openers, and smart shades. You can utilize the video and audio intercom feature to communicate between rooms. As long as each room has a Brilliant Smart Hub installed.

You can use these smart hubs to control a compatible smart thermostat, a Sonos speaker system, and many other options. They also integrate with Resideo's Total Connect 2.0 remote control platform for alarm systems. This allows for system arming and disarming, notifications, and Z-Wave device control. With this integration, the user can also view TC2 video cameras via the smart hub.

A monitoring plan with Automation enabled is required, and for camera viewing, a plan that includes video. However, the Brilliant integration is included with those plans at no extra cost. For Alarm Grid customers Automation is included with Self Silver, Silver, Self Gold, and Gold plans. Video surveillance is included in our Self Platinum and Platinum plans.

When you are away from home, even if you haven't yet set up scenes to automate your devices, you will still be able to remotely control them using the Brilliant Smart App. It is available as a free download from the Apple App Store or the Google Play Store. Automation scenes can be created based on events, schedules, or a combination of both.

Brilliant expands its range of smart home devices with the Smart Dimmer Switch that can turn on/off, dim, or run a scene based on the user tapping the capacitive touch plate. It has built-in motion detection, allowing the system to automatically turn lights on or off. Alarm Grid offers these smart dimmer switches in White, Black, Light Almond, or Gray. At least one (1) Smart Controller Hub must be installed in order to use the Brilliant Smart Dimmers.

To round out its family of Brilliant Smart Home Products, they offer a Smart Plug. It adds the ability to control nearly any plug-in device along with the option to integrate that device into scenes. Use it for lamps, coffee makers, fans, heaters, and more. At least one (1) Smart Controller Hub must be installed before you can use a Brilliant Smart Plug.

The Brilliant Smart Controller Hubs, and the in-wall smart dimmer switch, both require 120VAC, with a neutral, and a ground, and line and load wires for multi-way switches. They can be set up in a single pole or 3 or 4, multiway configuration. The smart hub can share control with a standard switch as long as there is no dimming capability on it. For the Smart Dimmer, all switches would need to be replaced with Brilliant Switches in a 3 or 4, multiway configuration.

Brilliant is compatible with the following manufacturers, and the list is growing all the time:
  • Voice Assistants:
    • Alexa built-in
    • Apple HomeKit
    • Google Assistant
  • Lighting & Switches:
    • Leviton (via SmartThings)
    • Lutron(via SmartThings)
    • LIFX
    • Philips Hue
    • tp-link
    • WEMO
  • Climate:
    • Ecobee
    • Google Nest
    • Honeywell Home
  • Video Doorbell:
    • Google Nest
    • Ring
    • SkyBell (DBCAM-TRIM2 via Total Connect 2.0)
  • Cameras:
    • Google Nest
    • Ring
    • TC2 Cameras via TC2 Integration (IPCAM-WIC1, IPCAM-WIC2, IPCAM-WOC2)
  • Security (Including Locks & Garage Doors):
    • August Smart Lock
    • ButterflyMX
    • EMTEK
    • Genie
    • Kwikset
    • Overhead Door
    • Resideo (Total Connect 2.0)
      • Vista Panels that support TC2
      • ProSeries Panels
      • Lyric Panels
      • Lynx Panels
    • Schlage
    • Yale
  • Music:
    • Sonos
  • Hubs:
    • SmartThings
  • Property Management:
    • Entrata
  • Motorized Shades:
    • Somfy
    • Hunter Douglas
Tags: , , , , , , , , , , , , , , , , , , , , , , , , , , , , , ,

Comments


Posted By

According to Resideo Technical Support, their integration with Accuweather is partially down. This may cause products that receive weather information some issues. Any touchscreen product that can display weather may show incorrect information. Any automation configured for sunrise/sunset may not operate.

We received this information based on a support request we sent to Resideo. In that specific case, automation schedules based on sunrise and sunset that had been programmed through Total Connect 2.0 were not working correctly. So far, there's been no official report of this outage in AlarmNet360. We are hopeful that additional details will be forthcoming.

Do products or TC2 show incorrect weather in addition to the sunrise and sunset timers being off? We don't know for sure. Is this a nationwide issue, or a regional one? We don't know that for sure either. If you have more details or would like to share your experience, leave a comment below. It could be helpful.

Resideo has not had great success with its products and displaying the weather. In the past, we've reported on issues with the older style Tuxedo keypads not updating the weather properly. Hopefully, this is something that will be resolved in due time. In the meantime, if you have automation schedules for your devices that are set to run at sunrise and/or sunset, be aware that they may not function as intended.

Tags: , , , , , , , , ,

Comments


Posted By

10/6/2022: As of now, Resideo has not posted an update showing that this issue has been resolved. They do report that some customers have had success in deleting the SkyBell from Total Connect 2.0, and then re-enrolling it.

Resideo announced today that users of their Total Connect 2.0 service may currently be experiencing impairment in service. This is as of 1:15 PM Eastern Time today. The services affected are TC2 SkyBell Live Streaming, TC2 SkyBell Clip Replay, and TC2 Video Event Capture.

These services are basically the full range of things you might use a video doorbell for. Bear in mind that TC2 and SkyBell use a server-to-server integration. That means that all the heavy lifting with regard to the SkyBell integration is happening on the SkyBell servers. The TC2 servers are just sending requests back and forth to those SkyBell servers. We don't know if this issue is completely on the SkyBell side of things, or if there is a breakdown in communication between the TC2 servers and the SkyBell servers. If any more information comes to light, we'll share it here.

In the meantime, what we do know is that all other aspects of Total Connect 2.0 service are working as they should. Also, and most importantly, the delivery of alarm signals is not in any way impaired by this temporary situation. We know that the issues began at 1:15 PM ET, and as of now, the outage is still ongoing. If we receive information on an end to this situation, we'll post it here, so stay tuned.

Tags: , , , , , , , , , ,

Comments


Posted By

The Resideo LTEM-PA and LTEM-PV are dual-path capable communicators that use the LTE Cat-M1 network. During the global chip shortage, these radios have come to prominence because of their availability in the absence of other LTE communicators. They provide nearly the same speed as LTE comms.

Another feature that differentiates the LTEM-PA and LTEM-PV from other communicators is their modular design. These radios are considered a part of the ProSeries lineup, which includes the Honeywell Home PROA7 and PROA7PLUS and the Resideo PROA7C and PROA7PLUSC. The reason for this is that many of the add-on modules that can be used with the ProSeries panels can also be used with the LTEM-P communicators. Including the PROWIFI or PROWIFIZW, the PROLTE-A or PROLTE-V, and the PRODCM.

The LTEM-P Series communicators support an ethernet connection, but if you find yourself in a situation where a wired connection is not possible, then you can install the PROWIFI or PROWFIZW, which will give you WIFI, or WIFI and Z-Wave Plus capabilities. The ability to add a modular cellular unit is exciting as it allows you to install a separate LTE communicator to use instead of the built-in LTE Cat-M1 communicator. This will come in handy if you purchase an AT&T LTEM-PA, but find out later that Verizon would provide a better signal in this particular installation. Also, far in the future, when LTE is eventually phased out, whatever takes its place can easily be installed in the unit, rather than having to replace the entire communicator.

The PRODCM is a dialer-capture module. It allows the LTEM-P Series communicator to work with an alarm panel that has a built-in dialer and can report using Contact ID Format. The PRODCM installs inside a slot in the LTEM-P Series communicator, then two wires are connected between it and the Tip and Ring terminals on the alarm panel. The panel believe's it is dialing out over a phone line, but the module captures the signal, and transmits it via IP, or Cellular. Many of these add-on modules are also compatible with the ProSeries panels, which is why the LTEM-P Series are considered a part of the ProSeries lineup.

Tip 1: Power Wiring

The LTEM-PA and LTEM-PV come with a 9VDC power supply. Depending on the communicator you may be replacing there could be an existing AC Transformer in place. Do not make the mistake of trying to use the existing transformer. You have two (2) options when it comes to powering the LTEM-PA or LTEM-PV. You can use the included power supply, making sure to observe proper polarity with the power wires, or you can wire it so that the communicator receives all its power from the alarm panel. If you choose the latter option, be sure to calculate the current draw for the communicator correctly, and if you decide to leave the battery out of the LTEM-P Series device, turn off the radio's Low Battery Reporting.

Tip 2: Installing A WIFI Module

If you want to add support for WIFI to your LTEM-P module, you can add the PROWIFI module. When the PROWIFI module is installed, the ethernet connection becomes unavailable, so you can only use one or the other of these, but not both. If you want to add both WIFI and Z-Wave Plus capabilities to your system, then you can choose to install the PROWIFIZW.

Using the PROWIFIZW can add Z-Wave support in a situation where it would otherwise be unavailable, such as when using the LTEM-P with a non-VISTA panel. The PROWIFIZW cannot be used as a secondary controller, so it can't be used to extend the range of another controller such as the Tuxedo or VAM. Using the PROWIFIZW also doesn't give you an option to create scenes through Total Connect 2.0, only manual control of Z-Wave devices is available.

Tip 3: Always Default the Communicator

We've found, through painful experience, that it is a good idea to always default the LTEM-PA or LTEM-PV once all the wiring is completed, prior to account creation and activation. To default, hold down the red button on the upper right side of the main communicator board for at least 20 Seconds. The LEDs on the communicator should begin going through their initial power-on sequence. This is how you can tell the default has completed.

Once the communicator has booted completely up, then do one last power cycle. Do this by unplugging the transformer and disconnecting the red battery lead. If the communicator is being powered completely by the panel, simply power the panel down and back up by unplugging its transformer and backup battery. If the communicator battery is still connected though, be sure to disconnect this battery as well to completely power the communicator off. Wait about 30 seconds, then power back on as you normally would. For VISTA panels, plug in the transformer, then the battery. If the communicator has its own DC Power Supply, plug in the communicator battery, then plug in the power supply. Now you can proceed with programming and activation.

Tags: , , , , , , , , , , , , , , , , , , , , , , , ,

Comments


Posted By

Effective in August of 2022, Alarm.com is ending sales of Alarm.Com Image Sensors (ADC-IS-220-GC and ADC-IS-300-LP). Alarm Grid has already discontinued these sensors due to the fact that they are in short supply, and no more of them will be produced. Only the Honeywell Home PROINDMV remains.

The 2GIG IMAGE3:


There was some overlap between the Alarm.com Image Sensor models, and the 2GIG and Qolsys Image Sensor models. I have confirmed with Alarm.com that the 2GIG and Qolsys models are also discontinued as of August, 2022. Currently, the only Image Sensors being offered by Alarm Grid are the DSC PowerG and Honeywell Home PROINDMV models which are discussed in more detail below.

Image sensors were a great idea that never really took off. The original image sensors, first offered by 2GIG and Alarm.com, did not have particularly good resolution or picture quality, which is probably one reason they weren't widely adopted by the DIY crowd. By the time the 2nd generation of these sensors came around, people were prepared to simply go with full-on video monitoring or to avoid capturing images altogether.

Both the second and third-generation image sensors that were offered by 2GIG, Qolsys, and Alarm.com had very good image quality. Combine that with Alarm Grid's policy of offering monitoring for image sensors without an additional price markup, and the image sensor was a viable alternative to the use of video cameras. An Alarm.com user could log into their account and perform a "peek-in", meaning they could request that a particular image sensor grab a picture of whatever it was able to see at that moment, and the image (actually two (2) images) would then be uploaded to the customer's alarm.com account for viewing. The sensor could also take images upon sensing motion after a particular period of inactivity, or upon an alarm. For full details on image sensor features and operation, check out this prior post.

DSC offers a couple of PowerG PIR Cameras that will work with the Qolsys IQ Panel 2 and IQ Panel 4 in addition to the DSC PowerSeries Neo panels with a PowerG Transceiver added. These are the DSC PG9934P, Indoor PIR Camera, and the DSC PG9944, Outdoor PIR Camera. These sensors work like any other PowerG Sensor with the Qolsys Panels. They can only capture images when the system is armed and the image sensor is active (not bypassed). They send their images to the panel, and then the first image is uploaded to Alarm.com. A total of ten (10) images are taken, and these images are stitched together by the panel into a sort of stop-motion video where each image can also be viewed individually. This is done via the panel screen itself. When used with the PowerSeries Neo panels, the DSC PIR Cameras can be used for Visual Verification only, they do NOT work like a regular image sensor with Alarm.com.

DSC PG9934P, Indoor Image Sensor:

DSC PG9944, Outdoor Image Sensor:


The Honeywell Home PROINDMV is a wireless PIR motion sensor with a camera built-in, just like the 2GIG, Qolsys, and Alarm.com image sensors were. The PROINDMV is currently only supported on the Resideo PROA7PLUSC, and Honeywell Home PROA7PLUS panels. There is no "peek-in" option for these image sensors. They can only capture images when they sense motion while the system is armed in Away mode. Images or videos are captured and uploaded to Total Connect 2.0 for viewing. The user can choose to receive either a still image or a 10-second video clip. You can read their full details of operation in our previous post.

Honeywell Home PROINDMV:


It seems like the era of the image sensor may be coming to a close, at least for now. Who knows, once we're through the global chip shortage, and the availability of components is back to normal, perhaps the humble image sensor will experience a revival. If so, DIYers may want to consider giving these sensors a try. They really are an excellent idea. They can be used for alarm verification in this age of increasing police resistance to alarm response, and they are cheaper, both initially and on an ongoing month-to-month basis, than video cameras.


Tags: , , , , , , , , , , , , , , , , , , , , , ,

Comments