Kwikset 914 Posts

Posted By

We have some exciting news from Alarm.com. The latest version of the Alarm.com Mobile App for iOS (Version 4.18) will make your enrolled smart locks compatible with Siri Shortcuts. This means that you will be able to control your smart locks with spoken voice commands. How convenient!


If you aren't familiar with Alarm.com Siri Shortcuts, they represent an innovative way to control your system and its integrated accessories using spoken voice commands. Each command is customized so that it performs the exact actions you want. Siri Shortcuts are available for iOS 12 and higher, so make sure your iOS device is on a high enough version before trying to set them up. We very strongly recommend reading this post from a couple years prior to refresh your memory on Siri Shortcuts and how they can be used. Overall, we think the Siri Shortcuts feature serves as a nice alternative to Apple HomeKit, which isn't compatible with Alarm.com or its associated security systems.

From what we can tell, the only way that a Siri Shortcut could control a smart door lock prior to Alarm.com iOS Version 4.18 was to do so indirectly through a smart scene. In other words, the user must create a smart scene that tells a door lock to LOCK or UNLOCK, and then create a customized Siri Shortcut to run that smart scene. Of course, a user would need separate scenes for LOCKING and ULOCKING, and they would need different scenes for each individual lock if they wanted complete control over their entire network of door locks. But with the update in iOS Version 4.18, smart lock control is made much more convenient and more easily accessible.

Thanks to the update, users can now create Siri Shortcuts that deal with locks directly, rather than being part of a smart scene. Each Siri Shortcut can control a single door lock, or a user can control all their locks at the same time with one single command. For a single lock, it's as simple as asking Siri to LOCK or UNLOCK a door based on the name of the lock. For example, you might say,

  • "Hey Siri, UNLOCK the FRONT DOOR."
  • "Hey Siri, LOCK the BACK DOOR."

Or if you wanted to control multiple doors,

  • "Hey Siri, LOCK all the doors."
  • "Hey Siri, UNLOCK every door."

Keep in mind that this door lock control for Siri Shortcuts is being made available in Alarm.com iOS Version 4.18. This update isn't available quite yet, but we expect it to be released in the coming days. At the time of this writing, the newest iOS Version we see is 4.17.3. You can check the version you're running by logging into the Alarm.com iOS App, and then choosing the Menu button (three horizontal bars) in the upper-left corner, and then selecting About in the bottom-left, and then About Alarm.com. The App Version will be displayed in white text across the top orange bar.


Remember to check the Apple App Store for the release of Alarm.com iOS App Version 4.18. Then open Settings within the Alarm.com Mobile App to access Siri Shortcuts. That is where you can enable the "Share Activity with Siri" settings and build customized Siri Shortcuts for use with your door locks. Remember that you can only control door locks that are enrolled with your Alarm.com account. Z-Wave door locks work great for this, and we have plenty of options available for purchase on our site if you are looking to get started.

Remember to check out our monitoring page if you are interested in starting monitoring service for access to Alarm.com. And please don't hesitate to reach out to us if you need help getting started with Alarm.com Siri Shortcuts for door locks. We're here to help you get the most out of your door locks and your Alarm.com service.

Tags: , , , , , , , , , , , , ,

Comments


Posted By

Stolen packages are a concern for many individuals. But you can take a stand and prevent thieves from taking your stuff. All you need is a doorbell camera, a Z-Wave door lock, and a monitored security system with Alarm Grid. We'll help you protect your packages from pesky porch pirates!


It doesn't take a genius to figure out how a package gets stolen. The delivery person rings the doorbell and finds that nobody is home. They leave the package out in the open. Then a no-good package thief comes along, swoops up the goods, and you're then left wondering whether or not the delivery got lost in the mail. Countless packages fall victim to this very setup every single day. And if you don't have any evidence, then it can be next to impossible to catch the guilty party.

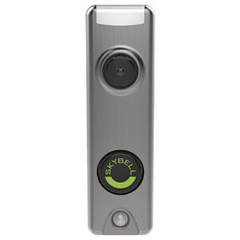
But there's an easy method to prevent this from happening to you. First, swap out your regular doorbell with a smart video doorbell camera. We recommend using one of the SkyBell Video Doorbell devices for this job. You can choose between a Total Connect 2.0 model and an Alarm.com model depending on which service you use with your system. Remember, you do not need special video monitoring service to get started with a SkyBell Video Doorbell. Total Connect 2.0 will allow a user to pair up to five (5) SkyBell devices per Alarm.com account, while Alarm.com provides support for one (1) SkyBell without true video monitoring service.


Next, configure your SkyBell device to work with your interactive service platform of either Total Connect 2.0 or Alarm.com. You can get push notifications on your phone whenever someone rings your SkyBell device. With the push of a button, you can pull up a live feed of the person at your door and communicate with them using two-way audio. When you see that it's the delivery person, greet them with a pleasant "Hello", and explain that you aren't home at the moment. Then invite them to step inside to drop off the package.

But how will the delivery person get inside? And how will they avoid setting off your security system? Easy. With a Z-Wave door lock, you can unlock the door, and you can disarm your alarm system using either the TC2 or ADC app on your phone. You might even consider making a smart scene to have your door automatically unlock as soon as your system is disarmed. Alarm Grid offers a wide selection of door locks to choose from. We recommend Z-Wave door locks, as they are super easy to program, and they can interface with nearly every modern wireless security system.


Once everything is in order, instruct the delivery person to go inside and leave the package near the door. If you're feeling extra groovy, you might invite them to grab a bottle of water from the fridge. It's hot out there, and your delivery driver would really appreciate the kind gesture. We'll leave that up to you though. If you don't want them walking through your house, then leaving a small snack or a tip by the front door will also show that you care.

Once the driver is gone, re-lock your door and re-arm your system. And just like that, you know that your package is nice and safe, and the porch pirate's plan has been foiled. It may also be a good idea to track any packages you order and know when you can expect them. Also make sure to take a good look at the delivery person when you let them inside. While fraudulent delivery drivers are very uncommon, they're not unheard of. If you're in doubt, instruct the driver to leave the package behind your house or behind some bushes so that you can retrieve it later. This is better than leaving the package wide open in front of your front door.

Of course, this setup will require monitoring service for accessing Total Connect 2.0 or Alarm.com. If your system isn't monitored, or if you don't have a security system, then Alarm Grid has you covered! We offer a wide selection of DIY security systems, including the Honeywell Lyric, the Qolsys IQ Panel 2 Plus, the 2GIG GC3e, and much more. We also offer monitoring plans for all budgets. This type of setup won't require anything fancy, and it's nothing that will break the bank. In the long run, it's worth it for your peace of mind!

If you want to learn more about Alarm Grid monitoring service, or if you have questions about protecting your deliveries, send an email to support@alarmgrid.com. We'll be happy to answer any questions or concerns you might have. Remember that our hours for checking email are from 9am to 8pm ET M-F. We look forward to hearing from you!

Tags: , , , , , , , , , , , , , , , , , , , , , , ,

Comments


Posted By

After our big return last week, we're back in a major way with 12 new videos this week! As our headquarters has only partially reopened, I had to try doing some videos again. But a familiar face has returned. We're sure you're eager to see who. Anyway, here come the new Alarm Grid videos!


Adjusting Z-Wave Device Limits On My Qolsys IQ Panel 2 Plus

I show you how to adjust the Z-Wave device limits on your Qolsys IQ Panel 2 Plus Security System. The Z-Wave device limits determine how many of each Z-Wave device type you can pair with the system. There are limits for thermostats, smart sockets, door locks, lights, garage doors, and "other" Z-Wave devices. The maximum total limit for all devices combined is 152 Z-Wave devices. You will need the Installer Code or Dealer Code (default 1111 and 2222, respectively) to change these limits. Also note that the Z-Wave device limit for Alarm.com is 122 Z-Wave devices.


Upgrading the Z-Wave Firmware for My Qolsys IQ Panel 2 Plus?

I show you how to upgrade the Z-Wave firmware for a Qolsys IQ Panel 2 Plus System. This is something you may want to do if the system is running a Z-Wave firmware of less than 6.81.03. At that Z-Wave firmware, you unlock the Smart Start feature for quickly adding Z-Wave devices, and you upgrade the system to the S2 security protocol for automation devices. Any Qolsys IQ Panel 2 manufactured with System Firmware Version 2.4.0 or higher (upgrading later doesn't count) will already have this Z-Wave Firmware Version.


Overview of the Smart Start Feature on the Qolsys IQ Panel 2 Plus

I talk about the Smart Start feature that can be used with any Qolsys IQ Panel 2 that is running Z-Wave Firmware Version 6.81.03 or higher. The Smart Start feature allows you to pair Z-Wave devices by scanning a QR code, instead of performing a traditional inclusion/exclusion process. As of June 2020, only a very limited selection of Z-Wave devices from Qolsys, Alarm.com, Eaton, and Danalock are compatible with the feature. But it can save you time if adding a large number of Z-Wave devices.


Using the Smart Start Feature on the Qolsys IQ Panel 2 Plus

I show you how to use the Smart Start feature on a Qolsys IQ Panel 2 Plus to add new Z-Wave devices. If your IQ Panel 2 is on Z-Wave Firmware Version 6.81.03 or higher and you have a compatible Z-Wave device, then you can use the Smart Start feature to add it to the Z-Wave network. Depending on the Z-Wave device, the QR code may be on the packaging or on the device itself. Some may have the code on both the packaging and the device.


How Many Z-Wave Devices are Supported on the 2GIG GC2 or GC2e?

I discuss the Z-Wave device limits for the 2GIG GC2 and the 2GIG GC2e. The classic GC2 has a standard Z-Wave controller, while the newer GC2e has an upgraded Z-Wave Plus controller. Both support the same Z-Wave devices, though Z-Wave Plus devices will get an extended range and battery life when used with the GC2e. The Z-Wave device limit for both systems is 232 Z-Wave devices, though it should be considered that adding a very large number of Z-Wave devices can diminish system performance.


How Many Z-Wave Devices are Supported on the 2GIG GC3 or GC3e?

I discuss the Z-Wave device limits for the 2GIG GC3 and 2GIG GC3e. Both of these systems have built-in Z-Wave Plus controllers for building an automation network of smart devices. Just like the "lower-end" 2GIG Systems, the GC3 and GC3e can support a maximum of 232 Z-Wave devices, though usually far fewer are actually used in practice. You should also keep in mind that Alarm.com has its own Z-Wave device limit of 122 devices. This means that only the first 122 Z-Wave devices paired with the system will get pushed over to Alarm.com.


Excluding the Kwikset Z-Wave Lock from the Lyric Controller

I show you how to exclude a Kwikset Z-Wave Lock from a Z-Wave network using a Honeywell Lyric Alarm System. Clearing the lock from the network will wipe out all of its residual Z-Wave data. This is normally done before adding the lock to the Z-Wave network, or when you need to delete it from the system. The Lyric can be used to clear the Z-Wave network data in the lock, even if the lock wasn’t paired using the Lyric to begin with.


Including the Kwikset Z-Wave Lock from the Lyric Controller

I show you how to pair a Kwikset Z-Wave Lock with your Honeywell Lyric Alarm System. This will allow you to control the lock from the panel and remotely from Total Connect 2.0 if the system is monitored and set up with the service. Normally, an exclusion process is performed before the inclusion process. Most Kwikset Locks have a simple button that is used for including and excluding. Pressing this button while the system is in its inclusion mode will include the lock into the Z-Wave network.


Excluding a Schlage Z-Wave Lock with the Honeywell Lyric

I show you how to exclude a Schlage Z-Wave Lock from a Z-Wave network using the Honeywell Lyric Alarm System. Just like most other Z-Wave devices, an exclusion process is normally performed either before adding the device to the Z-Wave network, or when deleting the device from the Z-Wave hub. For a Schlage Lock, you must access the programming code that is found on a white sticker underneath the lock's main cover. You will need a screwdriver to remove this cover.


Including a Schalge Z-Wave Lock with the Honeywell Lyric

I show you how to include a Schlage Z-Wave Lock to the Lyric's Z-Wave network. A Schlage Lock will follow the same process for inclusion as it does for exclusion. However, you will normally want to exclude the lock first to wipe out any residual Z-Wave data. To include the lock, simply enter the programming code on the lock's sticker, followed by the [0] key while the Lyric System is in the appropriate Z-Wave inclusion mode.


Enrolling a Z-Wave Lock to My Qolsys IQ Panel 2

In his triumphant return, the always fantastic Jorge shows you how to enroll a Z-Wave door lock to your Qolsys IQ Panel 2 System. This is done by putting the IQ Panel 2 into its Z-Wave inclusion mode and then activating the inclusion function on the lock. For most locks, you will want to clear the lock from the network to wipe its residual Z-Wave data before completing the inclusion process. The lock can then be controlled from the panel, as well as from Alarm.com if the system is monitored with access to the service.


Resetting an Interlogix Simon XT to Factory Defaults

This is an update from a previous video shot more than a year ago. Jorge shows you how to reset an Interlogix Simon XT System back to its factory default settings. This will reset the Master Code (1234) and the Installer and Dealer Codes (both 4321), delete any added codes and system zones, and restore all settings and configurations to their default values. It is important to note that if the option for "Phone Lock" in system programming is enabled, then certain settings will not be affected by the default.

Tags: , , , , , , , , , , , , , , , , , ,

Comments