The Alarm Grid holiday buying guide for the 2020 season continues, this time focusing on smart home automation. We will be covering our top picks for lights, door locks, and thermostats. As usual, our selections are compatible with our top security system picks for the 2020 shopping season.
If you haven't seen our earlier 2020 holiday buying guide releases, make sure to review them at some point. They will provide you with a good introduction before checking out our smart home automation offerings.
An automation device is a piece of equipment that you can have activate automatically based on a set schedule. These devices can also be controlled remotely from virtually anywhere in the world using a platform like Total Connect 2.0 or Alarm.com and a simple app on your smartphone. When we talk about automation devices for alarm systems, we are mainly discussing lights that can be turned ON or OFF, dimmer modules that can adjust the brightness of lights, door locks that can be LOCKED or UNLOCKED, and thermostats that can increase or decrease the set temperature in the building when connected with an HVAC system. There are also some miscellaneous automation devices, including smart water valves, that we will also explore. Depending on the platform, you can also integrate these devices with smart home voice assistants like Amazon Alexa and Google Home. We won't be exploring that too much in this buying guide, but it is something to keep in mind if you already have a smart home assistant set up in your house, or if you were considering setting one up in the near future.
To keep our automation section as simple as possible, we will be primarily looking at Z-WAVE PLUS automation devices. This refers mostly to 500-Series Z-Wave Plus devices, though you may occasionally see some newer 700-Series Z-Wave Plus devices thrown in as well. Using certified Z-Wave Plus devices with a Z-Wave Plus controller will ensure the furthest possible wireless range, as well as the longest possible battery life, when applicable. Using exclusively Z-Wave Plus devices on a Z-Wave Plus controller is also the best way to ensure the strongest possible mesh network. Another advantage to going with Z-Wave Plus is that your automation devices will pair directly with your alarm system, which will thereby serve as your central automation controller. This keeps things as simple and as organized as possible, and it will ultimately allow you to keep everything in the same app on your phone.
However, we will also be including a few Apple HomeKit products along the way. We understand that we have many customers who use iOS and are building around the HomeKit platform for automation. When looking at our top security system picks, only the Honeywell Lyric is compatible with Apple HomeKit. This is out recommended system if you are building around the HomeKit platform. If you are starting from scratch and you are not a dedicated iOS user, then you will likely prefer Z-Wave Plus, as you can keep all your system control and automation control in the same app, with virtually no crossover. But, if you have taken advantage of what Apple HomeKit has to offer, and you want to continue building around the platform, then we have you covered. Remember, of our top system picks, only the Lyric can support HomeKit, and even then, your HomeKit devices will not pair directly with the Lyric.
Of our top security system picks for the 2020 holiday buying season, both the Qolsys IQ Panel 2 Plus and the 2GIG GC3e support Z-Wave Plus technology. Both of those systems have their own integrated Z-Wave Plus controller, and they will allow you to take full advantage of what Z-Wave Plus has to offer. However, our other top pick, the Honeywell Lyric only has a classic Z-Wave controller built-in. You can still enroll Z-Wave Plus devices with the Lyric, but they won't offer the same range, battery life, and security provisions as Z-Wave Plus. This makes the Lyric the weak link of the three if automation outside of Apple HomeKit is particularly important to you. But rest assured that every product listed here should work with any of our recommended systems. Its just that you will get the best possible results by using a Z-Wave Plus compatible system, like the Qolsys IQ Panel 2 Plus or 2GIG GC3e.
With all of that out of the way, let's begin exploring our favorite smart home automation devices of the 2020 holiday season.

Smart lights can be split into a few different categories. They are usually either in-wall modules that replace your existing, standard light switches, or they are plug-in module that you simply plug into a regular wall outlet. Lights can also be split into groups of ON/OFF switches that merely turn the lights ON and OFF, and groups of dimmer modules that can actually adjust the brightness of the lights. As such, you will see four (4) groups of lights listed below. There are in-wall switches, in-wall dimmers, plug-in switches, and plug-in dimmers. We know that may seem a bit confusing, but it should make more sense once you see all of the categories properly laid out and organized. Spoiler, if you're looking for Apple HomeKit Lights, then skip to the very end of this section.
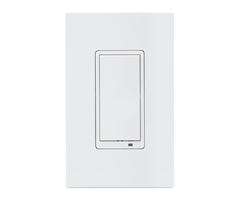
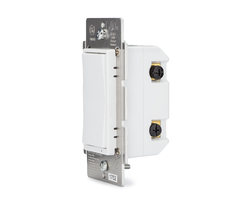
We will start with Z-Wave Plus in-wall switches. These devices replace existing in-wall switches, and they are able to turn the lights ON and OFF. When installing one, make sure to cut power at the circuit breaker first. Then simply remove the existing in-wall switch, and install your new Z-Wave Plus in-wall switch in its place. Keep in mind that most of these units will require the use of a neutral wire. Most homes built in the 1980s onward will have this readily available, though older homes may be lacking this wire. It's also important to mention that all of the in-wall switches listed here should readily fit into single gang brackets. We will also be listing coordinating 3-way switches in the notes section when applicable.
Here are our top picks for Z-Wave Plus in-wall switches.
|
Model
|
Notes
|
|
GoControl WS15Z5-1
|
From Nortek. Supports up to 1800W for resistive bulbs, or 600W for incandescent bulbs. Uses GoControl WT00Z5-1 as coordinating 3-way switch.
|
|
GE 14318
|
From GE. Supports up to 1800W for resistive bulbs, or 960W for incandescent. Uses GE 12723 as coordinating 3-way switch.
|
|
GE 46201
|
From GE. Supports up to 1800W for resistive bulbs, or 960W for incandescent. Compatible with CFL and LED bulbs. Uses GE 12723 as coordinating 3-way switch.
|
|
GE 46562
|
From GE. Supports up to 1800W for resistive bulbs, or 960W for incandescent. Uses GE 12723 as coordinating 3-way switch.
|
|
Resideo Z5SWITCH
|
From Resideo. Supports up to 1800W for resistive bulbs, or 960W for incandescent. Compatible with CFL and LED bulbs. Uses Resideo Z53WSWITCH as coordinating 3-way switch.
|
Next up are Z-Wave Plus in-wall dimmers. These units also replace your existing in-wall switches. The difference here is that these devices have the ability to adjust the brightness of your lights, in addition to simply turning them ON and OFF. You will want to make sure you are using these devices with dimmable light bulbs. Again, you will want to cut power at the circuit breaker when installing. Most of these units will require a neutral wire, though there is an exception here. You should be able to fit these units into a single-gang electrical bracket.
Here are our top picks for Z-Wave Plus in-wall dimmers.
Model
|
Notes
|
|
GE 14299
|
From GE. Supports up to 600W incandescent. For dimmable bulbs only. Uses GE 12723 as coordinating 3-way switch. No neutral wire required.
|
|
GE 14294
|
From GE. Supports up to 600W incandescent, or 300W for dimmable CFL/LED bulbs. Uses GE 12723 as coordinating 3-way switch.
|
| GoControl WD500Z5-1
|
From Nortek. Supports up to 500W of lighting load. Uses GoControl WT00Z5-1 as coordinating 3-way switch.
|
|
Resideo Z5DIMMER
|
From Resideo. Supports up to 600W incandescent, or 150W for dimmable CFL/LED bulbs. Uses Resideo Z53WSWITCH as coordinating 3-way switch.
|
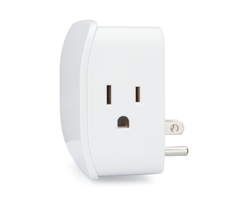
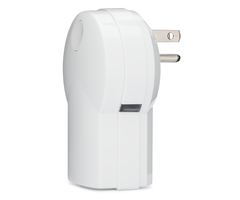
Now we will look at some more DIY-friendly options, starting with Z-Wave Plus plug-in switches. Unlike in-wall switches that you have to install using a screwdriver, these devices simply plug into your standard wall outlet. Just plug one in, connect a lamp, and you now have smart lighting control. These units couldn't be more straightforward and simple to use, and if you're intimidated by having to install your own in-wall light switch, then these are a fantastic alternative. Again, these units are only capable of turning the lights ON and OFF. You can also technically use some of these units with other plug-in devices, provided that the connected device does not exceed the maximum load limit.
Here are our top picks for Z-Wave Plus plug-in switches.
Models
|
Notes
|
|
GE 28172
|
From GE. Designed for lighting devices only. Supports up to 1800W for resistive lights, or 600W for incandescent lights.
|
|
Linear PS15EMZ5-1
|
From Nortek. Supports up to 1800W for resistive lights, or 600W for incandescent lights.
|
|
Resideo Z5SWPID
|
From Resideo. Supports up to 1800W for resistive lights, 600W for incandescent lights, or a 1/2 HP motor.
|
|
Resideo Z5SWPIO
|
From Resideo. Supports up to 1800W for resistive lights, 600W for incandescent lights, or a 1/2 HP motor. Suitable for outdoor use.
|
|
Qolsys IQ Smart Plug
|
From Qolsys. Supports up to 13A of power. Not just for lighting devices. Also sold as Qolsys QZ2101-840.
|
Our penultimate category of smart lights focuses on Z-Wave Plus plug-in dimmers. As you can probably guess, these are plug-in modules, but instead of just turning the lamp ON and OFF, you can also adjust its brightness. The use of dimmable bulbs is recommended. Again, this is an excellent DIY alternative if you don't feel comfortable installing your own in-wall dimmer switch. Just plug it in, connect a dimmable lamp, and enjoy your new smart lights!
Here are our top picks for Z-Wave Plus plug-in dimmers.
Model
|
Notes
|
|
GE 28170
|
From GE. Supports up to 300W for incandescent, or 100W for dimmable CFL/LED bulbs.
|
|
GoControl PD300EMZ5-1
|
From Nortek. Supports up to 300W for incandescent lights.
|
|
Resideo Z5DIMPID
|
From Resideo. Supports up to 300W for incandescent, or 100W for dimmable CFL/LED bulbs.
|
Lastly, we want to give special recognition to Apple HomeKit compatible smart lights. We're keeping things simple by only listing products from Lutron. These lights work by building around a centralized base station and then pairing lighting modules with that main unit. Our team at Alarm Grid is wholly impressed by what Lutron has to offer, and we can definitely recommend these lights for anyone building around the HomeKit platform. One other major benefit of Lutron Smart Lights is that no neutral wire is required as part of the setup. This can be very beneficial if you do not have a neutral wire in your home's existing electrical wiring. Please note that Alarm Grid only offers the Caseta lineup from Lutron, so that is what we will be focusing on in this buying guide.
The Lutron section of this guide will be split into four (4) categories. First we will look at the smart bridges, or central hubs, that we offer for Lutron. Then we will explore some bundled deals we offer as starter kits. From there, we will check out individual Lutron lighting devices. Lastly, we will examine some accessories for Lutron devices.
First up, we have the Lutron Smart Bridges. There are only two (2) here. You need one of these devices to start building a network of Lutron Smart Lights. You will notice a standard "non-Pro" model, as well as "Pro 2" model. The main difference here is that the "Pro 2" model can integrate with Alarm.com, while the "non-Pro" model cannot. This is completely irrelevant if you are building a HomeKit network around the Honeywell Lyric, as you will be using Total Connect 2.0 as your interactive smart platform instead of Alarm.com. But if you are using HomeKit separately with an IQ Panel 2 Plus, a 2GIG GC3e, or pretty much any other Alarm.com Security System, then this can really come in handy, as you can then integrate your smart lights in with the same network as your alarm system.
Here are our Lutron Smart Bridges.
But before you rush out and buy one of the aforementioned Lutron Smart Bridges, you may instead consider getting one of our Lutron Starter Kits, which all include a Lutron Smart Bridge and some compatible devices to get you started. This can save you a bit of money if you are just getting started with Lutron. Unfortunately, we only have starter kits based around the "Non-Pro" smart bridge. If you are wanting the "Pro 2" model for Alarm.com use, then you will need to buy that model ala carte, along with all the devices you want to pair.
Let's check out our Lutron Starter Kits.
Model
|
Notes
|
|
Lutron Caseta P-BDG-PKG1W
|
Includes Lutron Caseta Smart Bridge, In-Wall Dimmer, Pico Remote, and Wall Plate.
|
|
Lutron Caseta P-BDG-PKG2P
|
Includes Lutron Caseta Smart Bridge, Two (2) Plug-In Dimmers, Two (2) Pico Remotes, and Two (2) Mounting Pedestals.
|
|
Lutron Caseta P-BDG-PKG2W
|
Includes Lutron Caseta Smart Bridge, Two (2) In-Wall Dimmers, Two (2) Pico Remotes, Two (2) Wall Plates, and Two (2) Mounting Pedestals.
|

Now we'll look at the actual Lutron Lighting Components. These are the individual, ala carte lighting devices that you pair with your Lutron Smart Bridge. The included notes should help you decide which devices are right for your Lutron network. Lutron keeps things relatively simple here, as the selection is short but sweet.
Here are individual Lutron Lighting Components.
Model
|
Notes
|
|
Lutron Caseta PD-3PCL-WH
|
Plug-In Lamp Dimmer Module. Supports up to 300W for incandescent or halogen bulbs, or 100W for dimmable LED/CFL bulbs.
|
|
Lutron Caseta PD-5NE
|
In-Wall Smart Dimmer for Electronic Low Voltage (ELV+) Lights. Supports up to 250W for dimmable LED/CFL bulbs, 500W for incandescent, halogen, or ELV bulbs, or 400W for Magnet Low Voltage (MLV) bulbs.
|
|
Lutron Caseta PD-6ANS-WH
|
In-Wall Neutral Smart Switch. Supports up to 720W for incandescent, halogen, ELV, or MLV lights, 6A for LED/CFL, or 3.6A for a ceiling fan.
|
|
Lutron Caseta PD-6WCL
|
In-Wall Light Dimmer Switch. Supports 600W for incandescent or halogen bulbs, or 150W for dimmable LED/CFL bulbs.
|
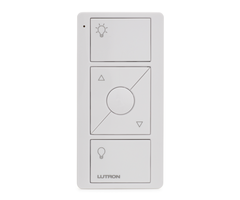
Last but not least, we have some Lutron Accessories. These include the Pico Remote that you can use a remote control for your Lutron Lights, as well as various wall-plates and some bundles. There are quite a few accessories to cover, and they make the perfect stocking stuffer for the Lutron lover on your gift list.
Here are Lutron Accessories.
|
Model
|
Notes
|
|
Lutron Caseta PJ2-3BRL-WH-L01R
|
Lutron Caseta Pico Remote. Small handheld remote that you can use to control your Lutron Lights. Includes three (3) buttons for turning ON and OFF and adjusting brightness. Can also be used to facilitate a multi-pole setup for your Lutron Lights.
|
|
Lutron Caseta PICO-WBX-ADAPT
|
Lutron Caseta Pico Remote Wallplate Adapter Bracket. Allows you to mount your Pico Remote to the wall. Wallplate not included.
|
|
Lutron Caseta PJ2-WALL-WH-L01
|
Lutron Caseta Pico Wall Plate Kit. Includes a Pico Remote, Wallplate Adapter Bracket, and Wallplate.
|
|
Lutron CW-1-WH
|
Single Gang Wallplate for Lutron. Double, triple, and quadruple gang wallplates also available!
|
Door locks are fairly straight forward. They replace the existing deadbolt lock on your front door, back door, patio door, pool door, garage door, or really any door with a deadbolt lock. You will then have smart control over that door, meaning you can LOCK and UNLOCK it remotely using a compatible interactive service platform. This also includes the ability to have the door LOCK or UNLOCK automatically with smart scenes. Most of the locks listed here will allow you to use a traditional key if you want, but you can also manually enter a code into the lock using push-buttons or a touchscreen. This can be very convenient for getting in if you forget your key or don't wish to carry one around.
Virtually any door lock will accomplish the same goal, so what you should base your buying decision on is how reliable the brand is, how you control the door lock locally (e.g. a push-button touchpad or a LED touchscreen), and which design you like. You will also need to decide whether you need a Z-Wave Plus door lock or an Apple HomeKit door lock. Most of the models listed here are Z-Wave Plus variants, but we did include a couple of HomeKit versions for good measure. Many of the door locks listed here come in multiple finishing options to give you some added customization. You will notice that we do not list too many brands here. We really wanted to focus on the ones we feel the most confident in offering.
Here are our top picks for door locks.
Model
|
Notes
|
|
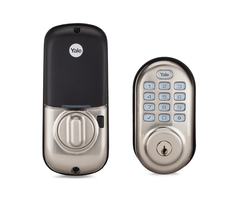
Yale YRD216
|
From Yale. Push button Z-Wave Plus door lock. Stores up to 250 codes. Available in Polished Brass, Oil Rubbed Bronze, or Satin Nickel.
|
|
Yale YRD226
|
From Yale. Touchscreen Z-Wave Plus door lock. Stores up to 250 codes. Available in Polished Brass, Oil Rubbed Bronze, or Satin Nickel.
|
|
Kwikset 914
|
From Kwikset. Push button Z-Wave Plus door lock. Stores up to 30 codes. Available in Satin Nickel, Aged Bronze, or Polished Brass.
|
|
Kwikset Obsidian
|
From Kwikset. Touchscreen Z-Wave Plus door lock. Stores up to 16 codes. Does not allow for traditional key locking/unlocking. Available in Oil Rubbed Bronze or Satin Nickel.
|
|
August Smart Lock Pro w/ Connect
|
From August. Includes August Smart Lock Pro and August Connect, which makes integrating w/ Apple HomeKit significantly easier and more reliable. Supports BOTH Apple HomeKit and Z-Wave Plus connectivity. Also supports Bluetooth connectivity. Does not allow for traditional key locking/unlocking. Available in Dark Gray and Silver.
|
|
Yale YRD256 w/ iM1 Module
|
From Yale. The integrated iM1 Module allows for use w/ Apple HomeKit. Lock itself can store 25 codes, pairing w/ HomeKit increases limit to 250. Available in Polished Brass, Oil Rubbed Bronze, or Satin Nickel. There is also a Z-Wave Plus variant of the same lock that does not support Apple HomeKit.
|
 Now we're really getting into exciting territory, as smart thermostats allow you to control the temperature in your home from virtually anywhere! This is perfect whether you want to keep energy costs low, or you simply want to ensure you arrive home to a comfy house. We all know how stressful it can be if you forgot to adjust your thermostat before leaving home. Well, now you can worry no longer! All you need to do to get started is cut the power at the breaker for your HVAC system, remove your old thermostat, and install your new smart thermostat in its place. This is easier than you might think! For this category, we will mostly be covering Z-Wave Plus thermostats, but we did include an Apple HomeKit thermostat in the listings as well.
Here are our top picks for smart thermostats.
Other Smart Home Devices
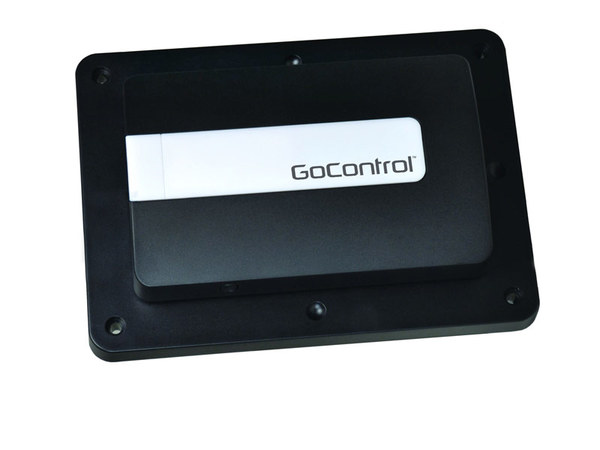
Alright, we're finishing this up with some great smart home devices that we couldn't really fit into any other category. Our main focus here will be on smart garage door controllers and smart water valves. These are super convenient and useful devices that make a great addition to almost any home. A smart garage door controller connects with your existing garage door motor so that you can open and close your garage door from anywhere or have it open and close automatically with smart scenes. Smart water valves are an excellent emergency tool that you can use to shut-off your water supply in the event of a flood or leak. Many users will pair them with flood sensors for inclusion in smart scenes. Unfortunately for Apple HomeKit users, we don't have any HomeKit devices for this section, and we will only be covering Z-Wave variants in this section.
Check out these miscellaneous smart home devices!

Got any questions about which smart home devices are right for you, or are you not sure about compatibility? Reach out to us! Our team is happy to help you make your holiday shopping season as easy and as stress-free as possible. The best way to contact us is to email support@alarmgrid.com. We check our email from 9am to 8pm ET M-F. And as always, we look forward to hearing from you!