May 2019 Archives

Posted By

Hi DIYers! We're here with a small video recap, covering May 16 & 17. It was a quiet week for our video team, as we only had five new videos. But we gotta give some credit to Jorge, as he cranked out four videos. Jarrett also came through with one. Let's take a look at the videos.

Adding a Profile Image to a Total Connect 2.0 Account

Jorge shows users how to add a profile image to their Total Connect 2.0 account. Each user on a TC2 account can have their own profile image. This helps to add a nice personalized touch to Total Connect 2.0. Any uploaded image will only be visible from TC2. It will not be visible from the panel. If you have multiple users on the same Total Connect 2.0 account, then each user can have a unique picture.


Adding a Location Image to a Total Connect 2.0 Account

Jorge teaches users how to add a location image to a Total Connect 2.0 account. Each location on a TC2 account can have its own picture. You will have a different location for each system on your Total Connect 2.0 account. This is great for users with multiple homes or businesses. Adding a unique image for each location can be a great way to differentiate them. This way, you can be sure that you are controlling the correct system when you use TC2.


Smart Home Items That are Compatible with the Honeywell Lyric

Jarrett talks about smart home items that are compatible with the Honeywell Lyric Controller. The system has a built-in Z-Wave controller for operating Z-Wave devices. Any Z-Wave device can be operated through Total Connect 2.0. The Lyric is also one of the few systems on the market that is compatible with Apple HomeKit. You can have your HomeKit devices set to respond based on activity that affects your system. It is also possible to control your Lyric through your iOS device.


Changing the Installer Code Using a Tuxedo Touch Keypad

Jorge explains how to change the Installer Code for a Honeywell VISTA Alarm System using a Tuxedo Touch Keypad. The Installer Code is the code used to enter programming and make system changes. We encourage most users to keep the code at its default of 4112. This will prevent users from being locked out of programming later. If you forget the default Installer Code, you can always look it up later. If you change the code and forget it, you will need to use the backdoor method to get back into programming.


Features Added in the 2GIG GC2 1.19 Firmware Upgrade

Jorge discusses Firmware Version 1.19 for a 2GIG Go!Control GC2 System. Upgrading to the latest firmware is very important for getting the most out of your system. Firmware Version 1.19 added support for various cellular communicators. If you want to use an AT&T LTE communicator, then you need Firmware Version 1.19.3. You can have a firmware update pushed down automatically to your panel from Alarm.com for a small fee. If your panel is not connected with Alarm.com, you will need an upgrade cable or an upgrade tool to complete the process.

Tags: , , , ,

Comments


Posted By

Hi DIYers! We're here with another Alarm Grid Tip. We're going to cover the proper technique for mounting your door alarm sensors. Many people have trouble getting a faulted zone to disappear when their sensors are not aligned properly. Mounting your sensors correctly will fix this issue.

Honeywell 5800mini interior wireless door and window sensor

First, It's important to understand how door and window contacts work. There are two (2) parts. These are a sensor and a magnet. The sensor is the larger component and usually represents the listed product dimensions. The magnet is the smaller component. In a proper installation, the sensor (larger) should be mounted on the door frame. The magnet (smaller) should be mounted on the actual door. Ideally, the magnet and the sensor should be in direct contact when the door is closed. The magnet should also be aligned with the metal reed switch inside the sensor. The sensor will most likely have indentations to indicate the location of the reed switch.

The idea is that when the door is closed, the magnet will be in contact with the sensor. This is why these sensors are often called "contacts". When the door is opened, the magnet will become separated from the sensor. This will release its internal metal reed switch. When this happens, the sensor will transmit a signal to the alarm control panel. The system will respond based on the programming settings for the corresponding zone.

When you mount your door contacts, you should make sure that the magnet and the sensor are in proper alignment when the door is closed. If not, then the reed switch inside the sensor will stay open. As a result, the zone will still be shown as faulted on the panel. You want proper alignment so that the zone functions consistently. Whenever the door is opened, the zone should appear as faulted. If it's closed, then you should not see any faults.

Walk testing your contacts is extremely important! This is the best way to make sure that the sensor and magnet are in proper alignment. Sure, it might pass the eyeball test, but does it pass the system test? Always, always, always test your equipment! We don't care if you are a novice DIYer or a seasoned professional installer - your job is not finished until you have completed the walk test.

Again, the ideal door sensor and magnet will be IN DIRECT CONTACT when the door is closed. This will provide the best possible results. We have seen customers stack multiple pieces of double-sided foam tape to make this happen. This is pretty unusual, but it works! It might look funny if you have to do that, but it will get the job done! As long as the sensor and magnet are in correct alignment, then the sensor will work.

If you absolutely must leave the contact and magnet separated, do not do so from more than one-half (0.5) of an inch, unless the manual specifically says that the sensor-magnet gap can be further. And make sure to test extra thoroughly if you decide to try and get these sensors to work with a wider magnet spacing.

Also remember to check sensor for indentations that indicate which side to place the magnet. If you are unsure, then check the device manual. Many answers can be found in the installation instructions. Unfortunately, many end users choose to ignore them. Read the manual!

Keep in mind that some door sensors may be equipped with LED lights that help the installer make sure that the sensor and magnet are indeed in proper alignment. If your sensor has this feature, then definitely use it! This is an easy and convenient way to make sure they are aligned correctly. Check your device manual for more information. An example of a door sensor that is equipped with this feature is the Honeywell 5800MINI.

Below is an example of what a properly installed contact looks like. In this case, it is the 2GIG DW10. Note how the sensor and the magnet are in direct contact and properly aligned. Normally, the battery tab at the bottom of the sensor would be removed, but for this example, it's okay.


We hope this tip has been helpful for anyone setting up their first alarm system. Please email us at support@alarmgrid.com if you have any questions. We look forward to hearing from you!

Tags: , , , , , , , , , , ,

Comments


Posted By

Hi DIYers! We are happy to announce that we are now selling encrypted IQ Panel 2 Plus Kits. Each kit includes a brand-new IQ Panel 2 Plus with built-in LTE communicator, two (2) IQ DW MINI-S Encrypted Contacts, a single IQ Motion-S Encrypted Motion Sensor, a transformer and a power cable.

Qolsys iq panel 2 plus at and t lte with powerg s line and legac

Last week, we announced that we are now offering IQ Panel 2 Plus Kits that feature the Versa-GE Door and Window Contacts. While these are excellent door and window sensors, they do not offer encrypted communication. Users who want added security will want to use encrypted sensors whenever possible.

The encrypted sensors included with the encrypted IQ Panel 2 Plus Kits use rolling code encryption. When these sensors are enrolled with compatible encrypted systems, they become synced with the panel. This allows a rolling code to be established. Only the panel and that exact sensor will know what the next rolling code transmission will be.

Currently, we are offering two versions of the encrypted IQ Panel 2 Plus Kits. There is an AT&T LTE option and a Verizon LTE option. Both kits are listed below:

The version of the IQ Panel 2 Plus included in these kits is compatible with the Qolsys S-Line Sensors that use this rolling code encryption. Additionally, it is also compatible with the PowerG Sensors that use 128-bit AES encryption. Both the PowerG Sensors and the Qolsys S-Line Sensors are nearly immune to wireless takeover attacks.

Encrypted sensors like these are perfect for users who want protection against possible hacking attempts. The included system is also backwards compatible with non-encrypted 319.5 MHz sensors. This includes the legacy Qolsys and Interlogix/GE Sensors. Each encrypted Qolsys IQ Panel 2 Plus Kit listed on our site comes pre-packaged by Qolsys. As a result, we cannot make substitutions for these kits.

At this time, we do not have kits for the 345 MHz IQ Panel 2 Plus or the 433 MHz IQ Panel 2 Plus. If you want either of those systems, you will have to purchase all the components individually. The only encrypted sensors that can be used with those systems are the PowerG Sensors. Both systems include a transformer and a prepared cable for providing power.

We are sure that many customers will love these new encrypted kits! If you have any questions please email us at support@alarmgrid.com. You may also call us at (888) 818-7728 from 9am to 8pm EST M-F to speak to one of our alarm system planners. We look forward to helping you design the perfect system for your home!

Tags: , , , , , , ,

Comments


Posted By

Hi DIYers! We have learned that a new law has been signed in Tennessee that disallows local governments from charging security companies fines for false alarms. The law also prohibits fees for alarm permits. The bill was signed by Tennessee Governor William "Bill" Lee on May 8th, 2019.

Under the new law, alarm monitoring companies cannot be charged fines for any false alarms that occur. Additionally, local governments cannot charge alarm companies fees for alarm permits or alarm permit renewals. End users may still be charged by local governments for causing excessive false alarms and for obtaining permits and renewals. The law goes into effect June 19, 2019.

Alarm Grid strongly supports this new law, as it makes it easier for us to provide customers with quality service. Preventing false alarms is the responsibility of both the alarm monitoring company and the end user. Alarm Grid does its part to ensure that customers cause as few false alarms as possible. We accomplish this by educating our customers about the best practices for reducing false alarms. The vast majority of end users do not actively seek out ways of causing false alarms. Most will do whatever they can to prevent them.

Some of the practices used to reduce false alarms include setting appropriate Entry and Exit Delay times, enabling Alarm Report Delay (if needed), and encouraging the use of Arm-Confirm features. Alarm Grid also offers certain panels that are compliant with the standards mandated by CP-01 of the Security Industry Association (SIA) for reducing false alarms.

At Alarm Grid, one of our top goals is to empower the end user. We strive to help our customers understand how their systems work so that false alarms occur less frequently. End users should also make sure to follow the manufacturer’s recommendations for installation and panel programming.

We are also pleased that monitoring companies will no longer need to worry about alarm permit fees. These fees only make it more difficult for alarm companies to provide service to their customers. Many companies avoid providing alarm monitoring service in certain areas because they do not want to pay permitting fees. Thanks to the removal of these fees, it will be easier to provide service to our customers in Tennessee moving forward.

Alarm Grid wants to help you avoid false alarm dispatches. But we also want you to know that your home or business will receive help in a real emergency. That is one of our top goals as an alarm monitoring company. If you want to learn more about how we work to prevent false alarms, please reach out to us. The best way to contact us is through email at support@alarmgrid.com. We will check your email at our earliest convenience and respond as soon as possible. We look forward to hearing from you.

Tags: , ,

Comments


Posted By

Hi DIYers! We have many customers who wonder what happens if their security system is destroyed when an intruder breaks into their home. Fortunately, alarm manufacturers considered this possibility. They put protective measures in place to deal with this issue. Enter Crash & Smash and APL.

2gig gc3 diy wireless security system w slash 7 screenCrash and Smash (C&S) for Alarm.com and Advanced Protection Logic (APL) for Total Connect 2.0 are both features designed to provide an added layer of protection in case an alarm panel and/or its communicator are destroyed during a home invasion. These features help ensure that the police are still dispatched and that the end user receives the help they need. An intruder might think they're okay because they have destroyed the panel, but the system is smart enough to overcome this issue.

Just last week, we made a post covering Entry and Exit Delays. Well it turns out that the Entry Delay period plays a big part in C&S and APL. As we discussed last week, if an Entry/Exit Zone is faulted while the system is Armed, an Entry Delay countdown begins. This period gives the end user a chance to Disarm their system before an alarm occurs. But what if the panel gets destroyed during this countdown? After all, the panel won't be able to send out an alarm signal. But this is where Crash and Smash and APL take priority. How they do this is actually quite smart.

Whenever a system goes into Entry Delay, it immediately sends out a signal to the Alarm.com Servers (ADC) or the AlarmNet Servers (TC2). This signal just lets the server know that the system is now in an Entry Delay period. The servers are smart enough to know that since the system is now in an Entry Delay period, a Disarm or an Alarm must follow. If neither event follows, then logically the panel must have been destroyed. The server will then know to send a signal to the central station to let a trained dispatcher know that the panel has been destroyed and dispatch is needed right away.

Please note that the Alarm.com Servers and the AlarmNet Servers do not send signals to the central station as soon as the usual Entry Delay period expires. These servers also account for delays in sending signals. A little more than a minute of additional time is added beyond the normal Entry Delay period before a C&S or APL signal is sent to the central station. This is done to prevent false alarms.

Advanced Protection Logic and Crash & Smash also work during alarms that do not follow Entry Delay periods. If the system has Alarm Report Delay enabled and an intrusion alarm occurs, then the system will not actually alert the central station the very instant that the alarm occurs. The system will actually enter into a short Alarm Report Delay period that is usually less than a minute in length. This delay period gives the user a chance to Disarm the system and cancel the alarm to stop the signal from being sent out. If an intruder destroys the system during this Alarm Report Delay period, APL or C&S will ensure that emergency dispatch is still sent out. Alarm Grid encourages users to disable Alarm Report Delay on their panel if possible.

It's also worth mentioning that the Alarm.com Servers and the AlarmNet Servers send all C&S and APL signals directly to the central station. The end user does not receive an alert from Alarm.com or Total Connect 2.0 when these signals are sent out. In other words, C&S and APL do not work with self-monitored customers. You need a central station monitoring plan to use these features. Also, C&S and APL do not work with phone line monitoring. You need an IP communicator or a cellular communicator. UPDATE: Alarm.com can now alert a user directly via a Push Notification on their phone when a C&S event occurs.

If you have any questions about Crash & Smash or Advanced Protection Logic, or if you want to learn more about our monitoring service, please reach out to us! The best way to contact us is to send an email to support@alarmgrid.com. We will check the email at our earliest convenience and respond as quickly as possible. If you prefer to speak on the phone, we are available from 9am to 8pm EST M-F at (888) 818-7728. We look forward to hearing from you!

Tags: , , , ,

Comments


Posted By

Hi DIYers! We hope you had a great Mother's Day weekend. Last week, our video team put up a bunch of new videos, 9 to be exact. All were posts on Thursday and Friday. We love helping users get the most out of their alarm systems and smart home networks. Let's take a look at the new videos!

Updating the Firmware on a Lyric Alarm System's SiXFOB

Jarrett kicks things off by showing you how to update the firmware for a Honeywell SiXFOB Key Fob. This key fob is designed exclusively for use with the Honeywell Lyric Controller. Unlike most SiX Series devices, the SiXFOB needs to receive firmware updates manually. The Lyric should be running the latest firmware version before performing the update. Updating the firmware for the SiXFOB will ensure that it works as effectively as possible. Updating the firmware will affect any zones associated with the SiXFOB.


Including a Schlage Z-Wave Lock

The ever friendly and helpful Joe shows you how to include a Schlage Z-Wave Lock into your local Z-Wave network. Pairing your Z-Wave lock is necessary for getting the most out of the device. You need to do this to control the lock remotely and to use it with smart scenes. Pairing a lock with an alarm panel is often a great option. You can then use it with an interactive service platform like Total Connect 2.0 or Alarm.com. Please note that you will need a monitoring plan with access to one of these services.


Excluding a Schlage Z-Wave Lock

Joe helps you some more by showing how to exclude your Schlage Z-Wave Lock from a Z-Wave network. This is an important step if you plan to transfer the lock from one Z-Wave hub to another. You should also do this before completing the initial pairing process. Many Z-Wave smart home devices are paired with Z-Wave networks before they even leave the factory for testing purposes. Clearing the lock first will ensure that you can pair it successfully.


Adding a Siren to the Qolsys Hardwire 16-F

Joe is back again, and this time he's gonna show you how to add a siren to a Qolsys IQ Hardwire 16-F. This is a wired to wireless converter that allows you to use hardwired sensors with a wireless 319.5 MHz system. The module was specifically designed with the Qolsys IQ Panel 2 Plus in mind. What's unique about the Qolsys IQ Hardwire 16-F is that it includes siren terminals and a built-in siren relay which can be controlled wirelessly by the panel. No external relay is needed for the connected siren, as long as the Qolsys IQ Panel 2 has a hardware RF PIC version 11.1.4 G2 or higher.


Powering the Honeywell Vista-20P

If you just can't get enough of Joe, then you're in luck! He will show you how to provide power to your Honeywell VISTA 20P Hardwired Security System. The panel receives power through two sources. Its primary power source is a plug-in transformer, specifically the Honeywell 1321. If the electricity goes out, then the system can remain powered on through its backup battery. We recommend using an UltraTech 1240 for this purpose. All of this equipment can be purchased from the Alarm Grid site.


How Alarm Systems Work

Hey look, it's Jorge! He's going to explain how alarm systems work. The centerpiece of every alarm system is the control panel. This panel receives signals from sensors that are used throughout the premises. There are sensors for letting the system know if a door or window is opened, if there is movement in the area, if glass is broken, if there is a fire, or really almost any troubling condition that warrants your attention. The system then responds based on the zone configuration and its current arming state.


The Tuxedo Touch - Not An AlarmNet Communicator

If you think the Tuxedo Touch WIFI is an AlarmNet Communicator, then you are sorely mistaken. Jorge is here to set the record straight and explain that the Tuxedo Touch is not a communicator. It is just a touchscreen keypad used with VISTA Series Systems. The keypad uses WIFI connectivity to transmit Z-Wave home automation signals to and from Total Connect 2.0. But you will still need a separate communicator for connecting your system with the AlarmNet Servers.


Programming Report Codes For a Self Monitoring Plan With Alarm Grid

Let's say you sign-up for a self-monitoring plan with Alarm Grid. Great! But since you are self-monitored, you don't need your system reporting out to a central monitoring station. Jorge will show you how to disable the reporting codes for your system so that it functions properly. This process is only necessary for self-monitored systems that use Total Connect 2.0. You do not need to disable report codes for Alarm.com Systems, since Alarm Grid can do it from their end.


Defaulting a Schlage Z-Wave Lock

Joe returns to tell you how to default a Schlage Z-Wave Lock. By performing a factory reset, the lock will be restored to its factory default settings. This will clear any Z-Wave settings, as well as any codes programmed for the device. You will need to re-add the lock to your Z-Wave network. You should check the programming sticker on the lock to find the default user codes. The programming sticker is found underneath the device's main cover.

Tags: , , , , , , ,

Comments


Posted By

Hi DIYers! We're back with another Alarm Grid Tip. Today's tip is to always know your Entry and Exit Delay periods and how they are used. Nearly every alarm system has these settings, and configuring them properly is important for any DIY user. Let's take a look at Entry and Exit Delays!

Alarm grid inside security stickers

Let's start with Entry Delays. When you enter your home while your system is armed, you probably don't want an alarm to occur. After all, you've done nothing wrong. All you've done is open a door. It's not like you smashed a window or burst open a wall. But at the same time, you want your alarm system to confirm that it's you that entered your home. For example, if you forgot to lock the door, an intruder might walk right inside.

This is actually where the very premise of alarm systems comes into play. In its Armed state, your system will want you to Disarm when an Entry/Exit door is opened. But you aren't a magician or a wizard. You can't just, poof, Disarm your system instantly. You have to get inside, close the door, set your stuff down, calm down your dog or cat, walk over to your keypad, enter your code and Disarm your system. Needless to say, this might take a minute or so.

That is why Entry Delay periods are important. They give you a small period of time for you to Disarm your system before it goes into alarm. Since you know your system's code, you should be able to Disarm in a timely manner. But an intruder who doesn't know the code won't be able to provide verification in time. The Entry Delay period will expire, and the central station will come calling to make sure everything is alright. An intruder won't know the false alarm passcode, and emergency dispatch will be sent out momentarily.

Qolsys iq panel 2 at and t wireless security system with at and

But wait! We understand the stress that Entry Delay periods can present! If you have a short Entry Delay period, you might be running frantically to your keypad to avoid that awkward conversation with the central station dispatcher.

"Yeah, sorry, I didn't get to the keypad in time. My false alarm passcode is DIYer." - The person with too short of an Entry Delay period.

But fortunately, you're a DIYer! You can go into programming and adjust your Entry Delay period. That way, you can set it to a duration that allows you to comfortably and calmly reach your system's keypad and Disarm the system. But remember, the shorter you keep this delay period, the sooner dispatch will be sent out in a real emergency.

We also understand that some situations require longer Entry Delay periods than others. For example, you might enter your home from your basement door. It might take you longer to walk up those stairs and reach the keypad than if you entered from your front door. Never fear, alarm manufacturers covered that as well. This is done by having multiple Entry Delay periods on the same system. They are usually conveniently named "Entry Delay 1" and "Entry Delay 2". We know, these are very creative names.

Each delay zone can be set individually to work with either Entry Delay 1 or Entry Delay 2 based on its programmed Response Type. So if you want a longer or shorter Entry Delay period for certain zones, then you have the power! Please note that the Entry Delay 2 period should always be the longer of the two, and is also commonly associated with Garage Door Zones. Keep this in mind when system planning.

Of course, you can also Disarm your system before even entering your home using a keyfob. Or if you have Total Connect 2.0 or Alarm.com, you can just open the mobile app on your smartphone and Disarm from there. But hey, maybe you forgot your phone and keyfob inside. In that case, knowing your Entry Delay period and how long you have to Disarm your panel is important!

Some common Response Types that use Entry Delay periods: Entry Exit 1, Entry Exit 2, Interior With Delay, Garage.

Honeywell lyric controller encrypted wireless security system

Whew! That was a lot to take in. But we saved time to discuss Exit Delay periods. When you Arm your system, there is usually that brief period of time where you need to collect your belongings, say bye bye to your precious puppy, leave the premises and lock the door behind you. During this time, you don't want your system to go into alarm because you activated a sensor. You want to have a moment to safely leave without worry. That is why we have Exit Delay periods.

The Exit Delay gives you a chance to exit the premises without worrying about setting off an alarm. Once the Exit Delay period expires, your system will be Armed. However, it's also important to touch on Auto-Stay Arming here. When you Arm Away using your panel or keypad, the assumption is that you will activate an Entry/Exit Zone on the way out. If no Entry/Exit zone fault and restore is seen by the system, it will assume that someone (you) is still present inside the building. If Auto-Stay Arming is enabled, the system will prevent false alarms by switching to Arm Stay at the end of the Exit count down, even though you Armed Away. To avoid this, open an Entry/Exit Zone during the Exit Delay countdown, or disable Auto-Stay Arming.

Just like with Entry Delay periods, you, as a DIYer, can adjust your Exit Delay. Most systems only have a single Exit Delay period, but you can easily configure it based on your needs. Find a time period that allows you to comfortably leave your home without worry, and set that as your Exit Delay. That way, you won't be scrambling to rush out the door whenever you Arm your system!

And again, you can always Arm from outside your home using a keyfob or a mobile app. Doing this will tell the system to ignore any Auto-Stay Arming settings, as you may not fault an Entry/Exit Zone when using a fob or app. Using either of these methods from outside your house will eliminate any worry you have about Exit Delay periods. But if you ever find yourself Arming from your panel or keypad like many of us do, you will want to keep that Exit Delay period in the back of your mind. Make sure you get out in time!

Honeywell sixfob key fob for lyric controller

We hope that this post was helpful in explaining Entry and Exit Delay periods to you! If you have any further questions or you need help changing the Entry and/or Exit Delay periods on your panel, please reach out to us. We offer free support for Alarm Grid monitored customers! The best way to reach us is to email support@alarmgrid.com. You may also call us during our regular business hours of 9am to 8pm EST M-F. We look forward to helping you get the most out of your security system.

Tags: , , ,

Comments


Posted By

Hi DIYers! We are excited to announce that the Qolsys IQ Panel 2 Plus with support for legacy 319.5 MHz sensors and PowerG sensors is now available for just $399.99. This is significantly reduced from the previous price-tag of more than $500. Now is a great time to buy an IQ Panel 2 Plus!

Qolsys iq panel 2 plus verizon lte with powerg s line and legacy

The IQ Panel 2 Plus is one of the most advanced wireless all-in-one security systems on the market today. The system supports up to 128 wireless zones, and it serves as a fully functional Z-Wave Plus controller. It also offers advanced features like Bluetooth disarming, live streaming with Alarm.com Cameras, facial recognition, partitioning and more. This version of the IQ Panel 2 Plus supports both PowerG sensors and legacy 319.5 MHz sensors from Qolsys and Interlogix/GE. It is available in both Verizon LTE and AT&T LTE options. Both 319.5 MHz versions have been reduced in price to $399.99 effective as of now.

Please note that this price reduction only affects the 319.5 MHz versions of the IQ Panel 2 Plus. The 345 MHz versions (legacy Honeywell and legacy 2GIG) and the 433 MHz versions (legacy DSC) have retained their original pricing. These versions are also available in AT&T LTE and Verizon LTE variants. You can find those panels with the following links:

We would also like to announce that the original IQ Panel 2 has been discontinued. It is no longer available for purchase, effective immediately. As a result, all of the Alarm Grid System Kits that included the original IQ Panel 2 have been updated to offer the IQ Panel 2 Plus 319.5 MHz System instead. At this time, we are only offering kits with the 319.5 MHz version of the IQ Panel 2 Plus. If you want the 345 MHz or 433 MHz version of the IQ Panel 2 Plus, you will need to purchase the system individually.

Each IQ Panel 2 Plus System Kit includes a brand-new IQ Panel 2 Plus 319.5 MHz System, Versa-GE Door and Window Contacts (3 or 10 depending on the kit), a single Qolsys IQ Motion-S Sensor, a power cable, a plug-in transformer, and a built-in LTE communicator (AT&T or Verizon). You can find these kits in the links below:

If you have any questions about the IQ Panel 2 Plus, please reach out to us. The best way to reach us is to email support@alarmgrid.com, and we will respond back as soon as possible. You may also call us at (888) 818-7728 during our normal business hours of 9am to 8pm EST M-F. We look forward to hearing from you!

Tags: , , , , , , , , , , , , , , , , , , ,

Comments


Posted By

Great news DIYers! The Total Connect 2.0 Service used with Honeywell and Resideo Alarm Panels now supports If This, Then That, otherwise known as IFTTT. This is huge for TC2, as a plethora of new integrations and features are now possible! TC2 users can visit this page to get started.


As you may know, Total Connect 2.0 is an interactive service platform used with Resideo Alarm Systems. The service can be used with any compatible panel that has an AlarmNet Cellular or IP Communicator installed and activated. Once a user has a Total Connect 2.0 account, they can access the platform through the Total Connect 2.0 website or through a mobile app on their Android or iOS device.

Accessing TC2 allows an end user to perform various system functions. These functions include Arming and Disarming their system, checking current system status, controlling connected Z-Wave smart home devices, viewing connected Resideo IP Cameras and more. The end user will need an active monitoring plan that includes access to the TC2 platform. Users who are not currently monitored should check out our monitoring page for more information about alarm monitoring service.

It was already possible to use Total Connect 2.0 to trigger security system and Z-Wave actions based around certain predetermined events and time schedules. But IFTTT support adds a world of new possibilities. Thanks to IFTTT, end users can now quickly and easily integrate peripherals like Lutron Smart Lights, Sonos Speakers, Phillips Hue Lights, Roomba devices, Rachio Sprinklers, MyQ Garage Doors, Somfy Blinds and more.

IFTTT works by using Triggers and Actions. Basically when a certain "Trigger" occurs, an "Action" will follow. Currently, IFTTT only allows TC2 "Triggers" caused by changing the arming status of your system, or an alarm event on your system. We are hopeful that IFTTT will allow specific sensor triggers sometime in the future. Additionally, IFTTT can be used to create Triggers based on date & time or a predetermined schedule. The Action that follows a Trigger could be something like telling your Sonos Sound System to start playing music, your Lutron Lights to all turn off, or your Rachio Sprinkler System to start watering the grass.

What's great about IFTTT is that it is ultra-customizable and offers nearly any possible combination of connected devices and responses. You can have multiple Actions corresponding to the same Trigger, or multiple Triggers to cause the same Action. And despite being extremely intricate in terms of possible combinations, creating individual commands in IFTTT is actually quite easy. We are sure that end users will love this new integration and the ease of use that it provides.

We expect to release new content in the near future to help users get started with IFTTT for TC2. This will likely include all-new FAQs and videos designed to walk users through the process of creating new Triggers and Actions for use with their Resideo Alarm Systems and their connected smart devices. Stay tuned for more content coming soon!

For now, if you want to learn more about IFTTT and how it can be used with TC2, the best way is to reach out to us. We recommend sending an email to support@alarmgrid.com with your question or concern. We will check your email at our earliest convenience and respond back as quickly as possible. If you prefer to call us, you can do so at (888) 818-7728 during our normal business hours of 9am to 8pm EST M-F. We look forward to hearing from you and helping you learn all about IFTTT.

Tags: , , , , , , , , , , , , , , , , ,

Comments


Posted By

Hi DIYers! Today, we're taking a look at SimpliSafe and how their monitoring service and equipment compares with Alarm Grid. We believe that this information will be helpful to end users when deciding upon an alarm monitoring provider. Let's see how SimpliSafe stacks up with Alarm Grid.

Alarm grid inside security stickers

Proprietary Equipment

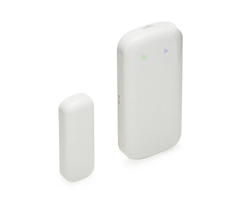
When a customer signs up for SimpliSafe, they are required to purchase a security panel and sensors directly from the company. This equipment is proprietary to SimpliSafe, and it will only work with their monitoring service. A user cannot take their SimpliSafe System and bring it to a different monitoring company. The equipment is for use with SimpliSafe only.

SimpliSafe does not require its customers to sign contracts. Their monitoring service is offered on a month-to-month basis. A customer can leave SimpliSafe at any time. The problem is that their system will be useless for alarm monitoring with any monitoring service outside of SimpliSafe. Unless a customer is willing to buy a completely new system, they will be stuck with SimpliSafe as their only option.

Alarm Grid does not manufacture its own equipment. Instead, Alarm Grid sells equipment from reputable manufacturers like Resideo/Honeywell, 2GIG, Qolsys and Interlogix. All the equipment sold on the Alarm Grid website is non-proprietary. If a customer decides to leave Alarm Grid, they can certainly bring their alarm panel, sensors and communicator with them to a new company.

Customers do not need to purchase their equipment from the Alarm Grid website. If they can find a better deal elsewhere, then we will encourage them to buy it from that location instead. Likewise, if a customer has an existing alarm system, we will do everything possible to take it over and make it work with our service. At Alarm Grid, we want to minimize the cost for our customers. Many systems and sensors can be taken over so that the customer does not need to buy new equipment.

Just like SimpliSafe, Alarm Grid is no contract, and customers pay on a month-to-month basis. The difference is that if a customer leaves Alarm Grid, they can take their system with them. Since the equipment we service is all non-proprietary, it can be taken over by any willing monitoring company. As a result, customers stick with Alarm Grid because they are pleased with the service and support we provide. This is the reason our customers refrain from taking their system and business elsewhere.

Equipment Compliance

Any reputable security equipment should be listed by a Nationally Recognized Testing Laboratory (NRTL). This is mandatory for meeting the requirements of National Electrical Code, NFPA 70 and UL Standards. For SimpliSafe, the proprietary wireless smoke detector and proprietary wireless carbon monoxide detector are both listed and labeled by the NRTL Intertek. This puts these devices in compliance with the aforementioned standards.

However, no other piece of SimpliSafe equipment is listed by Intertek. This includes the SimpliSafe Base Station (Panel) and the rest of the SimpliSafe Sensors. In fact, this equipment is not listed by any NRTL. In other words, this equipment is not necessarily compliant with UL Standards. It has not met the UL requirement of independent third-party testing needed for certified equipment. SimpliSafe says that they test their own equipment to UL standards, but this is different from the required third-party testing.

The equipment sold on the Alarm Grid website is UL or ETL listed and properly certified. It has met the third-party testing requirements. Additionally, the equipment we are familiar with taking over is also compliant with these standards. Again, companies like Resideo/Honeywell, 2GIG and Qolsys are known for their strict compliance. When you buy equipment from Alarm Grid you can be certain that you are getting quality equipment that is certified with the latest requirements.

Destruction Protection

Just like many systems, the SimpliSafe Base Station is designed to be placed out in the open for easy access. If an intruder destroys the base station before an alarm signal is sent out, then the signals might not go through successfully. To prevent this, SimpliSafe recommends disguising their system. One article claimed that a SimpliSafe representative suggested disguising their base station with a "lamp shade".

For Alarm Grid customers, their systems are connected with a reporting service like AlarmNet or Alarm.com. AlarmNet offers Advanced Protection Logic (APL), while Alarm.com provides "Crash & Smash". Although these features differ slightly, their general principle is the same. Both features are designed to ensure that the authorities are still properly dispatched if the security panel is destroyed.

The basic premise behind APL and Crash & Smash is that an alarm panel will immediately send an alert to the reporting service (AlarmNet or ADC) when an Entry Delay or communication delay period is activated. The reporting service will then know that either a system Disarm or an Alarm signal must logically follow. If after a certain period of time no signal is received, then the service will know that the panel must have been destroyed. In this case, APL or Crash & Smash will take effect, and the monitoring station will be notified.

Simply put, SimpliSafe does not offer this type of protection. Instead, the company advises its customers to hide and disguise its system. This can be very risky if an intruder recognizes the SimpliSafe Base Station and knows to destroy it. Additionally, the SimpliSafe Sensors do not include tamper covers. It's easily possible for a smart intruder to remove the cover for the sensor, take out the battery and beat the SimpliSafe System.

Life-Safety Offerings

Section NFPA 72 of the National Fire Alarm and Signaling Code requires that smoke detectors and CO detectors have the technical capability to produce distinct Temporal 3 and Temporal 4 sounding respectively. This is crucial for being able to actively distinguish between the type of danger at-hand and take the appropriate action.

SimpliSafe Smoke and CO Detectors do not have this functionality. As a result, they are non-compliant with NFPA 72. The only way for a SimpliSafe user to determine the cause of the alarm is to check the system's keypad or the associated text message from the SimpliSafe network. The SimpliSafe Base Station has an 85 dB sounder that meets code. However, this sounder is positioned downward. This positioning can muffle the siren and make it less likely for others to hear it.

SimpliSafe does offer an unsupervised external wireless siren that operates at 105 dB. However, this siren has no tamper switches and can be easily disabled by anyone who gains access. If the siren were to be taken offline, it is possible that the end user might not find out about this until it's too late.

Alarm Grid sells smokes and CO detectors with built-in sounders that meet the respective Temporal 3 and Temporal 4 sounder requirements. We also advise the use of supervised sirens that are either wired-in with the panel or protected by the system. Additionally, the wireless panels we sell feature built-in sounders that are positioned in such a manner that they can be easily heard when activated.

Conclusion

Whether you decide to go with SimpliSafe, Alarm Grid or a different monitoring company entirely is up to you. We can say that with Alarm Grid you can obtain a quality system that meets all the needed standards and requirements for your area. If you ever aren't satisfied with Alarm Grid for any reason, you can take the system you invested money into elsewhere and use it with a different monitoring company. You will also receive monitoring service that protects you and your family if your system is ever destroyed during a break-in.

We encourage you to check out our alarm monitoring page for more information about our monitoring services. If you decide that Alarm Grid is the right choice for your home, you can select a monitoring plan right from the same page. This page is also available through the orange "Alarm Monitoring" button at the top of any page on our website.

If you have any questions or you want to learn more about alarm monitoring, we invite you to reach out to us. The best way to reach us is to email support@alarmgrid.com. You can also call us at (888) 818-7728 during our normal business hours of 9am to 8pm EST M-F to speak with one of our security planners. Our team is here to help you make the right choice for home security monitoring, and we look forward to protecting you and your loved ones.

Tags: , , , ,

Comments