August 2018 Archives

Posted By

Hi DIYers! Are you ready for another Alarm Grid video recap? Our support technicians Joe, Jorge and Dylan have all been keeping busy making great new videos for our viewers. We've got some tremendous content this time around to help DIY users get the very most out of their security systems.

This is a particularly special video recap for our team, as we have just reached the 10,000 subscriber mark on YouTube. It's pretty incredible that 10,000 viewers love security systems enough to subscribe to our YouTube Channel to receive notifications about new videos. We would like to thank all of our YouTube Subscribers and monitored Alarm Grid customers for their continued support!


Security Cameras Compatible with LYNX Touch Security Systems

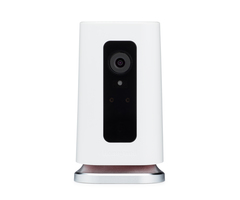
Joe discusses the security camera options available for use with a Honeywell LYNX Touch System. As long as the system is set up with Total Connect 2.0, any Total Connect Camera can be used. These cameras include both the legacy Honeywell IP Cameras and the newer HD Lyric Cameras. All cameras can be viewed and managed from the Total Connect 2.0 platform. But keep in mind that an alarm monitoring plan that includes video surveillance is needed to use these cameras.


Wholesale Home Alarm Monitoring w Alarm Grid

Dylan talks about wholesale alarm monitoring for home security systems. Wholesale monitoring refers to a situation where a person has multiple locations set up with a single monitoring account. This can be useful if a person has multiple residences, such as both a primary home and a summer home. By having multiple systems on the same account, a user can access all their systems from the same Total Connect 2.0 or Alarm.com account. These services have a locations tab for this specific purpose.


Changing the User Code on Partition 2 In a Honeywell VISTA Alarm System

Jorge goes through the process for changing a user code that has been set up with Partition Number 2 on a Honeywell VISTA Security System. Having multiple partitions on an alarm system allows the zones for one partition to remain armed while the zones on other partitions are disarmed. User codes that are designed to be used with Partition 2 exclusively are assigned code numbers 33 and up. Any code that is going to be used with Partition 2 should be assigned a user slot of 33 or higher.


Dual Path Monitoring on a Lyric

Dylan discusses how the Honeywell Lyric Controller can use a dual-path communication setup for alarm monitoring. This involves using WIFI as the primary communication path and cellular communication as the backup. This will provide the ultra-fast speeds of WIFI, along with the outstanding reliability of cellular. The system comes WIFI-ready with a built-in WIFI communicator. But a separate cellular radio will need to be added for cellular communication. We recommend using the Honeywell LYRICLTE-A Cellular communicator for this purpose.


Programming a 5816 Sensor

Jorge shows users how to program a Honeywell 5816 Door and Window Contact with various security panels. The Honeywell 5816 is actually Honeywell's best-selling security sensor of all-time. It is a relatively simple door and window contact that operates using a built-in reed switch and an included magnet. The sensor can also be used as a wireless transmitter for a single normally closed wired security device. The 5816 operates at 345 MHz, and it will learn-in with any compatible alarm system.


Difference Between Alpha-Numeric Programming Keypads and Fixed-English Keypads

Joe discusses the differences between Alphanumeric Keypads and Fixed-English Keypads. Both keypads can be used for performing basic panel functions, such as arming and disarming. But only an Alphanumeric Keypad should be used for deep level programming functions. This is because an Alphanumeric keypad will display actual English text and real programming information. A Fixed-English Keypad will only display numbers. If a user tries to perform programming functions on a Fixed-English Keypad, they will be operating blindly throughout the entire process, and they could easily mess up the panel settings.


Pairing the 2GIG SP2 Keypad with the 2GIG GC3

Joe shows users how to pair the 2GIG SP2 Keypad with the 2GIG GC3 Alarm System. The 2GIG SP2 is a wireless touchscreen keypad designed exclusively for use with the GC3. The keypad provides a great secondary access point for a GC3 System. Many users will install one of these keypads by their back door or their garage door so that they can conveniently arm and disarm their system from one of these locations. However, programming functions cannot be performed using the SP2, and they must be completed from the GC3 Panel, or from the more advanced SP1 Keypad.


Wiring a Trigger on a Lyric Alarm System

Dylan discusses how a trigger cannot be wired to a Honeywell Lyric Controller. The Lyric has two built-in hardwired inputs that can only support wired contacts. There is no voltage trigger available on the Lyric Controller. A trigger is an output that a system can activate under certain conditions. It can sometimes be used to activate a relay to power another device, such as a siren. Triggers are more commonly used with wired panels than wireless systems. If a user does want to use an external siren with the Lyric Controller, we usually recommend using the Honeywell SiXSIREN.

Tags: , , ,

Comments


Posted By

Hi DIYers! Today we're talking about Z-Wave mesh networks. A Z-Wave mesh network is essentially a collection of Z-Wave smart home devices that work together to create a stronger wireless connection amongst themselves. The more devices that are used, the stronger the mesh network will be.

Before understanding a Z-Wave mesh network, it's important to understand the basic functions of Z-Wave devices. A Z-Wave device is a wireless appliance that can be controlled remotely using an interactive service, such as Total Connect 2.0 or Alarm.com. It can also be setup to activate automatically based on a set schedule or with predetermined system events on an alarm system. Some popular types of Z-Wave devices include lights, locks and thermostats.

As the name implies, a Z-Wave device will communicate using wireless Z-Wave technology. Z-Wave signals operate at 908.42 MHz, which prevents it from interfering with any higher-frequency WIFI signals and the lower-frequency used with most security sensors. Z-Wave devices have a range of about 328 feet between devices in open air. But this range can be greatly reduced because of the presence of walls, large metal objects and other obstacles. However, this is not the end-all range for Z-Wave.

In a mesh network, Z-Wave devices act as repeaters for one another. A Z-Wave device will send its communication signal to other Z-Wave devices, and these devices will send out the signal again to reach Z-Wave devices that are further away. This will continue until the signal reaches its ultimate destination, the Z-Wave hub, or controller.

Every time a Z-Wave device sends its signal to another Z-Wave device in the mesh network, it is referred to as a "hop". Up to four hops can be used with any given Z-Wave signal. By using hops, the communication range for a Z-Wave device can be greatly increased. The estimated maximum range away from the central hub for Z-Wave devices that are utilizing four distinct hops is up to 600 feet!

And of course, Z-Wave signals can be sent in multiple directions. So if you have a Z-Wave hub in the center, you can have signal hops going in opposite directions to have a complete Z-Wave mesh network that is up to 1,200 feet in diameter. That's almost a quarter of a mile! And since the signals are constantly being repeated off of different Z-Wave devices, the more devices you add, the stronger your mesh network will be.

But that's just for standard Z-Wave. There's a newer technology known as Z-Wave Plus that is very similar to traditional Z-Wave, but with a further range. A Z-Wave Plus device can communicate with another Z-Wave Plus device or a Z-Wave Plus controller from up to 550 feet away in open air. Just imagine how far your Z-Wave mesh network can extend with Z-Wave Plus! It's also worth mentioning that a Z-Wave Plus controller can support traditional Z-Wave devices as well. So you won't have to worry about backwards compatibility not being an issue.

A Z-Wave controller is designed to provide support for a maximum of 232 different Z-Wave smart home devices. Each time you add a new device, your Z-Wave network will become that much stronger. If a device goes down for any reason, the other Z-Wave devices can pick up the slack and ensure that signals are still reliably sent out across the network. So if you want the strongest and most reliable mesh network, simply add more Z-Wave devices to your setup.

Z-Wave devices of all kinds are available on the Alarm Grid website. Get some for your smart home automation setup now! Pretty soon you'll have a mesh network of unparalleled strength!

Tags: , , ,

Comments


Posted By

We have received news from Honeywell that Tuxedo Touch Software Revision 5.3.21.0 is now available. This represents the latest firmware version for the Honeywell Tuxedo Touch WIFI Keypad that is used with Honeywell VISTA Systems. The update provides support for two additional Z-Wave devices.

Honeywell tuxedo touch wifi talking color graphic touchscreen alarm keypad
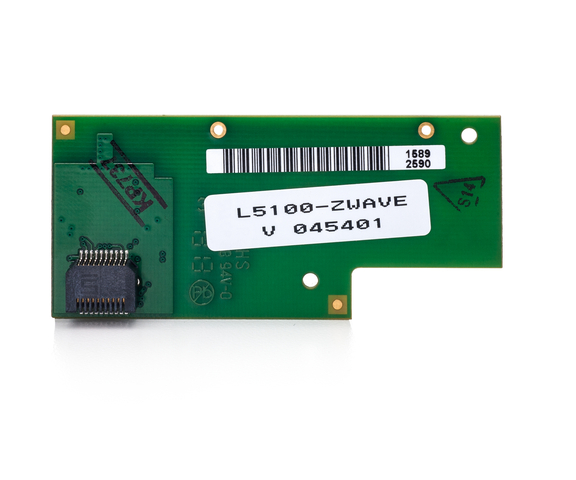
This update provides support for the Honeywell T6 Z-Wave Thermostat and the Fibaro Dimmer 2 FGD-212 Light Dimmer Module. The latest device firmware version of 5.3.21.0 is recommended if you plan to integrate either of these Z-Wave smart home devices with a Honeywell Tuxedo Touch Keypad.

We've previously blogged about the Honeywell T6 Z-Wave Thermostat. This Z-Wave Plus thermostat provides great innovation with its ability to be used without receiving common power from a C-wire. Instead, the device can run reliably and consistently using battery power. This makes it incredibly easy to install for DIY users. The device will work with a multitude of Z-Wave controllers. And now it is compatible with the Tuxedo Touch Keypad as well. We are particularly excited about this addition, as we believe that it is the finest Z-Wave thermostat available on the market today.

Honeywell t6 z wave thermostat smart thermostat

The Tuxedo Touch Software Revision 5.3.21.0 can be downloaded here. For instructions on how to to apply the firmware update to the Tuxedo Touch Keypad, please review this helpful FAQ. If you would like more information about the firmware update, please check out the Software Revision 5.3.21.0 Release Notes.

Tags: , , ,

Comments


Posted By

Hey there DIYers! We've got another product highlight for you. Today, we're taking a look at the L5100 ZWAVE for Honeywell Lynx Touch Systems. This add-on provides Z-Wave smart home capabilities for any L5100, L5200, L5210 or L7000, and it is great for getting the most out of a Lynx Touch.

Honeywell l5100 zwave lynx touch z wave controller anteriorAlthough there are newer systems on the market, like the Honeywell Lyric Controller, 2GIG GC3 and the Qolsys IQ Panel 2, the Honeywell Lynx Touch Panels are still very capable alarm systems. They provide easy-to-use touchscreen control, and they can use a WIFI connection with an L5100 WIFI add-on. There's even an LTE cellular communicator available for the L5210 and L7000 Systems! At the end of the day, these systems can do virtually anything that a brand-new, state-of-the-art alarm system can do. They just need a little support to get there.

One great add-on for a Lynx Touch is the L5100-ZWAVE. With Z-Wave smart home automation devices being more popular than ever, an L5100-ZWAVE will add many options to a Honeywell Lynx Touch Systems. Some of the most popular Z-Wave smart home devices include Z-Wave lights, locks, thermostats, garage door controllers and more. Any of these devices can be used with the panel once the L5100-ZWAVE has been installed. So if a user wants to turn on their lights or operate their thermostat, they can do so directly from their panel.

But the real benefit to using an L5100-ZWAVE is the ability to control Z-Wave devices from Total Connect 2.0. If a user is away from home, they can use the Total Connect 2.0 Mobile App on their iOS or Android device to control their Z-Wave devices from across the street or across the globe. Total Connect 2.0 also allows users to create smart scenes for their Z-Wave devices. This way, they can activate automatically with certain system events or on a pre-determined schedule. For example, a user could have their Z-Wave lights turn on and their Z-Wave thermostat activate when they return home and disarm their system. This can help the user save money and make their life super convenient.

The L5100-ZWAVE is available from Alarm Grid right now. Get one for your Lynx Touch System today!

Tags: , , ,

Comments


Posted By

Hi DIYers! Did you know that you can control Z-Wave smart home devices right from your Android or iOS device by using Total Connect 2.0 or Alarm.com? In fact, this is how most users control their smart home devices, because it is super convenient. Let's take a closer look at this feature.

One of the biggest benefits of smart home devices is their ability to be controlled remotely. Whether you're across the street or across the globe, you can have Total Connect 2.0 or Alarm.com send a command to your system to operate your Z-Wave devices. This is possible both for individual Z-Wave devices, such as door locks, thermostats and lights, as well as entire scenes.

The process for controlling Z-Wave devices is very easy across both platforms, but the steps do differ slightly. If you are using Total Connect 2.0, simply click the "Automation" tab from the main screen. You will then be able to control any individual home automation devices, as well as any programmed scenes. Remember, Total Connect is used exclusively with Honeywell Systems.

If have a system from a different manufacturer, like 2GIG or Qolsys, then you most likely have access to the Alarm.com service. Once you login to your Alarm.com account, you should see menu from the main screen for controlling various scenes. You can also press the menu button at the top to control individual smart home devices by type. We definitely recommend setting up some smart scenes for easy access!

If you don't already have a monitoring plan that includes home automation control, now is a great time to get started. Please check out our monitoring page for more information. All of our Silver, Gold and Platinum level plans (full and self) include this functionality. We hope that you'll enjoy using home automation to make your life easier just as much as we do!

Tags: , , , , ,

Comments


Posted By

Hey DIYers! We're gearing up for another video recap. This time, we have three videos from Joe and a video from Dylan. Two of the videos feature the Honeywell Lyric Controller, while the other videos focus on Honeywell VISTA Alarm Systems. Let's check out what the team has been up to.

Power Cycling a VISTA Alarm System

Joe teaches users how to power cycle their Honeywell VISTA Alarm System. To power down the system, a user must disconnect both the plug-in transformer and the backup battery. The user can then reconnect the transformer and backup battery to restore power. The system will automatically power back on to complete the power cycle. Performing a power cycle can be useful for helping the system connect to an IP or cellular network and for troubleshooting various system errors.


Reset the Lyric's Master Code

Joe shows users how to reset the Master Code for a Honeywell Lyric Controller. This can be done in one of three ways. The code can be changed from the panel itself. It can also be changed from Total Connect 2.0. Finally, the code can be updated by the user's alarm monitoring company. Typically, a user will just complete this task from the panel itself. To do this, a user must access the user settings menu. This requires entering in the current Master Code. All system codes, other than the Installer Code, can be accessed from this menu.


Can WIFI be Primary and Cellular the Secondary Comm. Path on a Lyric?

Dylan talks about the communication paths that can be used with a Honeywell Lyric Controller. The system comes with a built-in WIFI card for connecting with a WIFI network. As a result, almost all Lyric Systems use WIFI as a primary communication path. A user can also add a separate cellular module to their Lyric System to have cellular communication as a backup. This is highly recommended, as cellular service will keep the system monitored when the WIFI is down or when the power is out.


Night Stay Mode on a VISTA Alarm System

Joe discusses the night stay mode feature for Honeywell VISTA Security Systems. This is a type of arming that is similar to regular arm stay. But in night stay, a user can pick certain motion sensors to be active whenever their system is armed in this mode. The motion sensors must have a Response Type of Interior Follower or Interior With Delay to be used in night stay. They must also be set up as a night stay zone. The feature can certainly be useful for larger properties.

Tags: ,

Comments


Posted By

A new home security camera is always an exciting purchase. Now you can view exactly what occurs inside your house when you are away. You can even pull up your Total Connect 2.0 or Alarm.com account to view a live feed of your camera. But wait, where are you going to install the device?

Honeywell lyric oc1 standalone wifi outdoor 1080p hd total conne

Even if you have the best security camera on the market, it won't matter at all if it is installed in a poor location. And while most alarm cameras are easy to install, it can still be very inconvenient to have to break out the tools and remount a camera if you find that its current location isn't the best. Therefore, it's helpful to get a camera's mounting location right the first time. Following some basic tips can help you ensure that you choose the optimal location for your camera.

Start by asking yourself some basic questions. What type of camera is it? If it's an outdoor camera, you will obviously have more options as to where you can place it. How large is its viewing angle? A camera with a larger viewing angle will be able to record across a larger area. How many cameras do you have? If you have multiple camera, you can probably have some set up for specific areas. But if you only have one camera for monitoring, then it should be placed in a location that really counts.

Alarm dot com adc v522ir indoor 1080p fixed camera with night vi

In any case, there are a few general tips to keep in mind regardless of where exactly a security camera is installed. Placing a camera high up is always a good idea, as it will provide a better view of the area. The camera's positioning angle will also play a big role on its overall scope and use. It is also very important to make sure that there are no obstructions in the way of the camera. After all, a camera is no good if there's a large object right in front of it! Some users also find that they prefer to install their cameras in areas that are difficult to access, as it make it less likely that an intruder will destroy the camera. But remember, this may make it more difficult to make adjustments to the camera if needed.

For a single camera set up, placing the camera in location where it can get a good overview of the property is usually a good idea. For outdoor cameras, many homeowners will install one near their front door. Most burglars will attempt to enter a home right through the front door, so placing a camera in this area will surely capture them in the recording. Additionally, an intruder will often have to walk past the the camera to access the back or the side of the house, so you may still record some activity even if the front door is not their ultimate point of entry. Furthermore, a font door camera will allow you to monitor any suspicious activity that may occur in front of your property. Most users ultimately find that monitoring the front door is an absolute must for home video surveillance.

Honeywell lyric c2 wifi indoor 1080p hd total connect security c

But when a user has the luxury of a multiple-camera setup, where should they place their other cameras? Some users will add a second camera in their backyard. That way, their first camera will keep tabs on the activity in front of their house, while their second camera will monitor the rear. Additional cameras can then monitor the sides of the home and any accessible windows. Some users may also install cameras to cover areas that aren't necessarily seen by the other cameras. In order to maximize your investment, try and make each camera count so that it is recording an area that isn't seen by any others. You may also want cameras to monitor pool areas, guest homes and detached garages if applicable. Finally, try and choose areas that a potential intruder will be forced to pass if they want to access other areas of the property.

But what about indoor cameras? There are certainly a few good places that come to mind. Having cameras monitor any main entrances is always smart, since they will be virtually guaranteed to capture anyone who enters the home. It is also wise to place cameras in large central areas that will see activity in many different areas of the home. Some users also place cameras in hallways, as intruders will probably need to pass through them in order to access other areas. If you have a home with multiple stories, it is usually a good idea to have a camera on each level for maximum coverage. And finally, if you have any particularly valuable items, such as a safe, you may want to have a camera monitoring that area directly.

Honeywell lyric c1 wifi indoor 720p hd total connect security ca
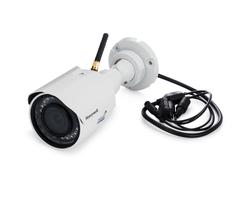
Remember to check any camera after you have installed it to make sure that it is covering a useful area. You may still need to adjust its angle, or maybe its mounting location wasn't very effective after all. Make any adjustments or changes if needed. Pretty soon your home will be nicely monitored, and you and your family will enjoy great peace of mind with your new home security cameras!

Tags: , , , , , , , ,

Comments


Posted By

Hi DIYers! Today, we're taking a look at the ADC-V722W, which is one of the most exciting security cameras currently on the market. This Alarm.com Camera is perfect for any user who has a security system connected with Alarm.com and also wants to achieve a robust outdoor recording setup.

Alarm dot com adc v722w front

What impresses us most with the ADC-V722W is its unrivaled versatility. It is robust enough to be used by medium to large businesses, yet also affordable enough for the average home security user. We've seen this camera set up in settings ranging from large corporate complexes to an elderly couple's front porch. This truly is the perfect outdoor camera for almost any situation.

Obviously, if you plan on using the camera strictly indoors, there are better ADC Cameras to choose from, such as the ADC-V522IR. But for outdoor settings, the ADC-V722W is the undisputed champ for Alarm.com Cameras. Our team has been repeatedly impressed by the crystal clear nature of the recordings produced by this camera. Just taking a quick look at its specifications shows the robust nature of this top-of-the-line video capture device.

Breaking down the numbers, the V722W has an IR night vision range of 40 feet, an 88 degree viewing angle, and a full 1080p recording quality. It has an IP66 rating, making it dust-tight and waterproof. The camera is fully prepared to survive nearly any harsh weather that nature can dish out. One of our techs actually has the ADC-V722W at his home, and he forgot to take it down during Hurricane Irma. But the camera was rock steady throughout the Florida hurricane, and it weathered the storm just fine.

DIY users will appreciate the fact that the ADC-V722W is very easy to install. The mounting plate can be secured using very basic tools, and the camera fits very nicely. And the camera connects to 2.4 GHz or 5 GHz WIFI to communicate wirelessly and minimize any wiring. Nearly any user will be able to set up the device at virtually no hassle or inconvenience whatsoever. Once the camera has been set up, it can be viewed almost anywhere using the Alarm.com Mobile App.

The ADC-V722W Outdoor 1080p Camera is available on the Alarm Grid website right now. Purchase yours today!

Tags: , , ,

Comments


Posted By

When people think of security cameras, they often imagine that they are complex and expensive pieces of equipment that require an intricate setup. But that is not the case. The latest security cameras for alarm systems are actually very easy to use, affordable and incredibly simple.

When looking for security camera for an apartment, there are a few things to consider. Most apartment residents are not able to drill holes in their walls. So having an easy-to-use camera that can be placed on a desk or table is usually ideal. It is also important that the camera has good night vision so that it can capture clear video even the lighting isn't the best. Finally, most apartment residents won't need to spend the extra money on a camera suitable for outdoor use. Instead, an indoor camera will work just fine. In summary, the requirements are a free-standing camera with night vision that works best in an indoor environment.

So with that in mind, there are a few different camera models we can recommend. The decision of which camera to get typically comes down to whether a user has access to Total Connect 2.0 or Alarm.com. Total Connect 2.0 is used with Honeywell Systems, and Alarm.com is used with systems from other manufacturers, such as 2GIG and Qolsys. The service that they connect with will ultimately determine which camera they use. Keep in mind that most security systems do not allow users to view the feed of their cameras right from the panel. Instead, this must be done from the interactive service platform. Simply put, if a user has Total Connect, they will need a Total Connect Camera. And if they have Alarm.com, they will need an Alarm.com Camera.

For Total Connect users, there are two viable options available. These are the Lyric C1 and the Lyric C2 Cameras. The Lyric C2 is a little more robust than the Lyric C1, but both are outstanding cameras for use in an apartment. The Lyric C1 features 720p recording quality, a 135 degree viewing angle and an IR night vision range of 16.5 feet. It can be mounted on a desk or a table for easy access. This is the perfect camera for any TC2 user who wants a basic recording option for their apartment.

Honeywell lyric c1 wifi indoor 720p hd total connect security caAs for the Lyric C2, it offers a superior, high-definition 1080p recording quality. And some users will prefer its rounder design. Its IR night vision range is also double that of the Lyric C2, coming in at an impressive 33 feet. Both the Lyric C1 and C2 can be easily integrated with a user's Total Connect account by having the camera scan a QR code that is produced by the Total Connect Mobile App. From there, the user can connect the camera to their local WIFI network. This makes both devices excellent for DIY users who are setting up their own system. A user should choose the C2 over the C1 if they require a more-advanced camera with greater recording capabilities.

Honeywell lyric c2 wifi indoor 1080p hd total connect security cMeanwhile, Alarm.com users will have to use a different set of cameras. For apartment residents, we definitely recommend the Alarm.com ADC-V522IR. This is the best ADC-compatible that can rest comfortably on a desk or table. The device features a 1080p recording quality, an IR night vision range of 15 feet, and a 113 degree viewing angle. The camera connects to a 2.4 GHz or a 5 GHz WIFI network, and it can be learned-in with Alarm.com through a simple pairing process. Once a user has set the camera up, they can view its live feed from Alarm.com at any time. Overall, it is the perfect camera for any Alarm.com user who lives an apartment.

Alarm dot com adc v522ir indoor 1080p fixed camera with night vi

Tags: , , , , , ,

Comments


Posted By

Good day DIYers! We have another update on pricing for Qolsys products. We have once again lowered the prices for various Qolsys Sensors and alarm systems. We love Qolsys, and their hardware is always excellent. The price changes are outlined in the table below:

Product Name
Old Price
New Price
Price Difference
Percent Savings
IQ DW MINI-S $23.99 $12.99 $11 45.85%
IQ Glass-S $83.99 $62.99 $21 25%
IQ Fob-S $26.99 $22.99 $4 14.82%
IQ Hardwire 8-S $69.99 $59.99 $10 14.29%
IQ Panel 2 Verizon LTE $399.99 $349.99 $50 12.5%
IQ Panel 2 AT&T LTE $399.99 $349.99 $50 12.5%
IQ Motion-S $56.99 $49.99 $7 12.28%
IQ Battery $33.99 $29.99 $4 11.77%
IQ Panel 2 Classic Kit Verizon $449.99 $399.99 $50 11.11%
IQ Panel 2 Classic Kit AT&T $449.99 $399.99 $50 11.11%
IQ Hardwire 16-S $99.99 $89.99 $10 10%
IQ Power Supply $16.99 $15.99 $1 5.89%
IQ Panel 2 Verizon 3-1 Kit $449.99 $429.99 $20 4.44%
IQ Panel 2 AT&T 10-1 Kit $499.99 $479.99 $20 4%
Tags: ,

Comments